|
|
[from] http://www.rackspace.com/knowledge_center/article/installing-active-directory-on-windows-server-2008-r2-enterprise-64-bit
This article provides prerequisites and steps for installing Active Directory Domain Services (AD DS) on Microsoft Windows Server 2008 R2 Enterprise 64-bit (W2K8).
This article does not provide instructions for adding a Domain Controller (DC) to an already existing Active Directory Forest Infrastructure.
Contents
- Prepare for Active DirectoryDomain Services Installation
- InstallActive Directory Domain Services (DCPROMO)
Prepare for Active Directory
Before you install AD DS on a Rackspace Cloud Server running Windows Server 2008 R2 Enterprise 64-bit (W2K8), you must perform the following prerequisite tasks.
Select Domain Name and Password
Select your domain name and know the domain administrator password that you want to use.
Note: Although it is not required, we recommend that you use a multiple name format for your domain name. For example, use domainName.com or domainName.local rather than simply domainName.
Specify the Preferred DNS Server
Windows Server 2008 can properly install and configure DNS during the AD DS installation if it knows that the DNS is local. You can accomplish this by having the private network adapter’s preferred DNS server address point tothe already assigned IP address of the same private network adapter, as follows:
- From the Windows Start menu, open Administrative Tools > Server Manager.
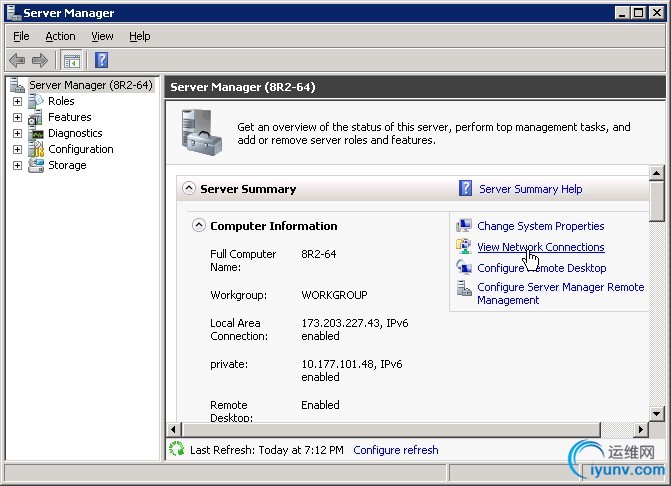
- In the Server Summary section of the Server Manager window, click View Network Connections.
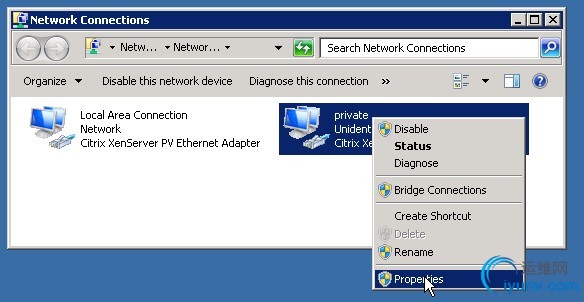
- In the Network Connections window, right-click the private adapter and select Properties.
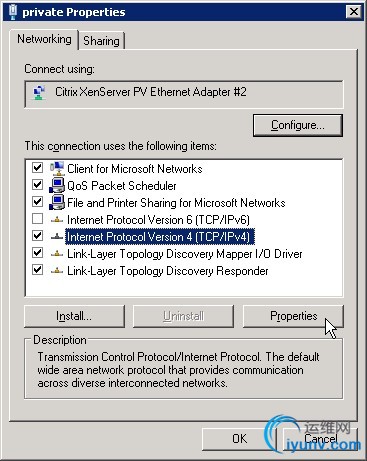
- Select Internet Protocol Version 4, and then click Properties.
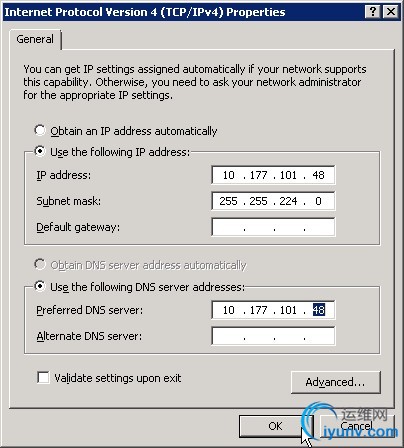
- Copy the IP address that is displayed in the IP address box and paste it into the Preferred DNS server box. Then, click OK.
- Click OK in the Properties dialog box, and close the Network Connections window.
Note: The last step for prepping W2K8 for AD is adding the proper Server Role. The “Active Directory Domain Services” Role will be added. This only installs the framework for W2K8 to become a DC and run AD. Itdoes not promote the server to DC or install AD.
Add the Active Directory Domain Services Role (You may start hereif only add AD role)
Adding the Active Directory Domain Services role installs the framework for Windows Server 2008 to become a DC and run AD DS. It does not promote the server to a DC or install AD DS.
- In the Server Manager window, open the Roles directory and in the Roles Summary section, click Add Roles.
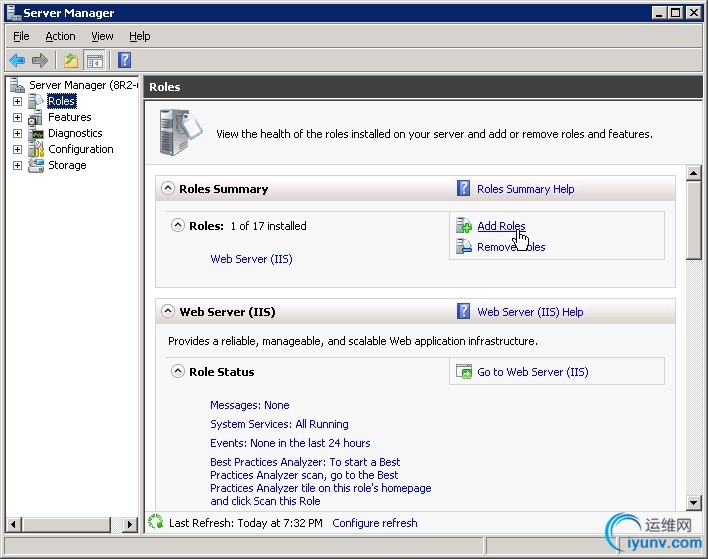
- On the Before You Begin page of the Add Roles Wizard, click Next.
- On the Select Server Roles page, select the Active Directory Domain Services check box, and then click Next on this page and on the Confirmation page.
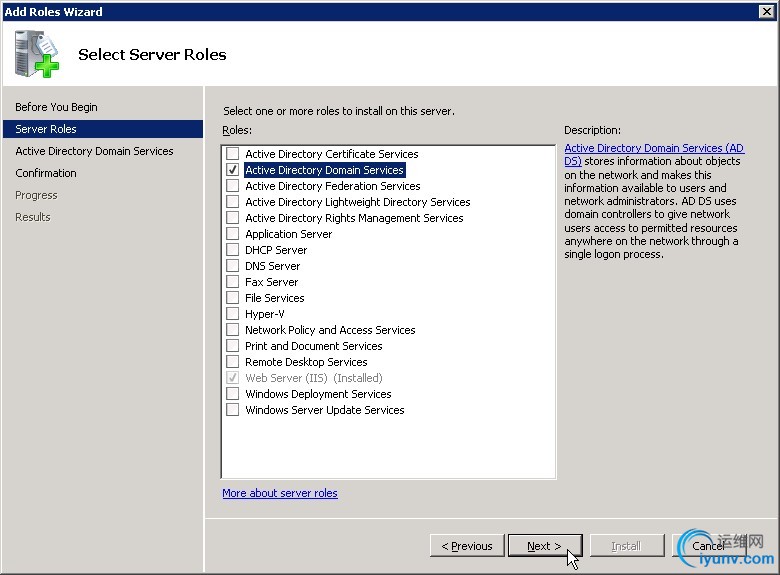
- On the Installation Progress page, click Install.
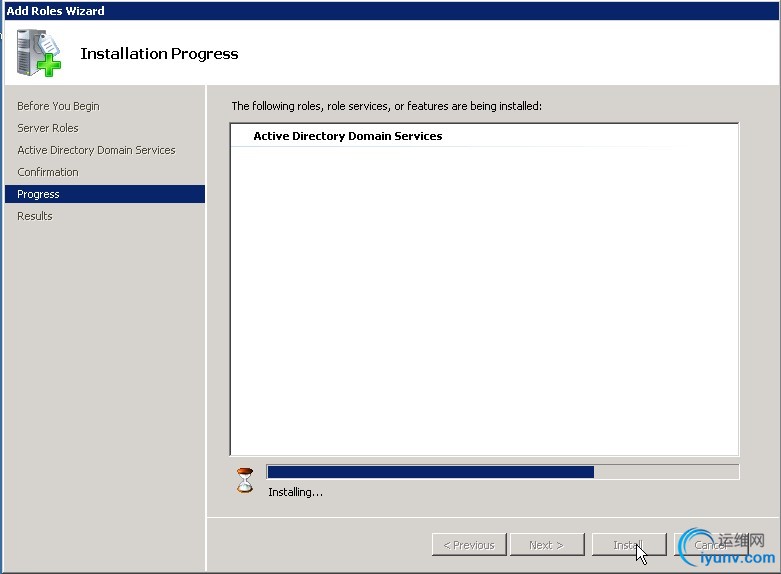
- On the Results page, after the role is successfully added, click Close.
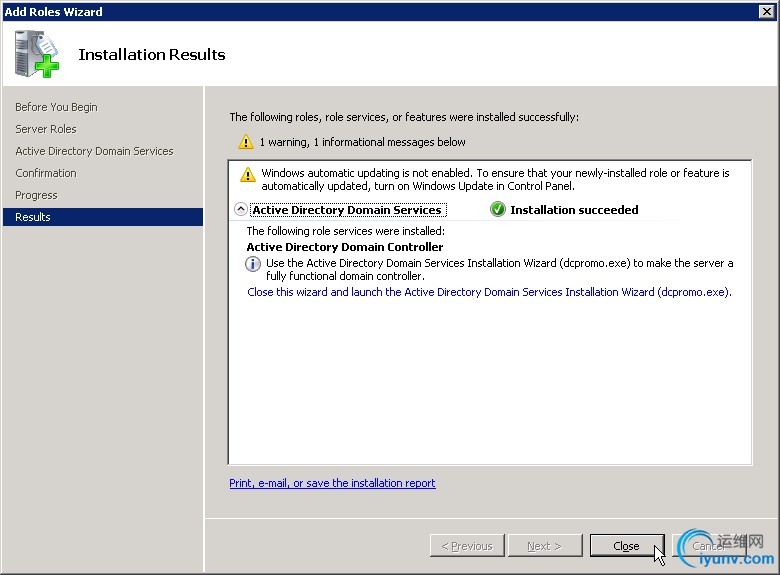
Enable the Remote Registry
- Open the Server Manager window if it is not already open.
- In the Properties area of the Local Servers page, click Remote Managemen.
- Select the Enable remote management of this server from other computers check box.
Install Active Directory Domain Services (DCPROMO)
Now that you have prepared the server, you can install AD DS.
Tip: As an alternative to performing steps 1 through 3, you can type dcpromo.exe at the command prompt. Then, skip to step 4.
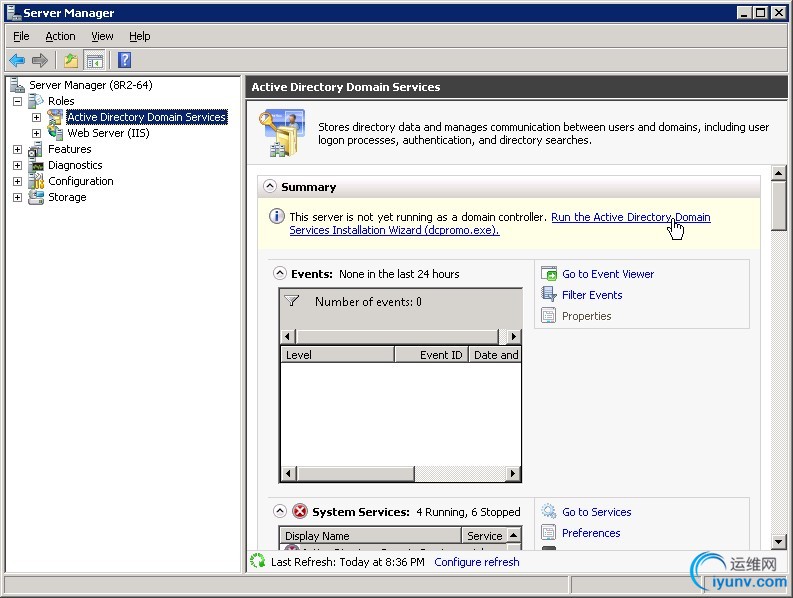
- If it is not already open, open the Server Manager window.
- Select Roles > Active Directory Domain Services.
- In the Summary section,click Run the Active Directory Domain Services Installation Wizard (dcpromo.exe).
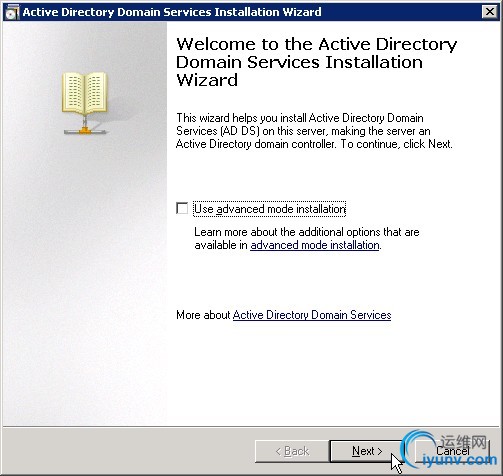
- On the Welcome page of the Active Directory Domain Services Installation Wizard, ensure that the Use advanced mode installation check box is cleared, and then click Next.
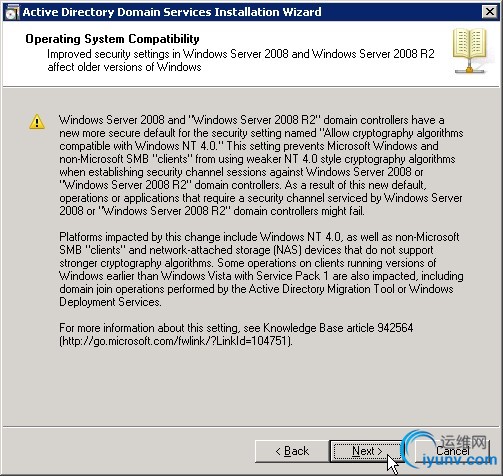
- On the Operating System Capability page, click Next.
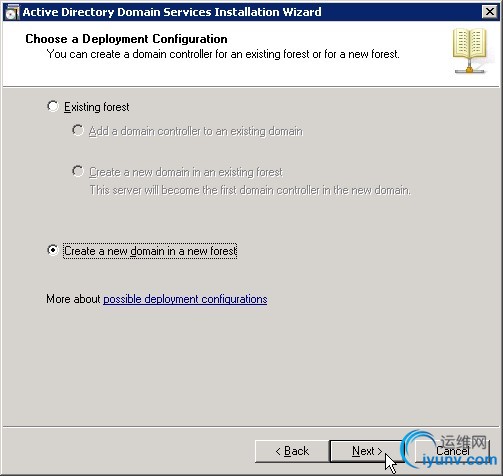
- On the Choose a Deployment Configuration page, select Create a new domain in a new forest and then clickNext.
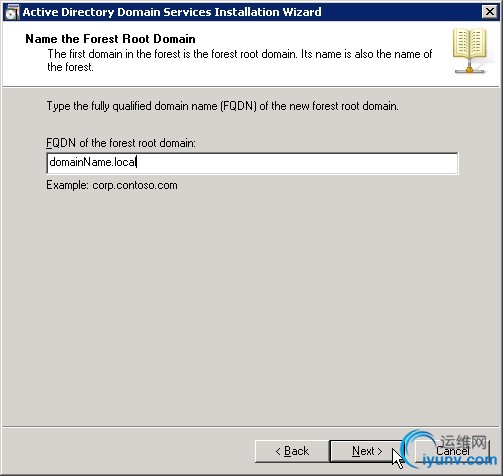
- On the Name the Forest Root Domain page, enter the domain name that you choose during preparation steps. Then, click Next.
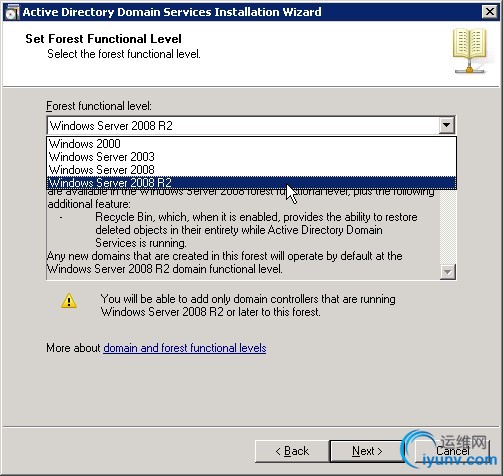
- After the installation verifies the NetBIOS name, on the Set Forest Functional Level page, select Windows Server 2008 R2 in the Forest function level list. Then, click Next.
The installation examines and verifies your DNS setting.
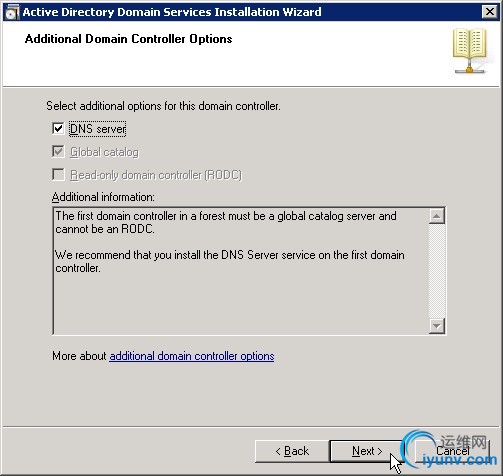
- On the Additional Domain Controller Options page, ensure that the DNS server check box is selected, and then click Next.
(You may not set DNS server if only add AD role)
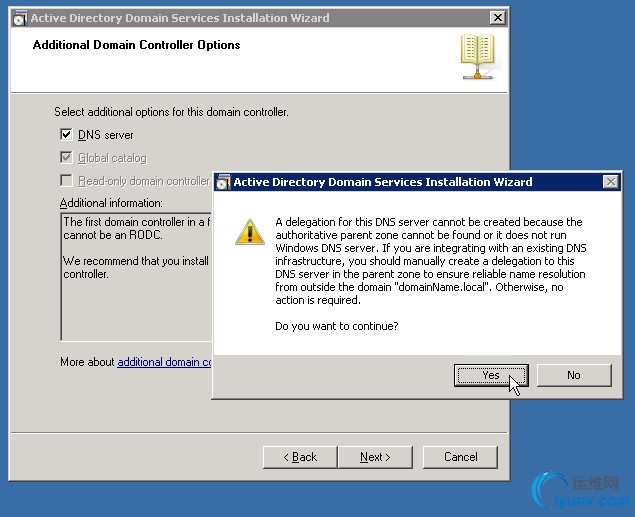
- In the message dialog box that appears, click Yes.
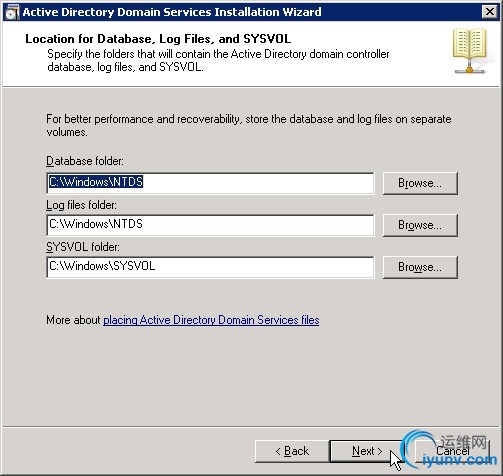
- On the Location for Database, Log Files, and SYSVOL page, accept the default values and then click Next.
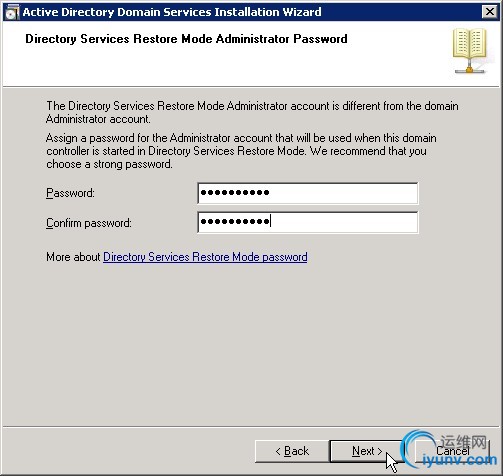
- On the Directory Services Restore Mode Administrator Password page, enter the domain administrator password that you chose during the preparation steps. This is not your admin password that was emailed to you during the creation of your server, althoughyou can use that password if you want to. Then, click Next.
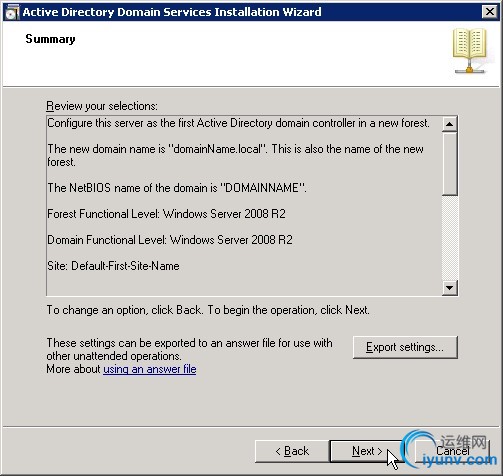
- On the Summary page, review your selections and then click Next.
The installation begins.
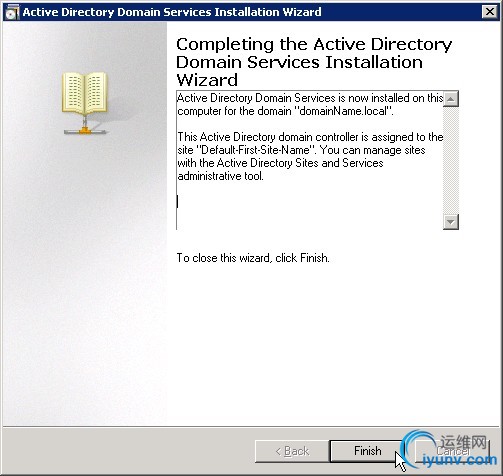
- If you want the server to restart automatically after the installation is completed, select the Reboot on completion check box.
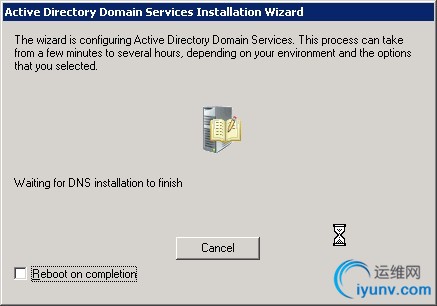
- If you did not select the Reboot on completion check box, click Finish in the wizard. Then, restart the server.
- After a few minutes, reconnect to your server by using the Console in your Control Panel or RDP.
- To log in, perform the following steps:
a. Click Switch User, and then click Other User.
b. For the user, enter the full domain name that you chose, followed by a back slash and Administrator.
c. Enter the password that was emailed to you when you first built the server. If you changed your password
for the local admin account to this server before you began the installation of AD DS, use that password.
d. Click the log in button.
The installation of Active Directory Domain Services on your server is complete.
For information about protecting your server from DNS amplification attacks, see PreventingDNS Amplification Attacks via the Windows Firewall in Windows 2008 R2 or Windows 2012. |
|