一、相关概念
1、apache+php组合方式:
1)module:php作为httpd的模块|插件,不需要额外启动新的进程
prefork:libphp5.so
work,event:libphp-zts.so
2)CGI:通过CGI协议通信,很少用
3)fastcgi:php5.3.3版本以后才支持之前的版本需要补丁
需要编译php_fpmb并启动为服务进程
此时httpd是反向代理服务器要装载proxy,proxy-fcgi模块,2.4版本以后自带这2个模块,2.2版本时需要手动编译这个模块
php-mysql:php与mysql通信的程序
mysql_connect()函数可以联通mysql和php,可以用来测试php于mysql是否联通,但注意先授权
1
2
3
4
5
6
| $link=mysql_connect('127.0.0.1','root','mypassword')
if($link)
echo "successful"
else
echo "faild"
mysql_close() ,
|
内存缓存服务器:memcached
只能缓存可序列化的对象(字符串),单个缓存对象不能超过1M,自己不会创建缓存
只有一台mysql不需要使用memcached,mysql自身缓存效率比memcached高
bypass:旁路模式
LAMMP:Linux+Apache+Mysql+Memcached+Php
redis:能把缓存数据持久存储在磁盘上
支持更复杂的数据结构(列表,字典)
属于nosql
二、编译安装LAMP
OS:CentOS6.7-x86_64
注意:1、先安装apache和mysql都可以,但php一定要最后安装
2、我这里先用上篇博文安装好二进制的mysql(不影响LAMP组合方式,只是mysql安装过程不一样)
mysqlde的配置文件查找顺序:/etc/my.cnf或/etc/mysql/my.cnf -->$mysql_base(mysql安装目录)/my.cnf-->--defaults-extra-file=/path/to/some_my.cnf-->.my.cnf
这次源码包都使用官网下载的最新稳定版:
1、安装mysql
2、安装httpd
1)安装依赖包
1
2
3
4
5
6
7
8
9
10
11
12
| [iyunv@BAIYU_179 LAMP]# rpm -qa|grep gcc #检查编译工具gcc,gcc-c++是否安装
gcc-4.4.7-4.el6.x86_64
gcc-gfortran-4.4.7-4.el6.x86_64
gcc-c++-4.4.7-4.el6.x86_64
libgcc-4.4.7-4.el6.x86_64
[iyunv@BAIYU_179 LAMP]# rpm -qa|grep pcre #检查pcre-devel是否安装
pcre-7.8-6.el6.x86_64
[iyunv@BAIYU_179 httpd-2.4.17]# rpm -qa|grep openssl #检查openssl-devel是否安装
openssl-1.0.1e-15.el6.x86_64
[iyunv@BAIYU_179 ~]# rpm -qa|grep zlib #httpd不需要zlib-devel,而安装php时需要libxml2-devel时会自动装上zlib-devel
zlib-1.2.3-29.el6.x86_64
[iyunv@BAIYU_179 LAMP]# yum install pcre-devel openssl -y #此时用光盘yum源安装openssl也成功了。。。
|
2)编译安装apr
1
2
3
4
5
6
7
8
9
10
11
| [iyunv@BAIYU_179 ~]# ls
anaconda-ks.cfg a.sql.orig install.log.syslog mysql-5.5.33-linux2.6-x86_64
a.sql install.log LAMP trash.sh
[iyunv@BAIYU_179 ~]# cd LAMP/
[iyunv@BAIYU_179 LAMP]# ls
apr-1.5.2.tar.gz httpd-2.4.17.tar.gz wordpress-4.3.1-zh_CN.tar.gz
apr-util-1.5.4.tar.gz php-5.6.15.tar.bz2 wordpress-4.3.1-zh_CN.zip
[iyunv@BAIYU_179 LAMP]# tar xf apr-1.5.2.tar.gz
[iyunv@BAIYU_179 LAMP]# cd apr-1.5.2
[iyunv@BAIYU_179 apr-1.5.2]# ./configure --prefix=/usr/local/apr #安装apr
[iyunv@BAIYU_179 apr-1.5.2]# make && make install
|
3)编译安装apr-util
1
2
3
4
5
6
| [iyunv@BAIYU_179 apr-1.5.2]# cd ..
[iyunv@BAIYU_179 LAMP]# tar xf apr-util-1.5.4.tar.gz
[iyunv@BAIYU_179 LAMP]# cd apr-util-1.5.4
[iyunv@BAIYU_179 apr-util-1.5.4]# ./configure --prefix=/usr/local/apr-util --wit
h-apr=/usr/local/apr #安装apr-util
[iyunv@BAIYU_179 apr-util-1.5.4]# make && make install
|
4)编译安装httpd
1
2
3
4
5
6
7
8
9
10
11
12
| [iyunv@BAIYU_179 apr-util-1.5.4]# cd ..
[iyunv@BAIYU_179 LAMP]# tar xf httpd-2.4.17.tar.gz
[iyunv@BAIYU_179 LAMP]# cd httpd-2.4.17
[iyunv@BAIYU_179 httpd-2.4.17]# ./configure --prefix=/usr/local/apache --sysconf
dir=/etc/httpd24 --enable-so --enable-ssl --enable-cgi --enable-rewite --with-z
lib --with-pcre --with-apr=/usr/local/apr --with-apr-util=/usr/local/apr-util -
-enable-modules=most --enable-mpms-shared=all --with-mpm=event #此时不加--with-include-apr也成功了。。。
[iyunv@BAIYU_179 httpd-2.4.17]# make && make install
[iyunv@BAIYU_179 ~]# /usr/local/apache/bin/apachectl
AH00557: httpd: apr_sockaddr_info_get() failed for BAIYU_179
AH00558: httpd: Could not reliably determine the server's fully qualified domain name, using 127.0.0.1. Set the 'ServerName' directive globally to suppress this message
|

[iyunv@BAIYU_179 ~]# ln -sv /usr/local/apache/include/ /usr/include/httpd #到处头文件
"/usr/include/httpd" -> "/usr/local/apache/include/"
3、安装php
1)安装依赖包
1
| [iyunv@BAIYU_179 php-5.6.15]# yum -y install libxml2-devel bzip2-devel libmcrypt-devel openssl-devel freetype #./configure报错时说缺什么包就安装跟包的devel包
|
2)编译安装php
1
2
3
4
5
6
7
8
| [iyunv@BAIYU_179 ~]# cd LAMP/
[iyunv@BAIYU_179 LAMP]# ls
apr-1.5.2 apr-util-1.5.4.tar.gz php-5.6.15.tar.bz2
apr-1.5.2.tar.gz httpd-2.4.17 wordpress-4.3.1-zh_CN.tar.gz
apr-util-1.5.4 httpd-2.4.17.tar.gz wordpress-4.3.1-zh_CN.zip
[iyunv@BAIYU_179 LAMP]# tar xf php-5.6.15.tar.bz2
[iyunv@BAIYU_179 LAMP]# cd php-5.6.15
[iyunv@BAIYU_179 php-5.6.15]# ./configure --prefix=/usr/local/php --with-mysql=/usr/local/mysql --with-openssl --with-mysqli=/usr/local/mysql/bin/mysql_config --enable-mbstring --with-freetype-dir --with-jpeg-dir --with-png-dir --with-zlib --with-libxml-dir=/usr --enable-xml --enable-sockets --with-apxs2=/usr/local/apache/bin/apxs --with-mcrypt --with-config-file-path=/etc --with-config-file-scan-dir=/etc/php.d --with-bz2 --enable-maintainer-zts
|
注意:
1、这里为了支持apache的worker或event这两个MPM,编译时使用了--enable-maintainer-zts选项。
2、如果使用PHP5.3以上版本,为了链接MySQL数据库,可以指定mysqlnd,这样在本机就不需要先安装MySQL或MySQL开发包了(mysql也可以安装在另外的主机上)。mysqlnd从php 5.3开始可用,可以编译时绑定到它(而不用和具体的MySQL客户端库绑定形成依赖),但从PHP 5.4开始它就是默认设置了。
# ./configure --with-mysql=mysqlnd --with-pdo-mysql=mysqlnd --with-mysqli=mysqlnd
3)创建php配置文件
1
| [iyunv@BAIYU_179 php-5.6.15]# cp php.ini-production /etc/php.ini
|
4)编辑httpd配置文件/etc/httpd24/httpd.conf,以httpd支持php
a、查看php模块是否装载
1
| 157 LoadModule php5_module modules/libphp5.so
|
b、添加如下两行
1
2
| 387 AddType application/x-httpd-php .php
388 AddType application/x-httpd-php-source .phps
|
c、定位至DirectoryIndex index.html 修改为: 1
| DirectoryIndex index.php index.html
|
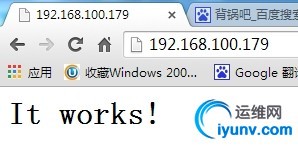
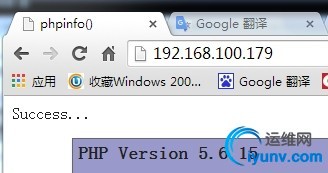
4、测试
1
2
3
4
5
6
7
8
9
10
11
12
13
14
15
16
17
18
| [iyunv@BAIYU_179 ~]# service httpd restart
停止 httpd:[确定]
正在启动 httpd:[确定]
[iyunv@BAIYU_179 ~]# cd /usr/local/apache/htdocs/
[iyunv@BAIYU_179 htdocs]# ls
index.html
[iyunv@BAIYU_179 htdocs]# mv index.html index.php
[iyunv@BAIYU_179 htdocs]# vi index.php
添加如下内容:
1 <?php
2 $link=mysql_connect('127.0.0.1','root','123456789');
3 if($link)
4 echo "Success...";
5 else
6 echo "Failure...";
7 phpinfo();
8 mysql_close();
9 ?>
|

三、安装phpadmin
phpMyAdmin是一个以PHP为基础,以Web-Base方式架构在网站主机上的MySQL的数据库管理工具,让管理者可用Web接口管理MySQL数据库。借由此Web接口可以成为一个简易方式输入繁杂SQL语法的较佳途径,尤其要处理大量资料的汇入及汇出更为方便。其中一个更大的优势在于由于phpMyAdmin跟其他PHP程式一样在网页服务器上执行,但是您可以在任何地方使用这些程式产生的HTML页面,也就是于远端管理MySQL数据库,方便的建立、修改、删除数据库及资料表。也可借由phpMyAdmin建立常用的php语法,方便编写网页时所需要的sql语法正确性。 官网:http://www.phpmyadmin.net/
最新稳定版:phpMyAdmin-4.5.1-all-languages.tar.gz
1
2
3
4
5
| [iyunv@BAIYU_179 ~]# ls
anaconda-ks.cfg a.sql.orig install.log.syslog mysql-5.5.33-linux2.6-x86_64 trash.sh
a.sql install.log LAMP phpMyAdmin-4.5.1-all-languages.tar.gz
[iyunv@BAIYU_179 ~]# tar xf phpMyAdmin-4.5.1-all-languages.tar.gz
[iyunv@BAIYU_179 ~]# mv phpMyAdmin-4.5.1-all-languages /usr/local/apache/htdocs/pma
|

四、安装xcache,为php加速
官网:http://xcache.lighttpd.net/
最新稳定版:xcache-3.2.0
1、安装xcache
1
2
3
4
5
6
7
8
9
10
11
12
13
14
| [iyunv@BAIYU_179 ~]# ls
anaconda-ks.cfg install.log mysql-5.5.33-linux2.6-x86_64 xcache-3.2.0.tar.gz
a.sql install.log.syslog phpMyAdmin-4.5.1-all-languages.tar.gz
a.sql.orig LAMP trash.sh
[iyunv@BAIYU_179 ~]# tar xf xcache-3.2.0.tar.gz
[iyunv@BAIYU_179 ~]# cd xcache-3.2.0
[iyunv@BAIYU_179 xcache-3.2.0]# ls
AUTHORS gen_structinfo.awk mod_assembler NEWS xcache
bin htdocs mod_cacher processor xcache.c
ChangeLog includes.c mod_coverager README xcache_globals.h
config.m4 INSTALL mod_decoder run-xcachetest xcache.h
config.w32 lib mod_disassembler tests xcache.ini
COPYING Makefile.frag mod_encoder THANKS xcache-test.ini
devel Makefile.frag.deps mod_optimizer util xcache-zh-gb2312.ini
|
注意:此时并没有configure文件,xcache是作为php的插件运行
1
2
3
4
5
6
7
8
9
10
11
12
13
14
15
16
17
18
19
20
| [iyunv@BAIYU_179 xcache-3.2.0]# /usr/local/php/bin/phpize
Configuring for:
PHP Api Version: 20131106
Zend Module Api No: 20131226
Zend Extension Api No: 220131226
[iyunv@BAIYU_179 xcache-3.2.0]# ls #已经生成了configure文件
acinclude.m4 config.sub install-sh mod_coverager tests
aclocal.m4 configure lib mod_decoder THANKS
AUTHORS configure.in ltmain.sh mod_disassembler util
autom4te.cache config.w32 Makefile.frag mod_encoder xcache
bin COPYING Makefile.frag.deps mod_optimizer xcache.c
build devel Makefile.global NEWS xcache_globals.h
ChangeLog gen_structinfo.awk missing processor xcache.h
config.guess htdocs mkinstalldirs README xcache.ini
config.h.in includes.c mod_assembler run-tests.php xcache-test.ini
config.m4 INSTALL mod_cacher run-xcachetest xcache-zh-gb2312.ini
[iyunv@BAIYU_179 xcache-3.2.0]# ./configure --enable-xcache --with-php-config=/usr/local/php/bin/php-c
onfig
[iyunv@BAIYU_179 xcache-3.2.0]# make && make install
|
2、创建配置文件
1
2
3
4
5
| [iyunv@BAIYU_179 xcache-3.2.0]# mkdir /etc/php.d
[iyunv@BAIYU_179 xcache-3.2.0]# cp xcache.ini /etc/php.d
[iyunv@BAIYU_179 xcache-3.2.0]# vi /etc/php.d/xcache.ini
将第四行改为以下内容:
extension = /usr/local/php/lib/php/extensions/no-debug-zts-20131226/xcache.so #为xcache.so提供绝对路径
|
注意:如果php.ini文件中有多条zend_extension指令行,要确保此新增的行排在第一位。
3、测试
1
2
3
| [iyunv@BAIYU_179 xcache-3.2.0]# service httpd restart
停止 httpd:[确定]
正在启动 httpd:[确定]
|
在phpinfo页面下面可以找到:

xcache缓存能提高3倍左右的性能。
五、启用服务器状态
mod_status模块可以让管理员查看服务器的执行状态,它通过一个HTML页面展示了当前服务器的统计数据。这些数据通常包括但不限于:
(1) 处于工作状态的worker进程数;
(2) 空闲状态的worker进程数;
(3) 每个worker的状态,包括此worker已经响应的请求数,及由此worker发送的内容的字节数;
(4) 当前服务器总共发送的字节数;
(5) 服务器自上次启动或重启以来至当前的时长;
(6) 平均每秒钟响应的请求数、平均每秒钟发送的字节数、平均每个请求所请求内容的字节数;
启用状态页面的方法很简单,只需要在httpd主配置文件中添加如下内容即可:
1
2
3
4
| <Location /server-status>
SetHandler server-status
Require all granted
</Location>
|
需要提醒的是,这里的状态信息不应该被所有人随意访问,因此,应该限制仅允许某些特定地址的客户端查看。比如使用Require ip 172.16.0.0/16来限制仅允许指定网段的主机查看此页面。

六、配置php以fpm方式的结合apache
1、apache、MySQL的安装与前面相同
2、编译安装php-5.4.26
注意:这里我直接使用前面的环境把之前安装好的php删掉或重命名,重新编译安装php
1
2
3
4
5
6
7
8
9
10
11
12
13
14
15
16
17
18
19
20
21
22
23
24
| [iyunv@BAIYU_179 ~]# ls /usr/local
apache bin include libexec php src
apr etc lib mysql sbin
apr-util games lib64 mysql-5.5.33-linux2.6-x86_64 share
[iyunv@BAIYU_179 ~]# mv /usr/local/php/ /usr/local/php.bak
[iyunv@BAIYU_179 ~]# vi /etc/php.
php.d/ php.ini
[iyunv@BAIYU_179 ~]# mv /etc/php.ini /etc/php.ini.bak
[iyunv@BAIYU_179 ~]# mv /etc/php.d /etc/php.d.bak
[iyunv@BAIYU_179 ~]# vi /etc/php.
php.d.bak/ php.ini.bak
[iyunv@BAIYU_179 ~]# ls
anaconda-ks.cfg install.log.syslog trash.sh
a.sql LAMP xcache-3.2.0
a.sql.orig mysql-5.5.33-linux2.6-x86_64 xcache-3.2.0.tar.gz
install.log phpMyAdmin-4.5.1-all-languages.tar.gz
[iyunv@BAIYU_179 ~]# cd LAMP/
[iyunv@BAIYU_179 LAMP]# ls
apr-1.5.2 httpd-2.4.17 wordpress-4.3.1-zh_CN.tar.gz
apr-1.5.2.tar.gz httpd-2.4.17.tar.gz wordpress-4.3.1-zh_CN.zip
apr-util-1.5.4 php-5.6.15
apr-util-1.5.4.tar.gz php-5.6.15.tar.bz2
[iyunv@BAIYU_179 LAMP]# \rm php-5.6.15 -rf #删掉之前编译过的包
|
1)编译安装php
1
2
3
| # ./configure --prefix=/usr/local/php5 --with-mysql=/usr/local/mysql --with-openssl --with-mysqli=/usr/local/mysql/bin/mysql_config --enable-mbstring --with-freetype-dir --with-jpeg-dir --with-png-dir --with-zlib --with-libxml-dir=/usr --enable-xml --enable-sockets --enable-fpm --with-mcrypt --with-config-file-path=/etc --with-config-file-scan-dir=/etc/php.d --with-bz2
# make
# make intall
|
注意:编译选项和上面的不同之处在于添加了--enable-fpm
并且去掉了--with-apxs2=/usr/local/apche/bin/apxs
2)为php提供配置文件
1
| # cp php.ini-production /etc/php.ini #解压后的php源码包目录中
|
3)配置php-fpm
为php-fpm提供SysV init脚本,并将其添加至服务列表:
1
2
3
4
| # cp sapi/fpm/init.d.php-fpm /etc/rc.d/init.d/php-fpm #解压后的php源码包目录中
# chmod +x /etc/rc.d/init.d/php-fpm
# chkconfig --add php-fpm
# chkconfig php-fpm on
|
4)为php-fpm提供配置文件:
1
| # cp /usr/local/php5/etc/php-fpm.conf.default /usr/local/php5/etc/php-fpm.conf
|
5)编辑php-fpm的配置文件:
# vim /usr/local/php/etc/php-fpm.conf
配置fpm的相关选项为你所需要的值,并启用pid文件(如下最后一行):
1
2
3
4
5
| pm.max_children = 50
pm.start_servers = 5
pm.min_spare_servers = 2
pm.max_spare_servers = 8
pid = /usr/local/php5/var/run/php-fpm.pid #要和服务脚本中的路径一致
|
6)测试
# service php-fpm start
使用如下命令来验正(如果此命令输出有中几个php-fpm进程就说明启动成功了):
# ps aux | grep php-fpm
默认情况下,fpm监听在127.0.0.1的9000端口,也可以使用如下命令验正其是否已经监听在相应的套接字。
# netstat -tnlp | grep php-fpm
tcp 0 0 127.0.0.1:9000 0.0.0.0:* LISTEN 689/php-fpm
3、配置httpd的主配置文件
1)取消之前加载的php模块并启用proxy的相关模块
在Apache httpd 2.4以后已经专门有一个模块针对FastCGI的实现,此模块为mod_proxy_fcgi.so,它其实是作为mod_proxy.so模块的扩充,因此,这两个模块都要加载
LoadModule proxy_module modules/mod_proxy.so
LoadModule proxy_fcgi_module modules/mod_proxy_fcgi.so
并检查是否添加或修改了如下内容:
387 AddType application/x-httpd-php .php
388 AddType application/x-httpd-php-source .phps
258 DirectoryIndex index.php index.html
2)配置虚拟主机支持使用fcgi
在httpd主配置文件中启用虚拟主机配置文件并注释中心主机
在虚拟主机配置文件配置:
1
2
3
4
5
6
7
8
9
10
11
12
13
14
15
16
17
18
19
20
21
22
23
24
25
26
27
| [iyunv@BAIYU_179 extra]# grep -vE '^#|^$' httpd-vhosts.conf
<VirtualHost *:80>
DocumentRoot "/web/a.com/htdocs"
ServerName www.a.com
ServerAlias a.com
ErrorLog "logs/a.com.err"
CustomLog "logs/a.com.access" combined
<Directory "/web/a.com/htdocs">
Options None
Require all granted
</Directory>
ProxyRequests Off #关闭正向代理
ProxyPassMatch ^/(.*\.php)$ fcgi://127.0.0.1:9000/web/a.com/htdocs/$1 #把以.php结尾的文件请求发送到php-fpm进程,php-fpm至少需要知道运行的目录和URI,所以这里直接在fcgi://127.0.0.1:9000后指明了这两个参数,其它的参数的传递已经被mod_proxy_fcgi.so进行了封装,不需要手动指定。
</VirtualHost>
<VirtualHost *:80>
DocumentRoot "/web/b.org/htdocs" #这里要先建立对应目录和网页文件
ServerName www.b.org
ServerAlias b.org
ErrorLog "logs/b.org.err"
CustomLog "logs/b.org.access" combined
<Directory "/web/b.org/htdocs">
Options None
Require all granted
</Directory>
ProxyRequests Off
ProxyPassMatch ^/(.*\.php)$ fcgi://127.0.0.1:9000/web/b.org/htdocs/$1
</VirtualHost>
|
fcgi方式比以模块方式运行性能更好
补充:Apache httpd 2.4以前的版本中,要么把PHP作为Apache的模块运行,要么添加一个第三方模块支持PHP-FPM实现。

|