批量添加主机和服务
 centreon的模板功能是做的非常强大的,而且优化过的nagios配置十分简单,加host的时候只需要输入了hostname,alias和ip 地址就可以加一台host上去,service配在hostgroup上,这样只要把host添加到hostgroup上就可以了
 只添加host,service和hostgroup自己配。
 运行脚本之前,要先准备好几件事情:
1、要有一个host的模板,将所有的属性基本上定义完整,使用脚本添加的host会和模板一模一样,只有ip地址和hostname有差别 (推荐自定义一个host模版)
2、要确认了host要添加到哪台nagios上,在centreon里叫poller
3、要有一个hosts文件,里面内容为要批量添加的hostname和ip地址,类似/etc/hosts的格式,第一栏ip,第二栏hostname
下面开始演示添加主机:
 添加前:
添加前:

引用代码:
1
2
3
4
5
6
7
8
9
10
11
12
13
14
15
16
17
18
19
20
21
22
23
24
25
26
27
28
29
30
31
32
33
34
35
36
37
38
39
40
41
42
43
44
45
46
47
48
49
50
51
52
53
54
55
56
57
58
59
60
61
62
63
64
65
66
67
68
69
70
71
72
73
74
75
76
77
78
79
80
81
82
83
84
85
86
87
88
89
90
91
92
93
94
95
96
97
98
99
100
101
102
103
104
105
106
107
108
109
110
111
112
113
114
115
116
117
118
119
120
121
122
123
124
125
126
127
128
129
130
131
132
133
134
135
136
137
138
139
140
141
142
143
144
145
146
147
148
149
| 脚本用perl写的,最前面db的部分需要修改,代码如下:
#!/usr/bin/perl
### ====================================================
## File name: insert_host.pl
## Use: insert host into centreondatabase
### ====================================================
use strict;
use warnings;
use DBI;
use DBD::mysql;
# ----------------------------------------------------
my $DB_HOST = "127.0.0.1"; #修改为127.0.0.1
my $DB_USER = "centreon"; # web安装时设置的数据库访问用户,修改为centreon
my $DB_PASSWD = "centreon"; # web安装时设置的数据库密码,修改为centreon
my $DB_NAME = "centreon"; # web安装时设置的数据库名,默认也是centreon
my $dbh= DBI->connect("DBI:mysql:database=$DB_NAME;host=$DB_HOST","$DB_USER", "$DB_PASSWD", { RaiseError=> 1 });
# ----------------------------------------------------
my $file_path= "hosts"; #hosts文件,自己创建
my$tpl_name= "generic-host"; #主机模板,填写你需要继承的模板;
my$nagios_name= "Central"; #poller,修改为Central
while (defined(my $arg= shift)) {
if ($argeq'-f') {
$file_path= shift;
}
# == name of template ==
elsif($argeq'-t') {
$tpl_name= shift;
}
# == name of nagiosname ==
elsif($argeq'-n') {
$nagios_name= shift;
}
else {
&print_help();
exit1;
}
}
# -----------------------------------------------------
open (HOST, "$file_path")|| die "Cannot open $file_pathfor read $!";
my $sql;
my $sth;
my $line;
my ($host, $ipaddr);
my ($host_id,$tpl_id,$nagios_id)= (0, 0, 0);
while (defined($line = <HOST>)) {
# == skip blank lines =================
next if ($line =~ /^\s*$/);
# == skip if # ========================
next if ($line =~ /^\s*#/);
# == get host and ipaddress===========
($ipaddr,$host) = split(/\s+/, $line);
next if ($ipaddreq'' || $host eq'');
# == insert the host to table host ====
$sql= "insert host set host_template_model_htm_id='2',host_name='$host',host_alias='$host',host_address='$ipaddr',host_active_checks_enabled='2',host_passive_checks_enabled='2',host_checks_enabled='2',host_event_handler_enabled='2',host_flap_detection_enabled='2',host_process_perf_data='2',host_retain_status_information='2',host_retain_nonstatus_information='2',host_notifications_enabled='2',host_register='1',host_activate='1',host_obsess_over_host='2',host_check_freshness='2'";
$sth= $dbh->do($sql);
sleep(1);
# == get host_id======================
$sql= "select host_idfrom host where host_name='$host'";
$sth= $dbh->prepare($sql);
$sth->execute();
while (my $ref = $sth->fetchrow_hashref()){
$host_id= $ref->{'host_id'};
print "host_idis $host_id\n";
}
next if ($host_id== 0);
# == insert extended_host_information==
$sql= "insert extended_host_informationset host_host_id='$host_id'";
$sth= $dbh->do($sql);
# == insert host_template_relation=====
$sql= "select host_idfrom host where host_name='$tpl_name'";
$sth= $dbh->prepare($sql);
$sth->execute();
while (my $ref = $sth->fetchrow_hashref()){
$tpl_id= $ref->{'host_id'};
print"template id is $tpl_id\n";
}
next if ($tpl_id== 0);
$sql= "insert host_template_relationset host_host_id='$host_id',host_tpl_id='$tpl_id',`order`='1'";
$sth= $dbh->prepare($sql);
$sth->execute();
# == insert ns_host_relation===========
$sql= "select id from nagios_serverwhere name='$nagios_name'";
$sth = $dbh->prepare($sql);
$sth->execute();
while (my $ref = $sth->fetchrow_hashref()){
$nagios_id=$ref->{'id'};
print "nagiosid is $nagios_id\n";
}
next if ($nagios_id== 0);
$sql = "insert ns_host_relationset host_host_id='$host_id',nagios_server_id='$nagios_id'";
$sth = $dbh->prepare($sql);
$sth->execute();
# == insert complete ==
print "insert $host to centreoncomplete\n";
}
close(HOST);
$dbh->disconnect();
exit 0;
#--------------------------------------------------------------------------------
sub print_help{
print "Usage ./insert_host.pl [-f path of host file][-n nagiosname] [-t template name]\n";
print "\n";
}
|

添加后:刷新WEB页面:多了三台;

 批量生成和主机相关联的服务

上面的脚本能够批量添加主机,但是不能自动生成和主机相关联的服务
 使用 CentreonCLAPI 可以解决这个问题,CentreonCLAPI 是centreon 命令行接口,可以替代在网页上的许多工作,这里我们只介绍下怎么解决我们的问题。了解更多请看网址:
 http://forge.centreon.com/projects/centreon-clapi/wiki进行安装
 http://download.centreon.com/Modules/CLAPI/centreon-clapi-1.1.tar.gz

tar zxvfcentreon-clapi-1.1.tar.gz

cd centreon-clapi-1.1


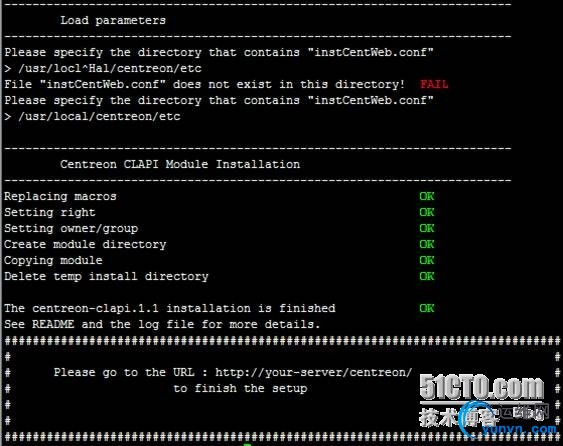
提示输入instCentWeb.conf配置文件的路径:/usr/local/centreon/etc/ 安装完成后: cd /usr/local/centreon/www/modules/centreon-clapi/core/ vimcentreon +64 require_once "$centreon_etc/centreon.conf.php"; 改为: require_once "/usr/local/centreon/etc/centreon.conf.php";

cd /usr/local/centreon/www/modules/centreon-clapi/core/

vim centreon +64

require_once"$centreon_etc/centreon.conf.php";

改为:

require_once"/usr/local/centreon/etc/centreon.conf.php";

 对client主机应用所关联的模板服务:

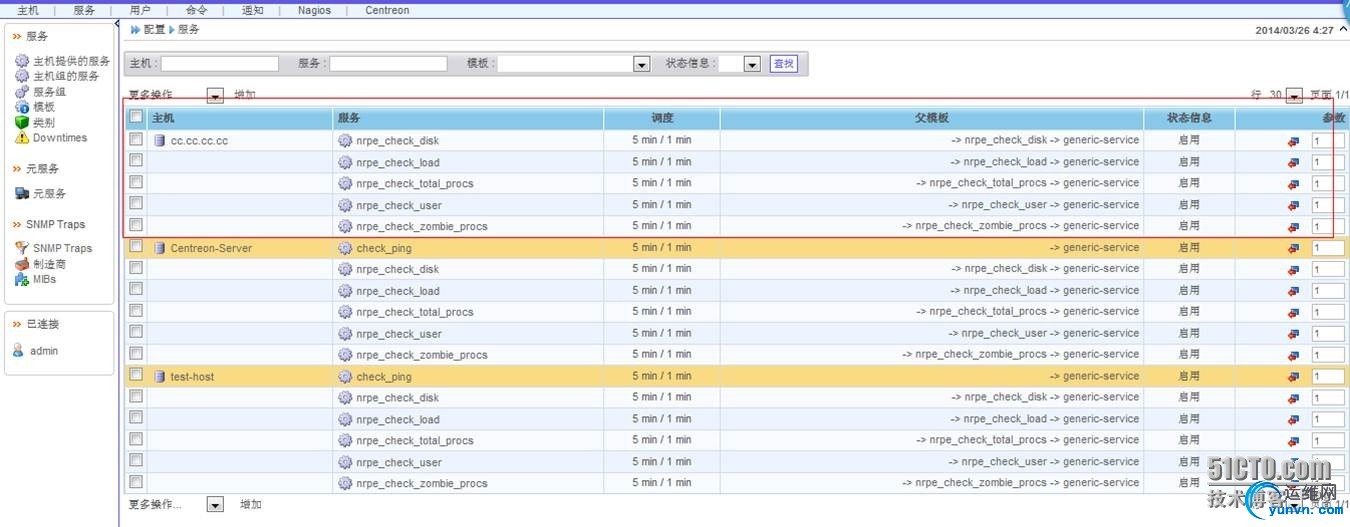
关联前:

 进行关联:
进行关联:
 [iyunv@mastercore]# ./centreon -uadmin-padmin123 -o HOST -a applytpl -v"cc.cc.cc.cc"

 查看页面:
查看页面:

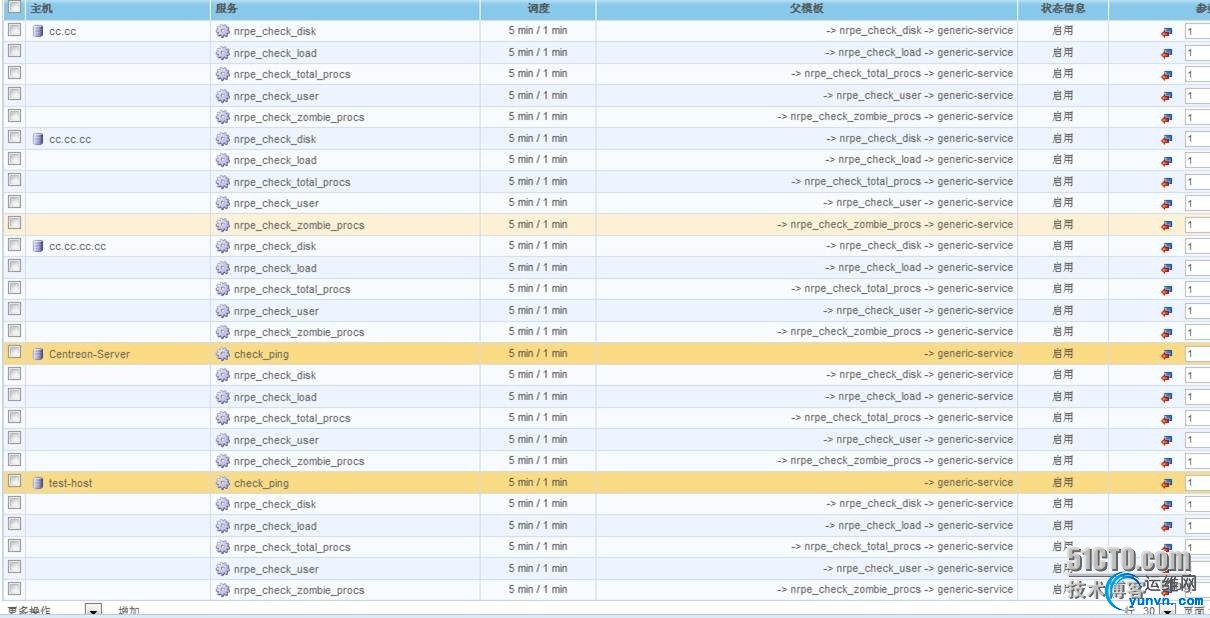
通过以上命令可以关联模板的服务,如果需要批量添加,只需写个简单的脚本就能实现,见下图,执行前可删除刚才手动执行的命令添加的client服务:

 刷新页面查看:

批量添加完主机和服务要需要重新生成nagios配置后生效。
|