基本信息
OS:
RHEL 5.6 64BITEnterprise-R5-U6-Server-x86_64-dvd.iso
ORACLE:
ORACLE 11.2.0.2 64BIT
p10098816_112020_Linux-x86-64_1of7.zip
p10098816_112020_Linux-x86-64_2of7.zip
p10098816_112020_Linux-x86-64_3of7.zip(GI ASM)
ORACLE PSU:
11.2.0.2.3 Database PSU:
p12419331_112020_Linux-x86-64.zip
11.2.0.2.3 Grid Infrastructure PSU:
p12419353_112020_Linux-x86-64.zip
New Optch:
p6880880_112000_Linux-x86-64.zip
WEBLOGIC:
weblogic V18594-01-weblogic.zip
wls1032_generic.jar
JDK:
jdk-6u18-linux-x64-rpm.bin
GC:
V23674-01_1of3.zip
V23674-01_2of3.zip
V23674-01_3of3.zip
GC PSU:
Agent:p9345913_111010_Linux-x86-64.zip
Oms:p12620174_111010_Generic.zip
OS环境配置按照ORACLE
11.2.0.2数据库安装配置
安装OEL 5.6把ORACLE的包和ASM包选上
参数设置
[iyunv@hotel01 ~]# uname -r
2.6.18-194.el5xen
[iyunv@hotel01 ~]# rpm -q --qf '%{NAME}-%{VERSION}-%{RELEASE} (%{ARCH})\n' \binutils compat-libstdc++-33 elfutils-libelf elfutils-libelf-devel
gcc gcc-c++ glibc glibc-common glibc-devel glibc-headers ksh libaio libaio-devel libgomp- libgcc libstdc++ libstdc++-devel make numactl-devel- sysstat unixODBC unixODBC-devel
binutils-2.17.50.0.6-14.el5 (x86_64)
compat-libstdc++-33-3.2.3-61 (x86_64)
compat-libstdc++-33-3.2.3-61 (i386)
elfutils-libelf-0.137-3.el5 (x86_64)
elfutils-libelf-devel-0.137-3.el5 (x86_64)
gcc-4.1.2-48.el5 (x86_64)
gcc-c++-4.1.2-48.el5 (x86_64)
glibc-2.5-49 (i686)
glibc-2.5-49 (x86_64)
glibc-common-2.5-49 (x86_64)
glibc-devel-2.5-49 (x86_64)
glibc-devel-2.5-49 (i386)
glibc-headers-2.5-49 (x86_64)
ksh-20100202-1.el5 (x86_64)
libaio-0.3.106-5 (i386)
libaio-0.3.106-5 (x86_64)
libaio-devel-0.3.106-5 (i386)
libaio-devel-0.3.106-5 (x86_64)
libgomp-4.4.0-6.el5 (x86_64)
libgcc-4.1.2-48.el5 (i386)
libgcc-4.1.2-48.el5 (x86_64)
libstdc++-4.1.2-48.el5 (x86_64)
libstdc++-4.1.2-48.el5 (i386)
libstdc++-devel-4.1.2-48.el5 (x86_64)
make-3.81-3.el5 (x86_64)
numactl-devel-0.9.8-11.el5 (x86_64)
numactl-devel-0.9.8-11.el5 (i386)
sysstat-7.0.2-3.el5 (x86_64)
unixODBC-2.2.11-7.1 (x86_64)
unixODBC-2.2.11-7.1 (i386)
unixODBC-devel-2.2.11-7.1 (i386)
unixODBC-devel-2.2.11-7.1 (x86_64)
[iyunv@hotel01 ~]#
cd /media/cdrom/Server
rpm -Uvh binutils-2.*
/etc/sysctl.conf
fs.aio-max-nr = 1048576
fs.file-max = 6815744
kernel.shmall = 2097152 #redhad 5.7只改这个参数即可
#kernel.shmmax = 536870912
kernel.shmmni = 4096
kernel.sem = 250 32000 100 128
net.ipv4.ip_local_port_range = 9000 65500
net.core.rmem_max = 4194304
net.core.wmem_default = 262144
net.core.wmem_max = 1048586
net.core.rmem_default = 262144
sysctl –p
[iyunv@hotel01 ~]# cat /etc/sysctl.conf
# Kernel sysctl configuration file for Oracle Enterprise Linux
#
# For binary values, 0 is disabled, 1 is enabled.See sysctl(8) and
# sysctl.conf(5) for more details.
# Controls IP packet forwarding
net.ipv4.ip_forward = 0
# Controls source route verification
net.ipv4.conf.default.rp_filter = 1
# Do not accept source routing
net.ipv4.conf.default.accept_source_route = 0
# Controls the System Request debugging functionality of the kernel
kernel.sysrq = 1
# Controls whether core dumps will append the PID to the core filename
# Useful for debugging multi-threaded applications
kernel.core_uses_pid = 1
# Controls the use of TCP syncookies
net.ipv4.tcp_syncookies = 1
# Controls the maximum size of a message, in bytes
kernel.msgmnb = 65536
# Controls the default maxmimum size of a mesage queue
kernel.msgmax = 8192
# Controls the maximum shared segment size, in bytes
kernel.shmmax = 4398046511104
# Controls the maximum number of shared memory segments, in pages
kernel.shmall = 1073741824
# For 11g, recommended value for file-max is 6815744
fs.file-max = 6815744
# For 10g, uncomment 'fs.file-max 327679', comment other entries for this parameter and re-run sysctl -p
# fs.file-max:327679
kernel.msgmni = 2878
kernel.sem = 250 32000 100 142
kernel.shmmni = 4096
net.core.rmem_default = 262144
# For 11g, recommended value for net.core.rmem_max is 4194304
net.core.rmem_max = 4194304
# For 10g, uncomment 'net.core.rmem_max 2097152', comment other entries for this parameter and re-run sysctl -p
# net.core.rmem_max=2097152
net.core.wmem_default = 262144
# For 11g, recommended value for wmem_max is 1048576
net.core.wmem_max = 1048576
# For 10g, uncomment 'net.core.wmem_max 262144', comment other entries for this parameter and re-run sysctl -p
# net.core.wmem_max:262144
fs.aio-max-nr = 3145728
# For 11g, recommended value for ip_local_port_range is 9000 65500
net.ipv4.ip_local_port_range = 9000 65500
# For 10g, uncomment 'net.ipv4.ip_local_port_range 1024 65000', comment other entries for this parameter and re-run sysctl -p
# net.ipv4.ip_local_port_range:1024 65000
# Added min_free_kbytes 50MB to avoid OOM killer on EL4/EL5
vm.min_free_kbytes = 51200
[iyunv@hotel01 ~]#
vi /etc/security/limits.conf
oraclesoftnproc2047
oraclehardnproc16384
oraclesoftnofile1024
oraclehardnofile65536
vi /etc/pam.d/login
sessionrequiredpam_limits.so
cat /etc/selinux/config
SELINUX=disabled
groupadd oinstall默认已经有
groupadd dba默认已经有
groupadd oper
groupadd asmadmin
userdel oracle
cd /home rm -rf oracle
useradd -g oinstall -G dba,oper,asmadmin oracle
passwd oracle
mkdir /112db
mkdir -p /u01/app/ora11g
mkdir -p /u01/app/ora11g/product
mkdir -p /u01/app/ora11g/oradata
mkdir -p /u01/app/ora11g/product/11.2.0/db_1
chown -R oracle:oinstall /u01
chown -R oracle:oinstall /112db
chmod -R 775 /u01
su – oracle
vi .bash_profile
export TMP=/tmp
export TMPDIR=$TMP
export ORACLE_TERM=xterm
export ORACLE_BASE=/u01/app/ora11g
export ORACLE_HOME=$ORACLE_BASE/product/11.2.0/db_1
export ORACLE_GRID=$ORACLE_BASE/product/11.2.0/grid
export ORACLE_SID=gcdb
export PATH=/usr/sbin:$PATH
export PATH=$ORACLE_HOME/bin:$ORACLE_GRID/bin:$PATH
exportLD_LIBRARY_PATH=$ORACLE_HOME/lib:/lib64:/usr/lib64:/usr/local/lib64:/usr/X11R6/lib64
export CLASSPATH=$ORACLE_HOME/JRE:$ORACLE_HOME/jlib:$ORACLE_HOME/rdbms/jlib
export NLS_LANG="SIMPLIFIED CHINESE_CHINA.ZHS16GBK"
export ALERT=$ORACLE_BASE/diag/rdbms/$ORACLE_SID/$ORACLE_SID/trace
sttyerase
^H
umask 022
if [ $USER = "oracle" ]; then
if [ $SHELL = "/bin/ksh" ]; then
ulimit -p 16384
ulimit -n 65536
else
ulimit -u 16384 -n 65536
fi
fi
fdisk –l
[iyunv@hotel01 ~]# fdisk -l
Disk /dev/sda: 53.6 GB, 53687091200 bytes
255 heads, 63 sectors/track, 6527 cylinders
Units = cylinders of 16065 * 512 = 8225280 bytes
Device BootStartEndBlocksIdSystem
/dev/sda1*11310439183Linux
/dev/sda214535419296582Linux swap
/ Solaris
/dev/sda353665274813074083Linux
Disk /dev/sdb: 4294 MB, 4294967296 bytes
255 heads, 63 sectors/track, 522 cylinders
Units = cylinders of 16065 * 512 = 8225280 bytes
Disk /dev/sdb doesn't contain a valid partition table
Disk /dev/sdc: 4294 MB, 4294967296 bytes
255 heads, 63 sectors/track, 522 cylinders
Units = cylinders of 16065 * 512 = 8225280 bytes
Disk /dev/sdc doesn't contain a valid partition table
Disk /dev/sdd: 4294 MB, 4294967296 bytes
255 heads, 63 sectors/track, 522 cylinders
Units = cylinders of 16065 * 512 = 8225280 bytes
Disk /dev/sdd doesn't contain a valid partition table
[iyunv@hotel01 ~]#
Fdisk /dev/sdb
n p 1 w
rpm –vihasmlib
/
[iyunv@hotel01 ~]# /etc/init.d/oracleasm configure
Configuring the Oracle ASM library driver.
This will configure the on-boot properties of the Oracle ASM library
driver.The following questions will determine whether the driver is
loaded on boot and what permissions it will have.The current values
will be shown in brackets ('[]').Hitting <ENTER> without typing an
answer will keep that current value.Ctrl-C will abort.
Default user to own the driver interface []: oracle
Default group to own the driver interface []: asmadmin
Start Oracle ASM library driver on boot (y/n) [n]: y
Scan for Oracle ASM disks on boot (y/n) [y]: y
Writing Oracle ASM library driver configuration: done
Initializing the Oracle ASMLib driver:[OK]
Scanning the system for Oracle ASMLib disks:[OK]
**oracleasm init在
rac的时候需要
[iyunv@hotel01 /]# /etc/init.d/oracleasm createdisk v1 /dev/sdb1
Marking disk "v1" as an ASM disk:[OK]
[iyunv@hotel01 /]# /etc/init.d/oracleasm createdisk v2 /dev/sdc1
Marking disk "v2" as an ASM disk:[OK]
[iyunv@hotel01 /]# /etc/init.d/oracleasm createdisk v3 /dev/sdd1
Marking disk "v3" as an ASM disk:[OK]
[iyunv@hotel01 /]#
[iyunv@hotel01 /]# /etc/init.d/oracleasm listdisks
V1
V2
V3
主库
IP:10.1.5.241
HOSTNAME: hotel01
[iyunv@hotel01 ~]# cat /etc/hosts
# Do not remove the following line, or various programs
# that require network functionality will fail.
#127.0.0.1hotel01 localhost.localdomain localhost
127.0.0.1localhost.localdomain localhost
::1localhost6.localdomain6 localhost6
10.1.5.241hotel01
10.1.5.242hotel02
10.1.5.243hotel03
10.1.5.245gc.localdomaingc
[iyunv@hotel01 ~]#
备库 1
IP:10.1.5.242
HOSTNAME:hotel02
[iyunv@hotel02 ~]# cat /etc/hosts
# Do not remove the following line, or various programs
# that require network functionality will fail.
#127.0.0.1hotel02 localhost.localdomain localhost
127.0.0.1localhost.localdomain localhost
::1localhost6.localdomain6 localhost6
10.1.5.241hotel01
10.1.5.242hotel02
10.1.5.243hotel03
10.1.5.245gc.localdomaingc
[iyunv@hotel02 ~]#
备库2
IP :10.1.5.243
HOSTNAME:hotel03
[iyunv@hotel03 ~]# cat /etc/hosts
# Do not remove the following line, or various programs
# that require network functionality will fail.
#127.0.0.1hotel03 localhost.localdomain localhost
127.0.0.1localhost.localdomain localhost
::1localhost6.localdomain6 localhost6
10.1.5.241hotel01
10.1.5.242hotel02
10.1.5.243hotel03
10.1.5.245gc.localdomaingc
[iyunv@hotel03 ~]#
GC
GRID CONTROL
IP:10.1.5.245
HOSTNAME :gc
[iyunv@gc ~]# cat /etc/hosts
# Do not remove the following line, or various programs
# that require network functionality will fail.
#127.0.0.1gc localhost.localdomain localhost
127.0.0.1localhost.localdomain localhost
::1localhost6.localdomain6 localhost6
10.1.5.241hotel01
10.1.5.242hotel02
10.1.5.243hotel03
10.1.5.245gc.localdomaingc
[iyunv@gc ~]#
环境检查
rpm -q \
glibc \
rng-utils \
make \
binutils \
gcc \
libaio \
glibc-common \
compat-libstdc++-296 \
libstdc++ \
libstdc++-devel \
setarch \
sysstat \
compat-db
一.配置GC
安装11.2.0.2 software
在10.1.5.245安装oracle
11.2.0.2 创建监听不要安装em
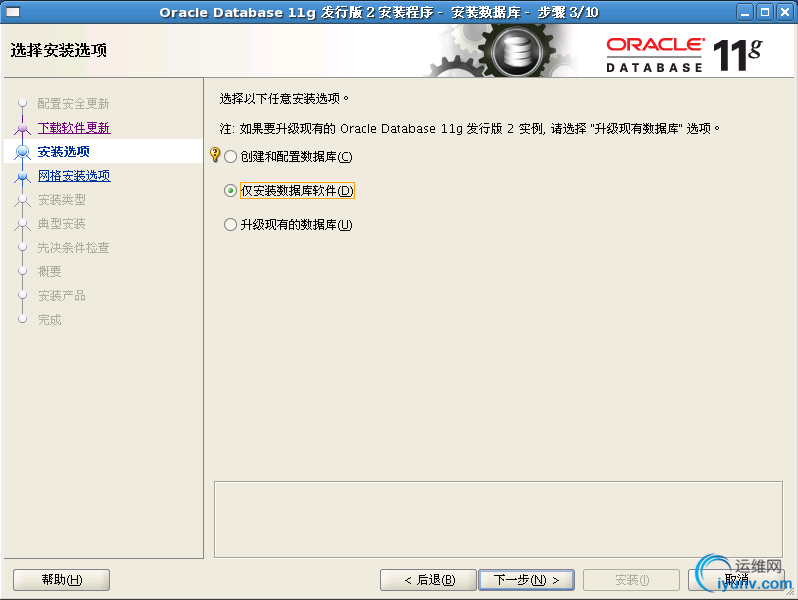
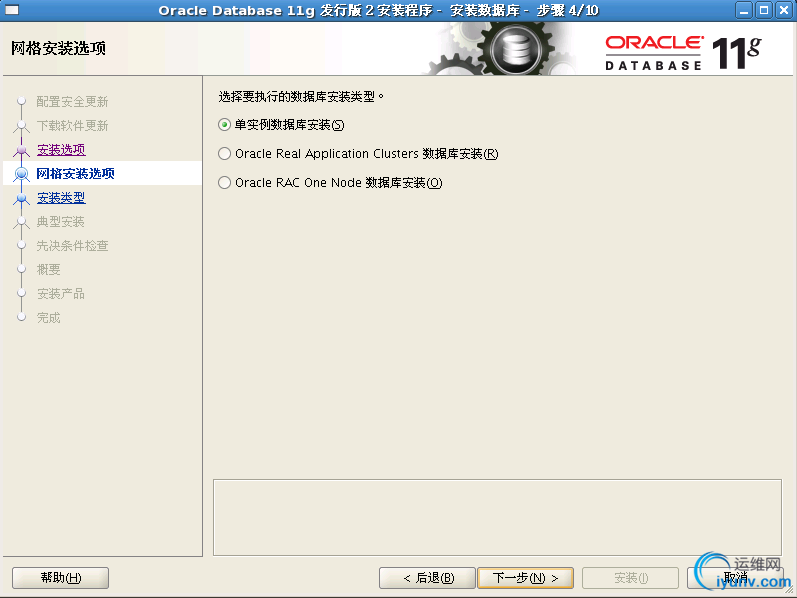
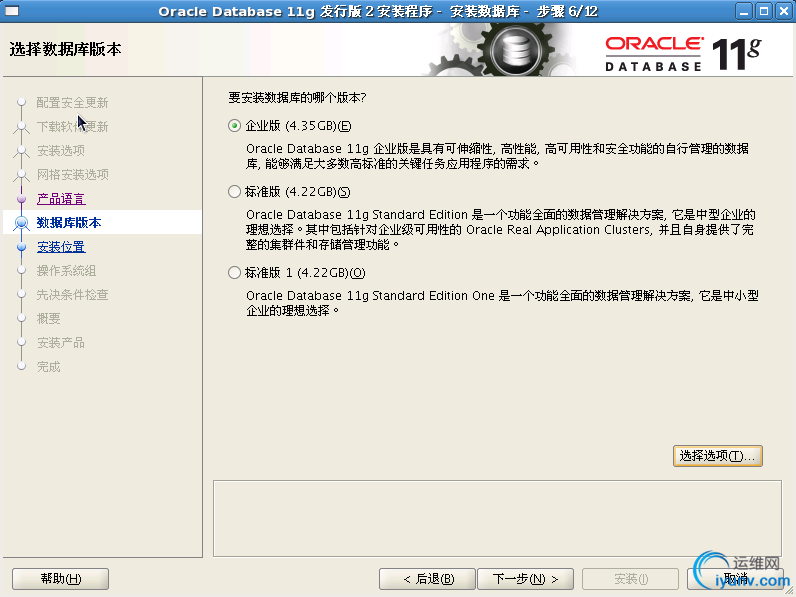
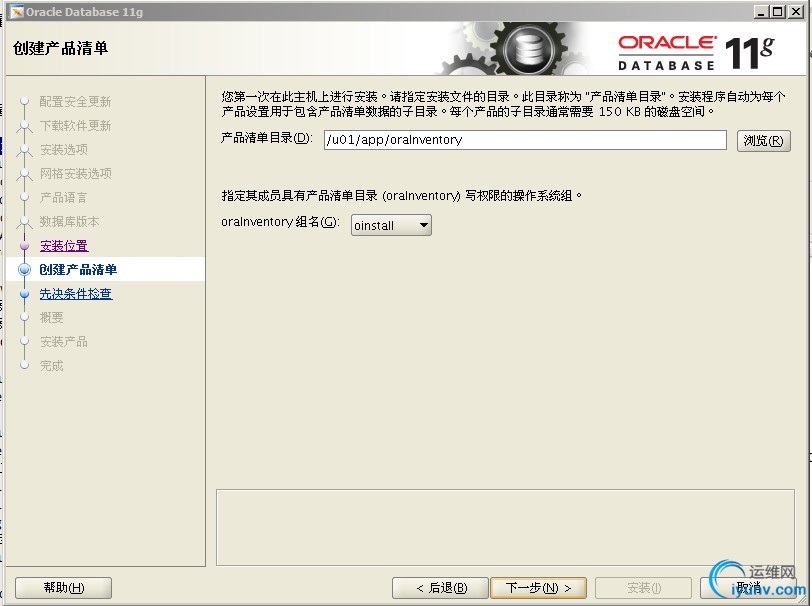
setup new opatch
[oracle@gc op]$ ll
总计 29688
drwxrwxr-x 8 oracle oinstall 4096 03-23 19:24 OPatch
-rw-r--r-- 1 oracle oinstall 30358026 04-12 17:57 p6880880_112000_Linux-x86-64.zip
[iyunv@gc ~]# cd /u01/app/ora11g/product/11.2.0/db_1/OPatch
[iyunv@gc OPatch]# cd ..
[iyunv@gc grid]# pwd
/u01/app/ora11g/product/11.2.0/db_1
[iyunv@gc grid]# mv OPatch OPatch.b
drwxrwxr-x 2 oracle oinstall 4096 06-03 09:53 db_1
drwxr-x--- 67 rootoinstall 4096 06-03 11:42 grid
[iyunv@gc 11.2.0]# pwd
/u01/app/ora11g/product/11.2.0
#[iyunv@gc 11.2.0]# chown -R oracle:oinstall grid
[oracle@gc op]$ pwd
/112db/psu/op
[oracle@gc op]$ mv OPatch /u01/app/ora11g/product/11.2.0/db_1/
[oracle@gc op]$
[oracle@ptest OPatch]$ export ORACLE_HOME=/u01/app/ora11g/product/11.2.0/db_1/
[iyunv@gc OPatch]# ./opatch version
Invoking OPatch 11.2.0.1.5
OPatch Version: 11.2.0.1.5
OPatch succeeded.
安装oracle software PSU
Patch 12419331(11724916)
[oracle@gc 2419331]$ pwd
/112db/psu/db/2419331
[oracle@gc 2419331]$ /u01/app/ora11g/product/11.2.0/db_1/OPatch/./opatch apply
Invoking OPatch 11.2.0.1.5
Oracle 中间补丁程序安装程序版本 11.2.0.1.5
版权所有 (c) 2010, Oracle Corporation。保留所有权利。
Oracle 主目录 : /u01/app/ora11g/product/11.2.0/db_1
主产品清单: /u01/app/oraInventory
从 : /etc/oraInst.loc
OPatch 版本 : 11.2.0.1.5
OUI 版本 : 11.2.0.2.0
OUI 位置 : /u01/app/ora11g/product/11.2.0/db_1/oui
日志文件位置 : /u01/app/ora11g/product/11.2.0/db_1/cfgtoollogs/opatch/opatch2011-08-05_14-48-10下午.log
………………………….
………………………….
Verifying the update...
Inventory check OK: Patch ID 12419331 is registered in Oracle Home inventory with proper meta-data.
Files check OK: Files from Patch ID 12419331 are present in Oracle Home.
本地系统已打补丁,
可以重新启动。
OPatch succeeded.
check Patch 12419331(11724916)
[oracle@gc 12419331]$ cd /u01/app/ora11g/product/11.2.0/db_1/OPatch
[oracle@gc OPatch]$ ./opatch lsinventory
Invoking OPatch 11.2.0.1.5
Oracle 中间补丁程序安装程序版本 11.2.0.1.5
版权所有 (c) 2010, Oracle Corporation。保留所有权利。
Oracle 主目录 : /u01/app/ora11g/product/11.2.0/db_1
主产品清单: /u01/app/oraInventory
从 : /etc/oraInst.loc
OPatch 版本 : 11.2.0.1.5
OUI 版本 : 11.2.0.2.0
OUI 位置 : /u01/app/ora11g/product/11.2.0/db_1/oui
日志文件位置 : /u01/app/ora11g/product/11.2.0/db_1/cfgtoollogs/opatch/opatch2011-08-05_14-54-22下午.log
Patch history file: /u01/app/ora11g/product/11.2.0/db_1/cfgtoollogs/opatch/opatch_history.txt
Lsinventory Output file location : /u01/app/ora11g/product/11.2.0/db_1/cfgtoollogs/opatch/lsinv/lsinventory2011-08-05_14-54-22下午.txt
--------------------------------------------------------------------------------
已安装的顶级产品 (1):
Oracle Database 11g 11.2.0.2.0
此 Oracle
主目录中已安装 1 个产品。
中间补丁程序 (1) :
Patch 12419331 : applied on Fri Aug 05 14:50:21 CST 2011
Unique Patch ID: 13779022
Created on 11 Jul 2011, 07:34:02 hrs PST8PDT
Bugs fixed:
10151017, 10158965, 11724916, 10190642, 12586486, 12586487, 10129643
12586488, 12586489, 10018789, 9744252, 10248523, 9956713, 10356513
9715581, 9770451, 10378005, 10170431, 10425676, 10222719, 10126094
9591812, 10127360, 10132870, 10094201, 9443361, 10193846, 11664046
11069199, 10324294, 10245086, 12586490, 10205230, 12586491, 10052141
12586492, 12586493, 12586494, 10142788, 11818335, 11830776, 12586495
9905049, 11830777, 12586496, 11830778, 6892311, 10040921, 10077191
10358019, 12431716, 10219576, 10258337, 11707699, 10264680, 10209232
11651810, 10102506, 11067567, 9881076, 10278372, 10040531, 10621169
10155605, 10082277, 10356782, 10218814, 9078442, 9788588, 10157249
9735237, 10317487, 12326246, 11707302, 10310299, 10636231, 10230571
11065646, 12419321, 10368698, 10079168, 10013431, 10228151, 10233732
10324526, 8223165, 10238786, 10217802, 10061015, 9953542, 9572787
10052956, 10080579, 11699057, 12620422, 10332111, 10227288, 10329146
10332589, 10110863, 10073683, 9869401, 10019218, 10229719, 11664719
9539440, 10373381, 9735282, 9748749, 11724984, 10022980, 10411618
11800854, 12419331, 11674485, 10187168, 6523037, 10648873, 9724970
10053725, 10084145, 10367188, 11800170, 11695285, 10157402, 9651350, 10299224
--------------------------------------------------------------------------------
OPatch succeeded.
NETCA 创建监听
注意:如果安装前面已经安装了giasm,那么监听已经自动创建,这里就不用再创建了。
lsnrctl status
[oracle@gc ~]$ lsnrctl status
DBCA创建数据库
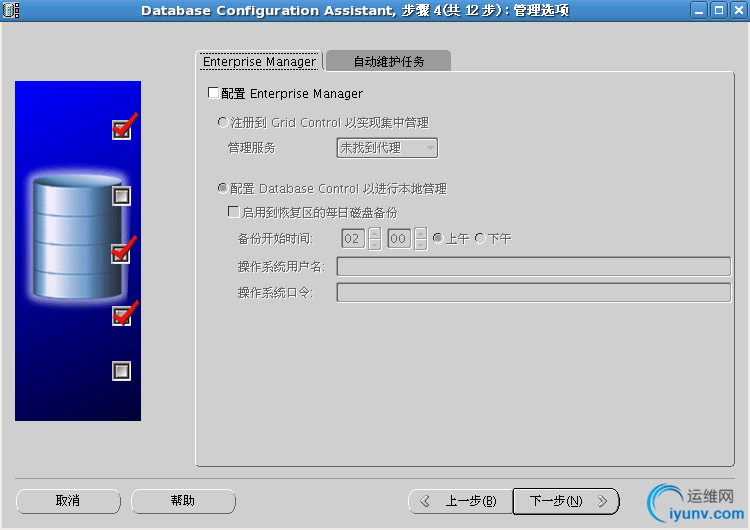
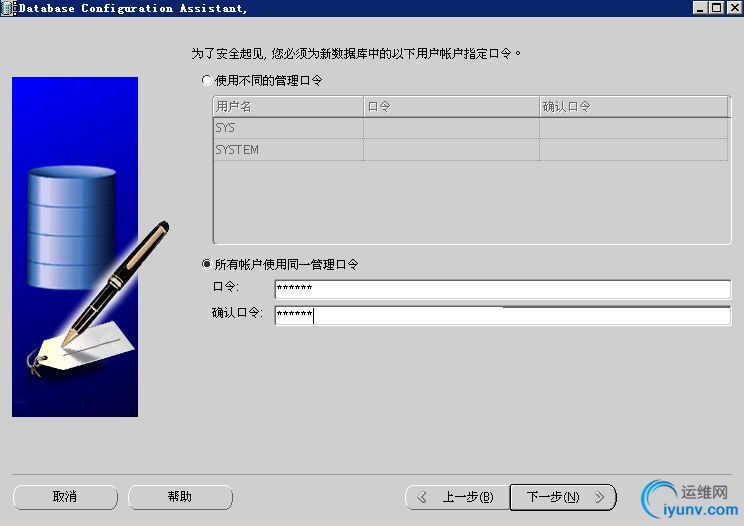
密码:Oracle123
DB名称叫GCDB
配置weblogic
Weblogic也安装在10.1.5.245
首先
安装64bit jdk
上传jdk
Root下执行
# chmod u+x jdk-6u18-linux-x64-rpm.bin
# ./jdk-6u18-linux-x64-rpm.bin
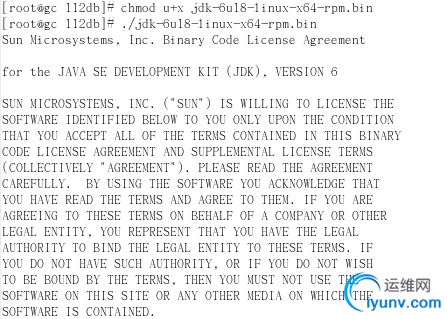
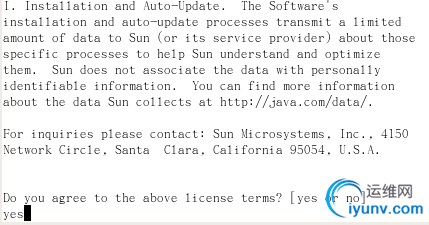
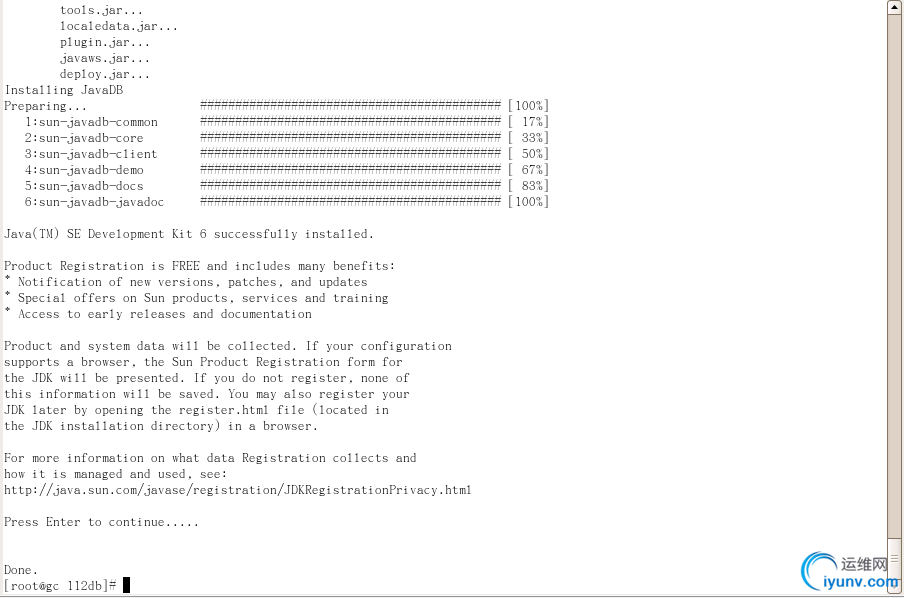
默认安装到了
[iyunv@gc bin]# pwd
/usr/java/jdk1.6.0_18/bin
[iyunv@gc bin]# ./java -version
java version "1.6.0_18"
Java(TM) SE Runtime Environment (build 1.6.0_18-b07)
Java HotSpot(TM) 64-Bit Server VM (build 16.0-b13, mixed mode)

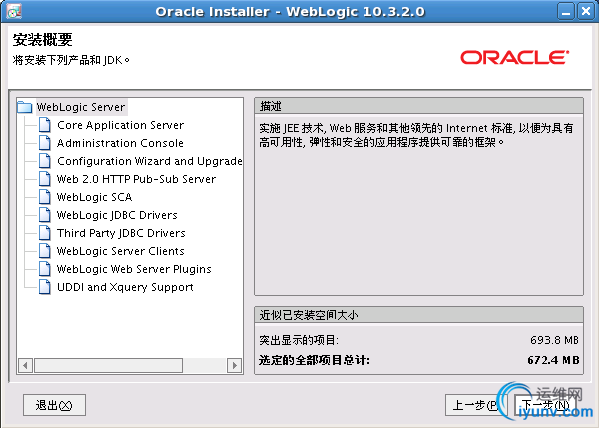
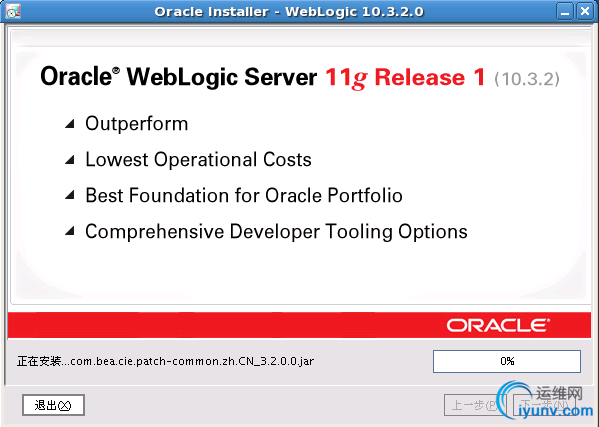
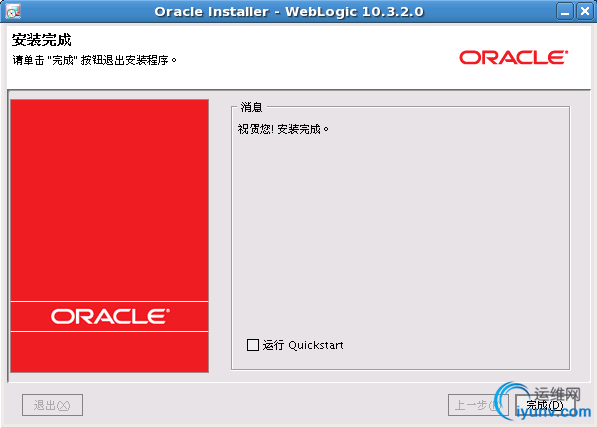
安装weblogic
在oracle用户下执行:
$ /usr/java/jdk1.6.0_18/bin/java -jar wls1032_generic.jar
进到/usr/java/jdk1.6.0_18/bin

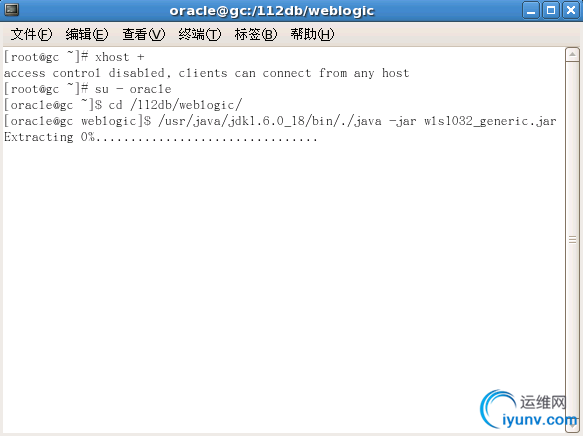
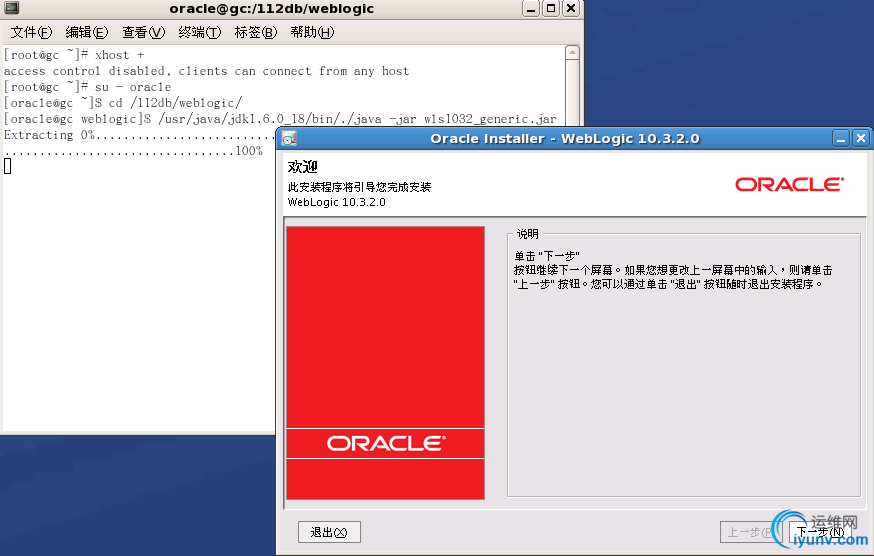
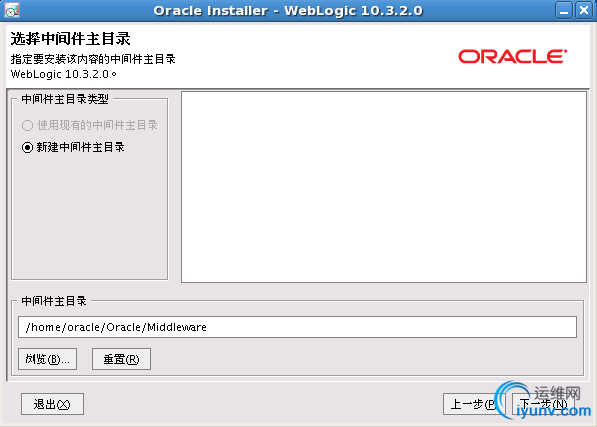
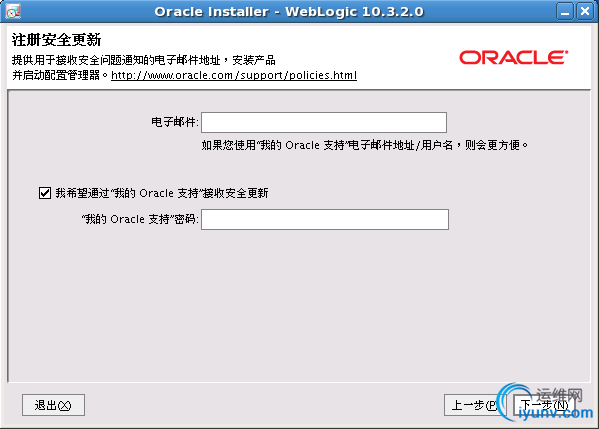
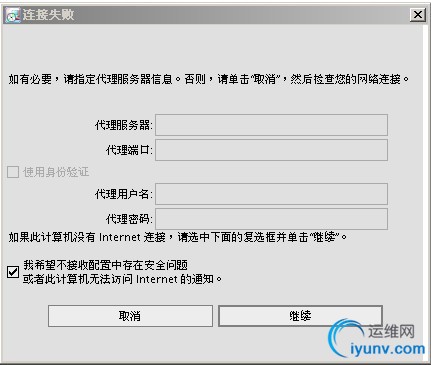
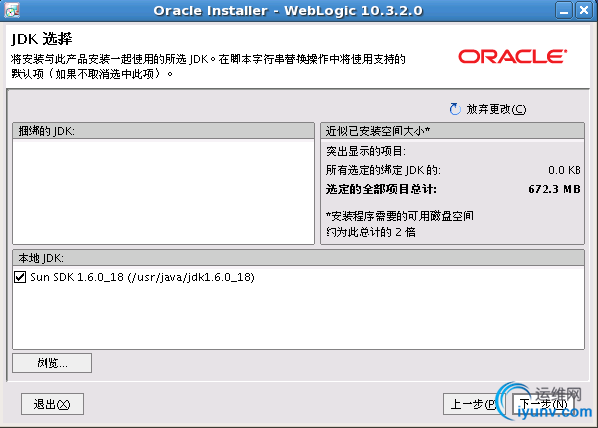
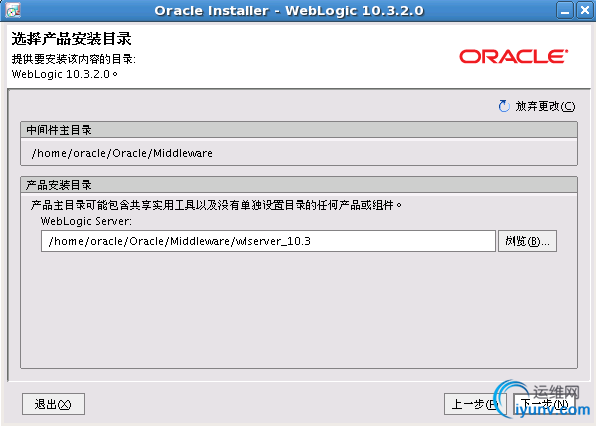
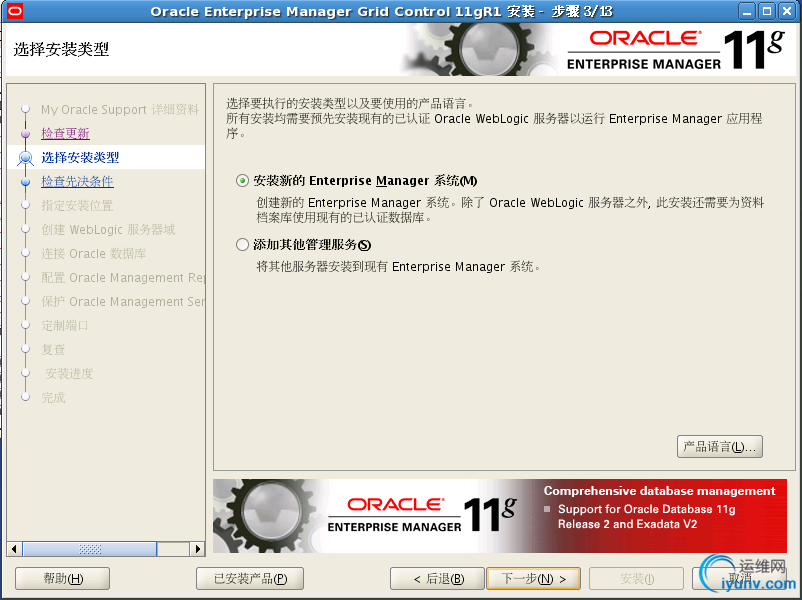
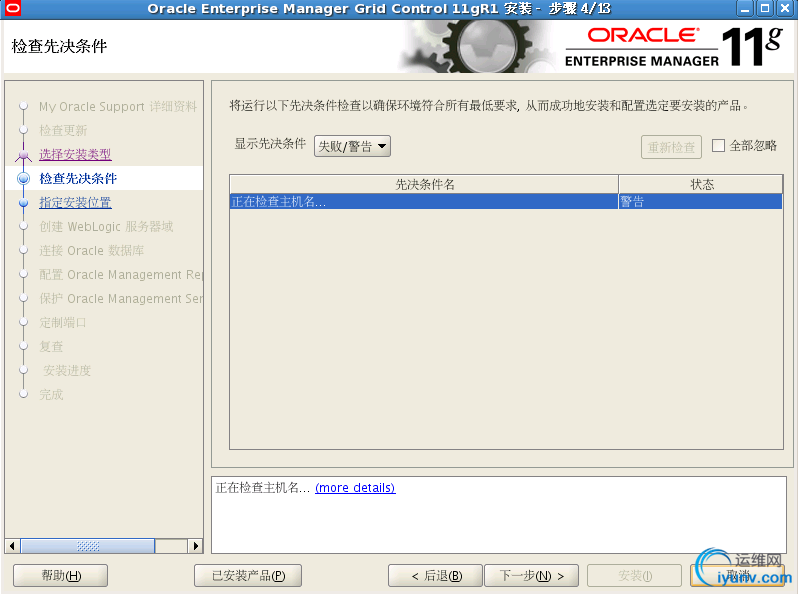
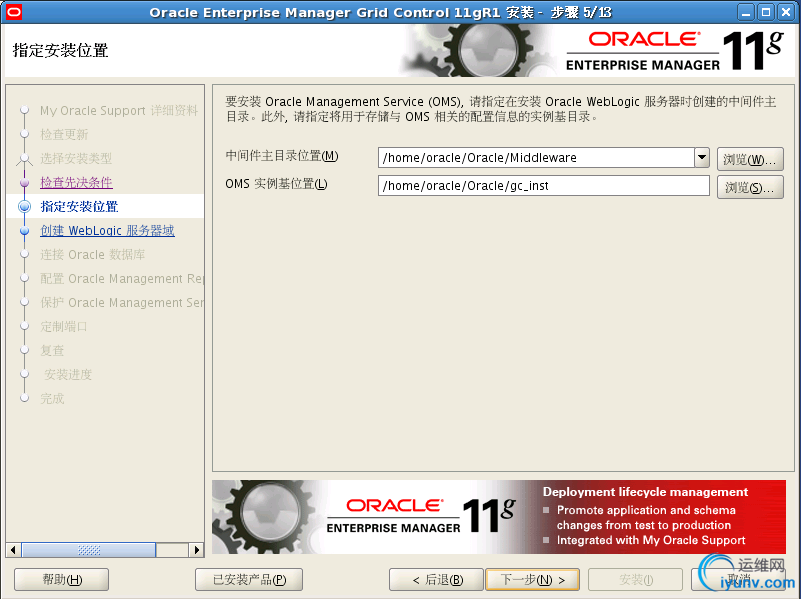
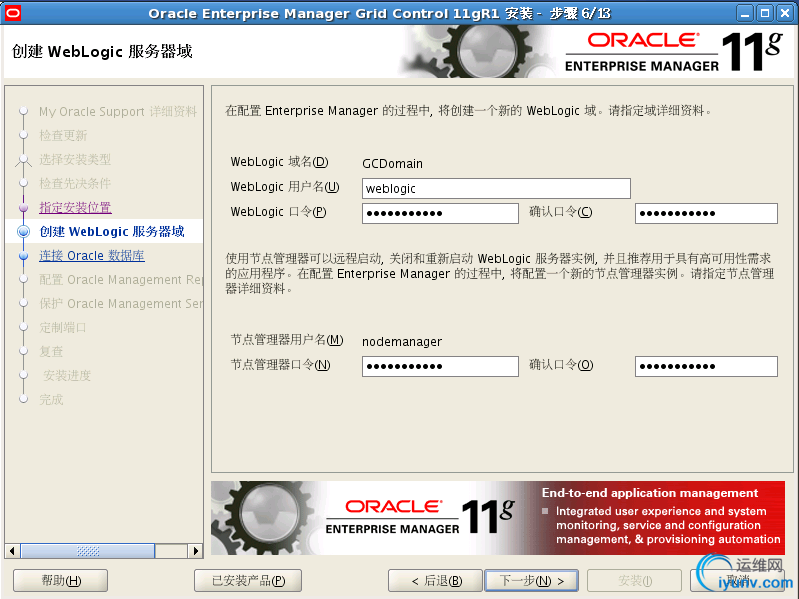
安装GC
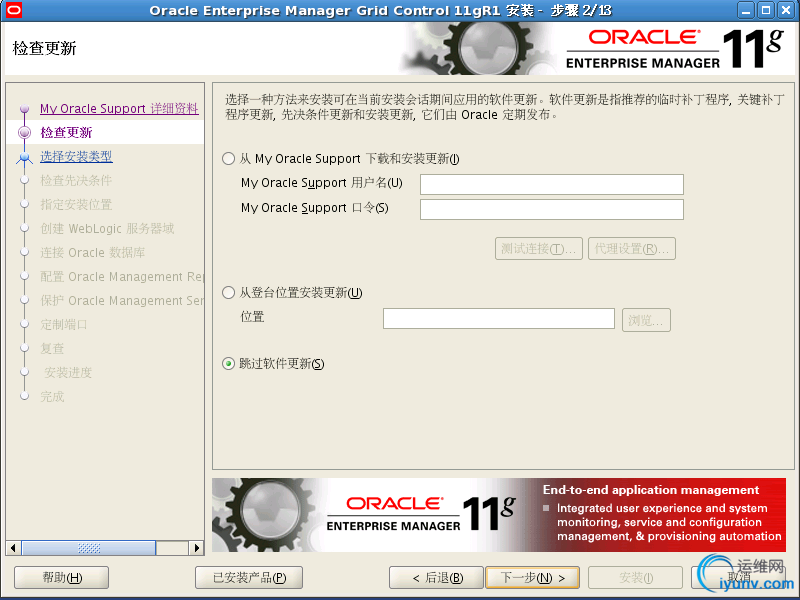
上传 GC V23674-01_1of3 V23674-01_2of3 V23674-01_3of3单独解压缩
解压缩到相同的目录
[oracle@gc grid]$ unzip -n V23674-01_1of3 -d gc
[oracle@gc grid]$ unzip -n V23674-01_2of3 -d gc
[oracle@gc grid]$ unzip -n V23674-01_3of3 -d gc
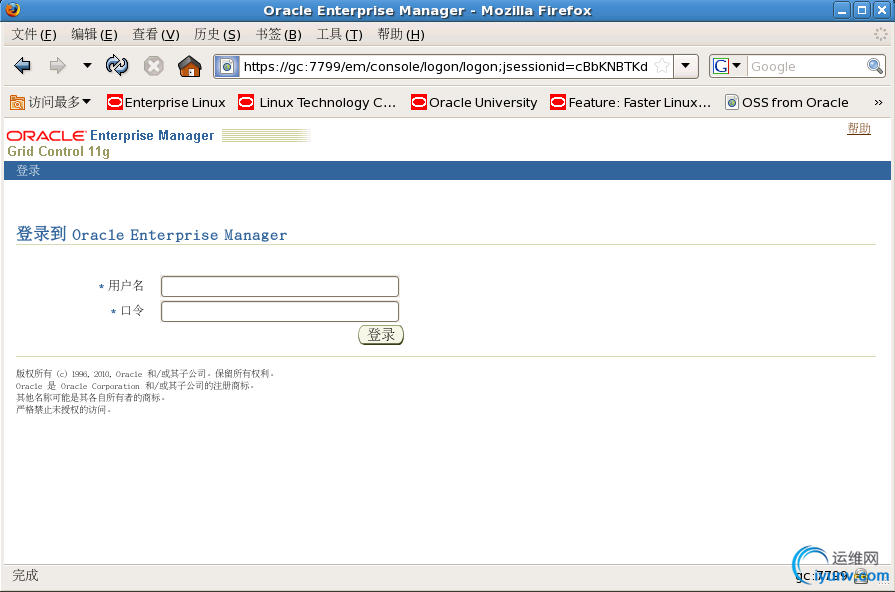
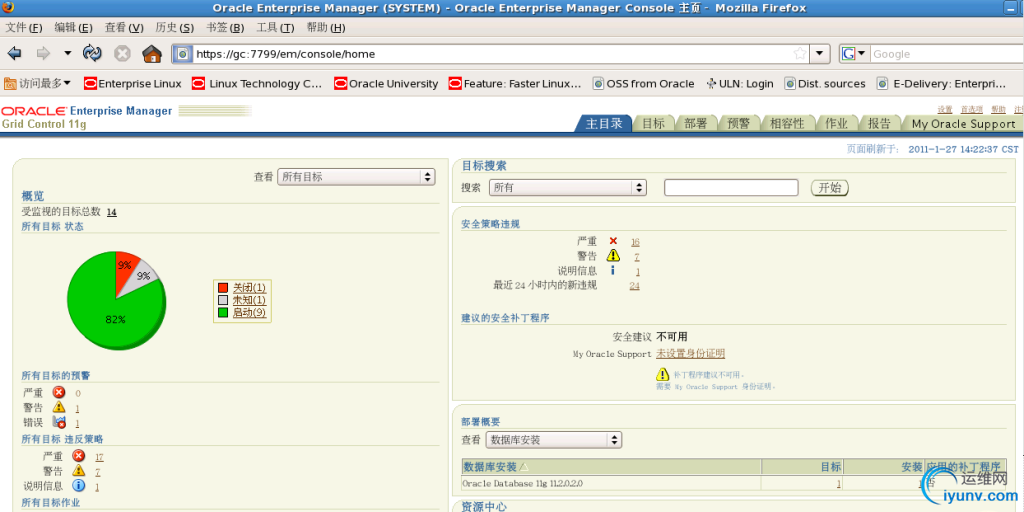
安装
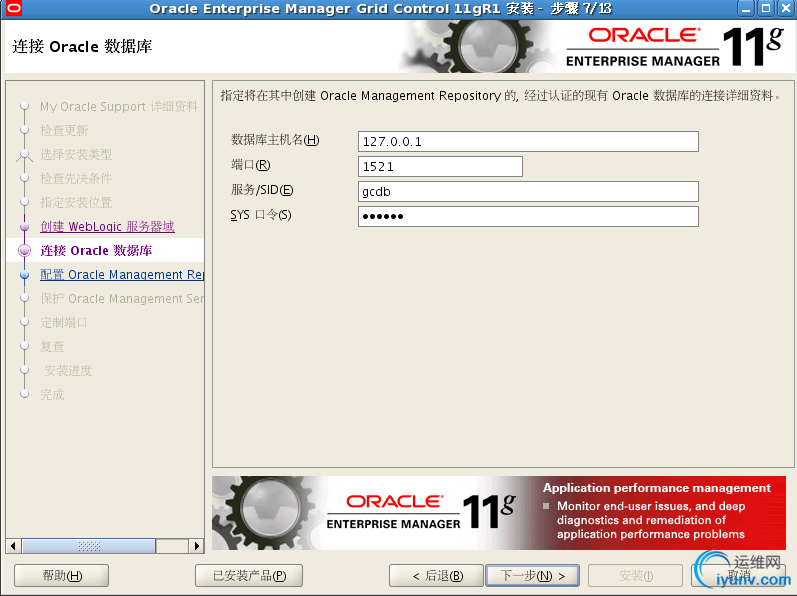
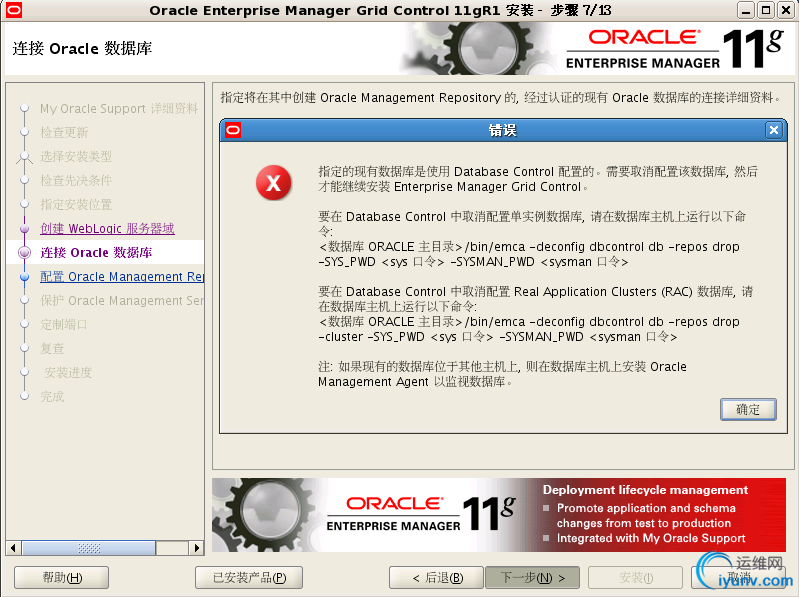
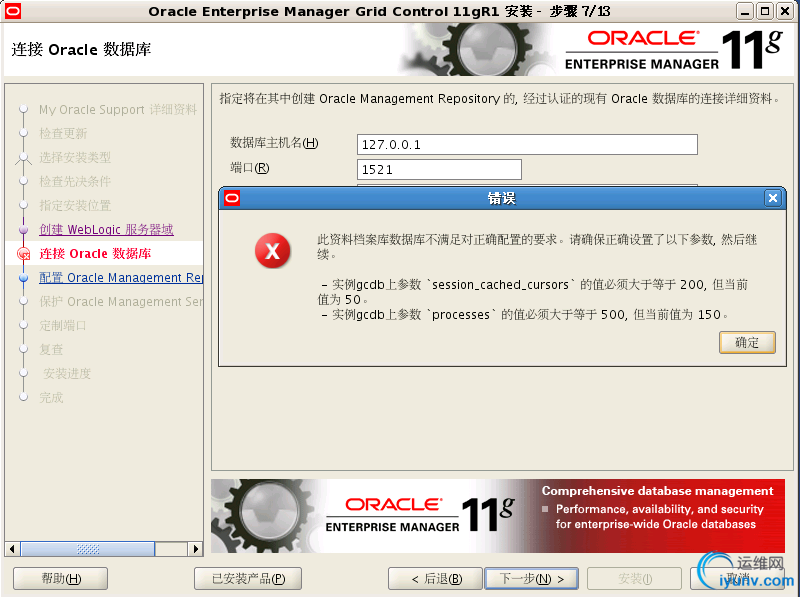
[oracle@gc ~]$ export LANG=zh_CN
[oracle@gc ~]$ emca -deconfig dbcontrol db -repos drop
EMCA 开始于 2011-3-3 16:35:10
EM Configuration Assistant, 11.2.0.0.2正式版
版权所有 (c) 2003, 2005, Oracle。保留所有权利。
输入以下信息:
数据库 SID: gcdb
监听程序端口号: 1521
SYS 用户的口令:
SYSMAN 用户的口令:
----------------------------------------------------------------------
警告: 当删除资料档案库时,数据库将进入静默模式。
----------------------------------------------------------------------
是否继续? [是(Y)/否(N)]: Y
2011-3-3 16:35:32 oracle.sysman.emcp.EMConfig perform
信息: 正在将此操作记录到 /u01/app/ora11g/cfgtoollogs/emca/gcdb/emca_2011_03_03_16_35_09.log。
2011-3-3 16:35:34 oracle.sysman.emcp.util.GeneralUtil initSQLEngineLoacly
警告: ORA-28000:
帐户已被锁定
2011-3-3 16:35:34 oracle.sysman.emcp.ParamsManager checkListenerStatusForDBControl
警告: 初始化 SQL连接时出错。无法执行 SQL操作
2011-3-3 16:35:34 oracle.sysman.emcp.EMDBPreConfig performDeconfiguration
警告: 没有为此数据库配置 EM。无法执行任何 EM特定的操作。一些可能的原因包括:
1) 使用物理主机之外的主机名配置了 EM。请设置环境变量 ORACLE_HOSTNAME=<hostname>并重新运行 EMCA脚本
2) ORACLE_HOSTNAME 已设置。请取消设置该变量并重新运行 EMCA脚本
2011-3-3 16:35:34 oracle.sysman.emcp.EMReposConfig invoke
信息: 正在删除 EM资料档案库 (此操作可能需要一段时间)...
2011-3-3 16:40:21 oracle.sysman.emcp.EMReposConfig invoke
信息: 已成功删除资料档案库
已成功完成 Enterprise Manager的配置
EMCA 结束于 2011-3-3 16:40:21
[oracle@gc~]$
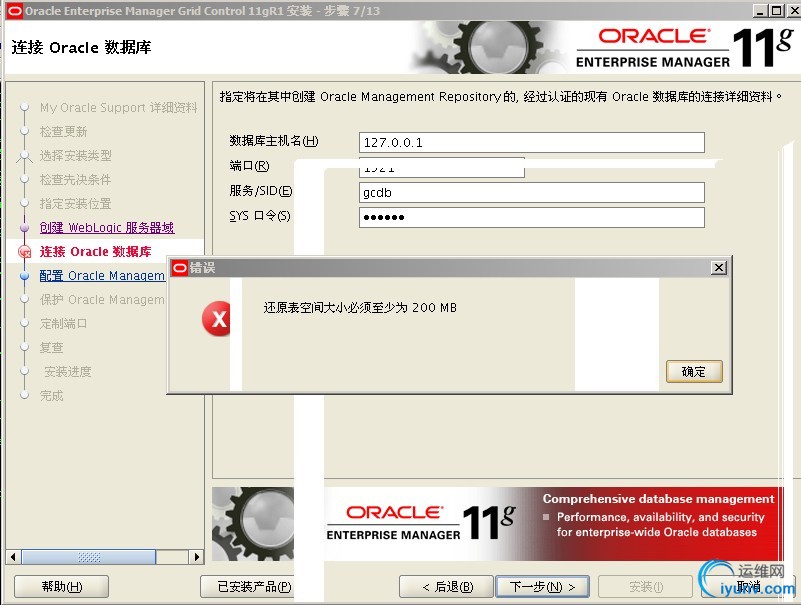
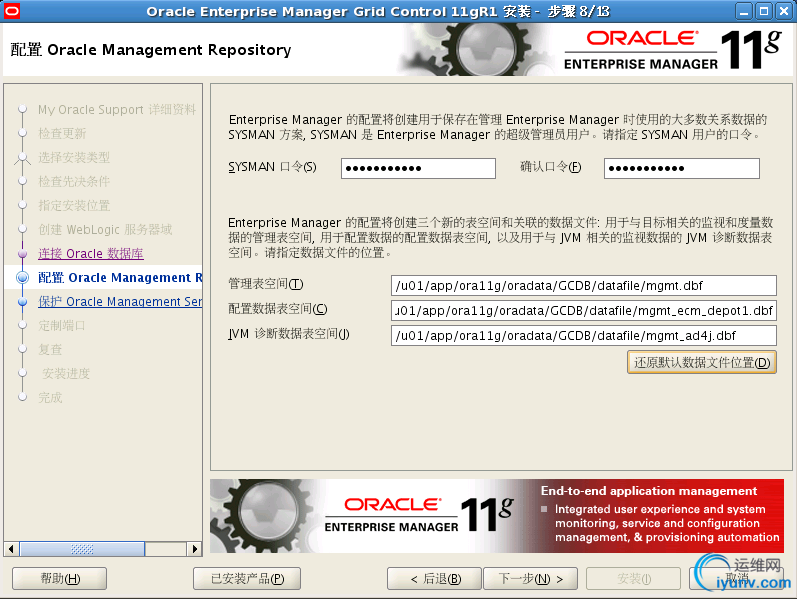
SQL> alter tablespace undotbs1 add datafile ;如果报undo tbs过小
SQL> alter system set session_cached_cursors=201 scope=spfile;
系统已更改。
SQL> alter system set processes=501 scope=spfile;
系统已更改。
SQL> shutdown immediate
Startup
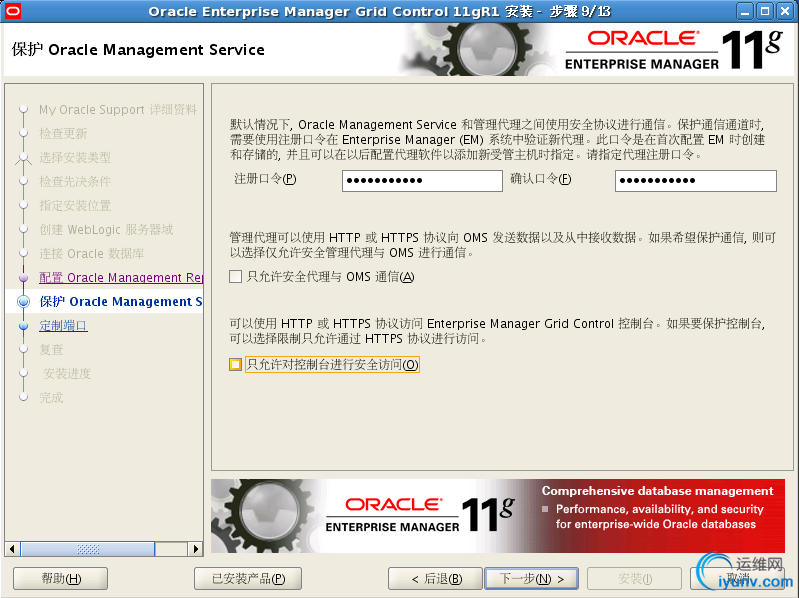
oracle123
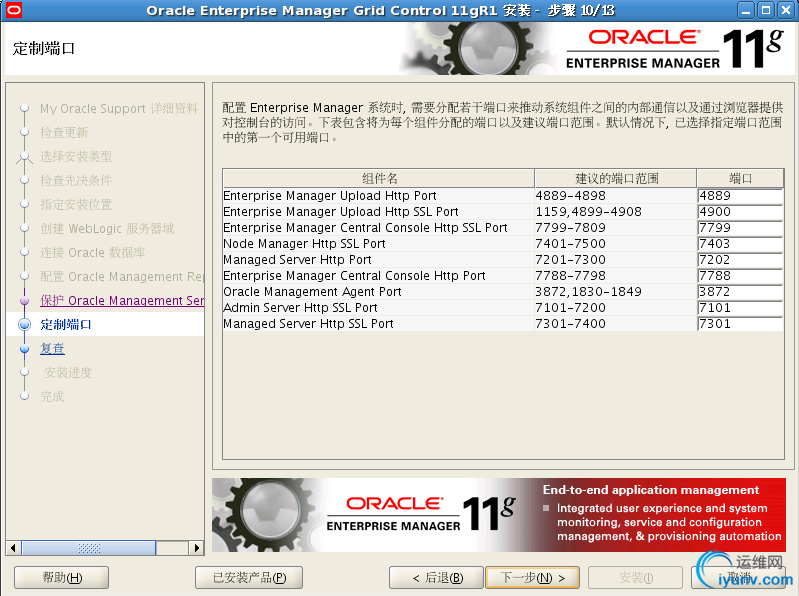
oracle123
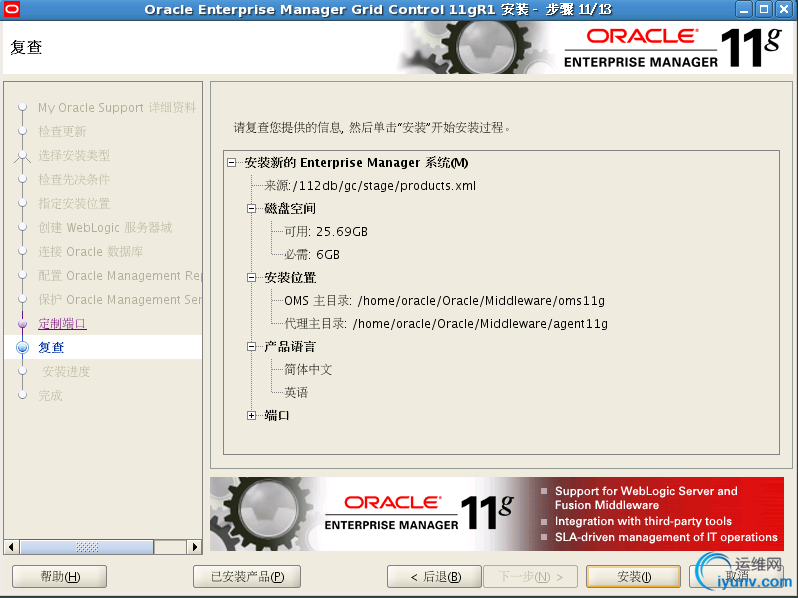
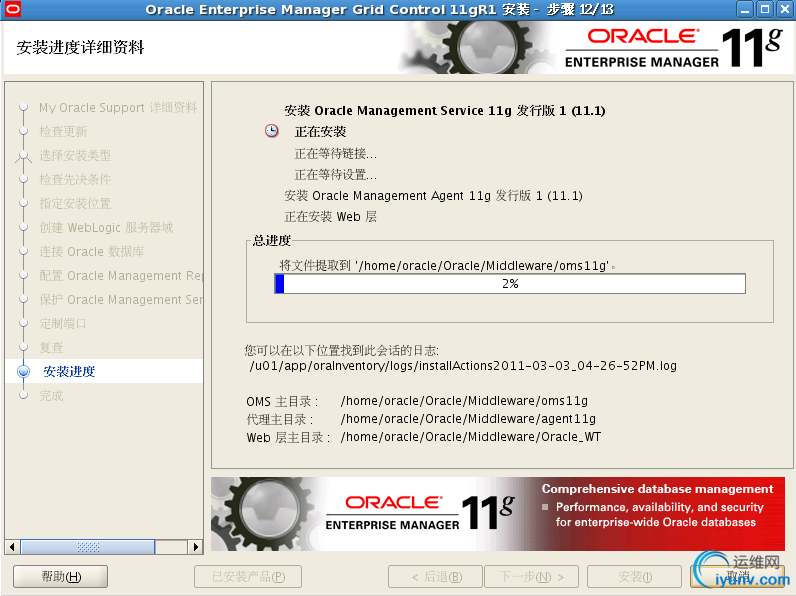
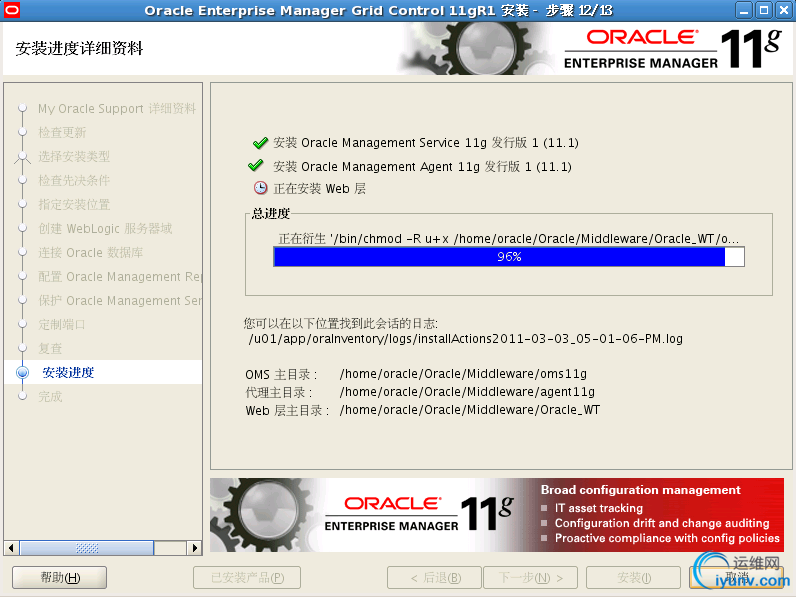
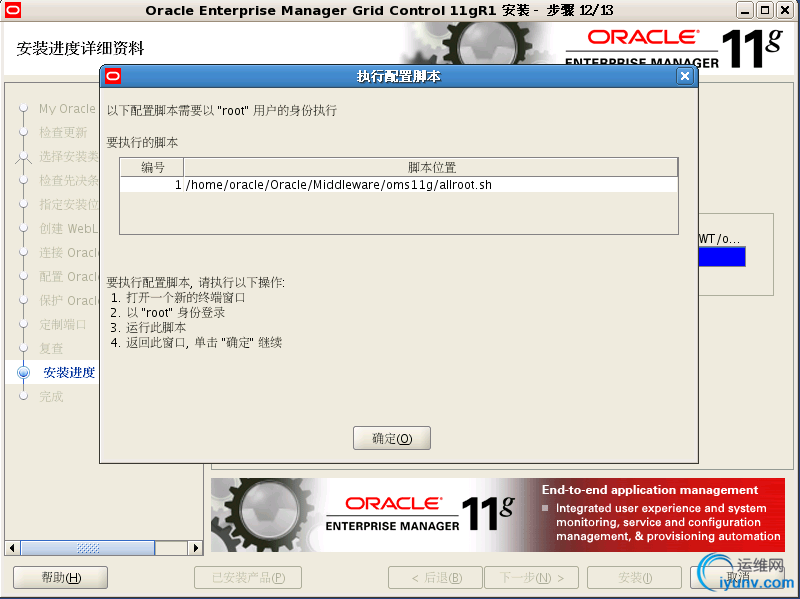
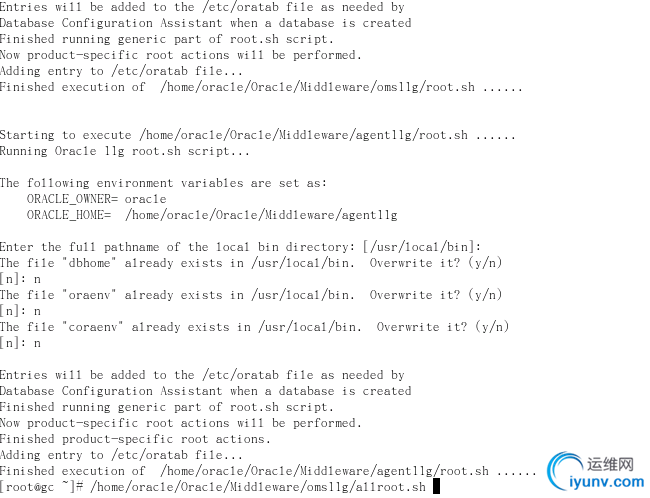
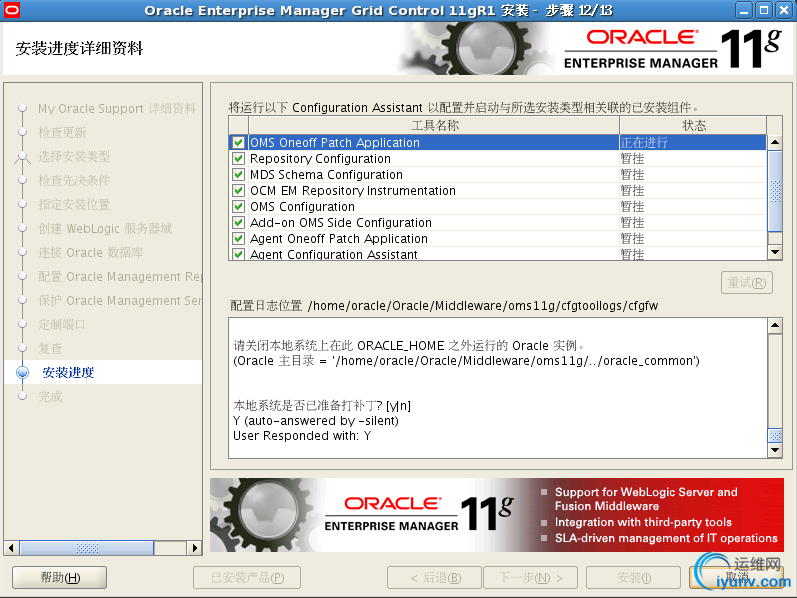
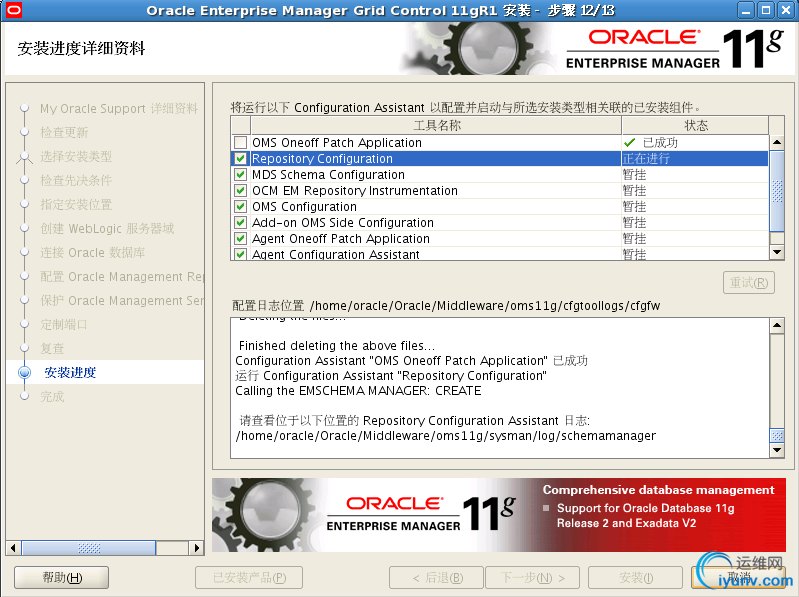
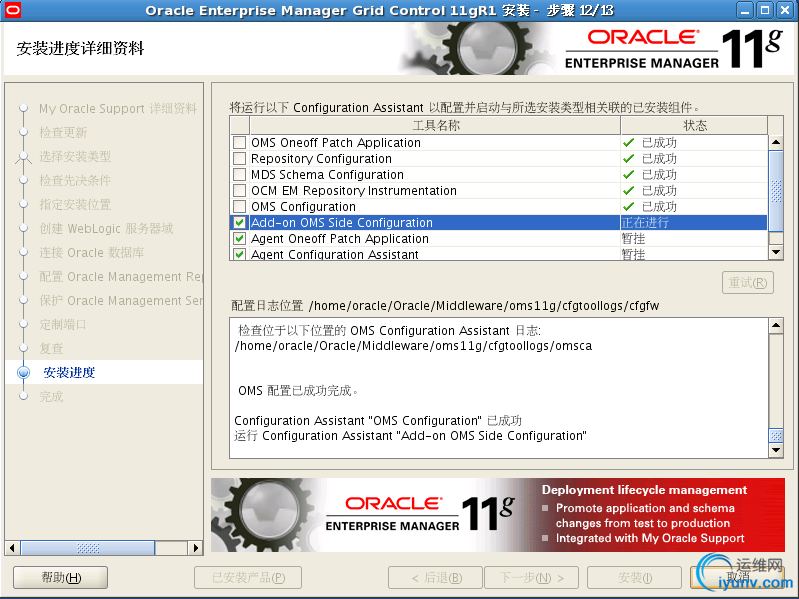
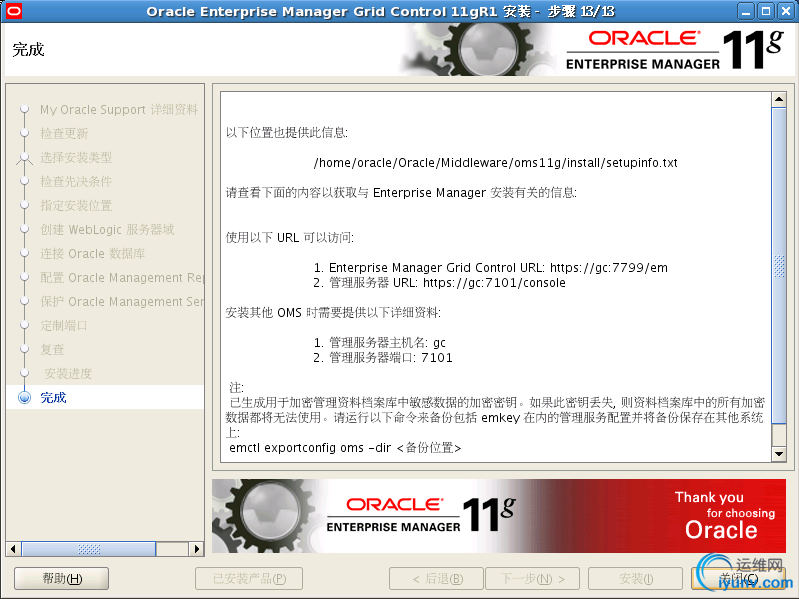
安装 Agent PSU
Setup patch 9345913(9345906)
[oracle@gc agent11g]$ export ORACLE_HOME=/home/oracle/Oracle/Middleware/agent11g
[oracle@gc agent11g]$ cd /u01/app/ora11g/product/11.2.0/db_1/OPatch
[oracle@gc OPatch]$ ./opatch lsinventory
Invoking OPatch 11.2.0.1.5
Oracle 中间补丁程序安装程序版本 11.2.0.1.5
版权所有 (c) 2010, Oracle Corporation。保留所有权利。
Oracle 主目录 : /home/oracle/Oracle/Middleware/agent11g
主产品清单: /u01/app/oraInventory
从 : /etc/oraInst.loc
OPatch 版本 : 11.2.0.1.5
OUI 版本 : 11.1.0.8.0
OUI 位置 : /home/oracle/Oracle/Middleware/agent11g/oui
日志文件位置 : /home/oracle/Oracle/Middleware/agent11g/cfgtoollogs/opatch/opatch2011-08-07_10-17-02上午.log
Patch history file: /home/oracle/Oracle/Middleware/agent11g/cfgtoollogs/opatch/opatch_history.txt
OPatch detects the Middleware Home as "/home/oracle/Oracle/Middleware"
Lsinventory Output file location : /home/oracle/Oracle/Middleware/agent11g/cfgtoollogs/opatch/lsinv/lsinventory2011-08-07_10-17-02上午.txt
--------------------------------------------------------------------------------
已安装的顶级产品 (1):
Oracle Management Agent 11.1.0.1.0
此 Oracle
主目录中已安装 1 个产品。
中间补丁程序 (4) :
Patch 8240469 : applied on Sat Aug 06 01:59:07 CST 2011
Unique Patch ID: 12108719
Created on 13 Jan 2010, 15:16:03 hrs PST8PDT
Bugs fixed:
8240469
Patch 8685010 : applied on Sat Aug 06 01:58:37 CST 2011
Unique Patch ID: 12136632
Created on 21 Jan 2010, 14:42:11 hrs US/Pacific
Bugs fixed:
8685010
Patch 7568506 : applied on Sat Aug 06 01:58:30 CST 2011
Created on 3 Dec 2008, 02:06:34 hrs US/Eastern
Bugs fixed:
7568506
Patch 5336126 : applied on Sat Aug 06 01:58:19 CST 2011
Created on 11 Nov 2008, 12:48:26 hrs US/Pacific
Bugs fixed:
5336126
--------------------------------------------------------------------------------
OPatch succeeded.
[oracle@gc OPatch]$ ./opatch prereq CheckConflictAgainstOHWithDetail -phBaseDir ./9345913
Invoking OPatch 11.2.0.1.5
Oracle 中间补丁程序安装程序版本 11.2.0.1.5
版权所有 (c) 2010, Oracle Corporation。保留所有权利。
PREREQ session
Oracle 主目录 : /home/oracle/Oracle/Middleware/agent11g
主产品清单: /u01/app/oraInventory
从 : /etc/oraInst.loc
OPatch 版本 : 11.2.0.1.5
OUI 版本 : 11.1.0.8.0
OUI 位置 : /home/oracle/Oracle/Middleware/agent11g/oui
日志文件位置 : /home/oracle/Oracle/Middleware/agent11g/cfgtoollogs/opatch/opatch2011-08-07_10-30-35上午.log
Patch history file: /home/oracle/Oracle/Middleware/agent11g/cfgtoollogs/opatch/opatch_history.txt
OPatch detects the Middleware Home as "/home/oracle/Oracle/Middleware"
Invoking prereq "checkconflictagainstohwithdetail"
Prereq "checkConflictAgainstOHWithDetail" passed.
OPatch succeeded.
[oracle@gc ~]$ cd /home/oracle/Oracle/Middleware/agent11g/bin
[oracle@gc bin]$ ./emctl stop agent
[oracle@gc bin]$ cd ./9345913
[oracle@gc 9345913]$
/u01/app/ora11g/product/11.2.0/db_1/OPatch/opatch apply
Invoking OPatch 11.2.0.1.5
Oracle 中间补丁程序安装程序版本 11.2.0.1.5
版权所有 (c) 2010, Oracle Corporation。保留所有权利。
Oracle 主目录 : /home/oracle/Oracle/Middleware/agent11g
主产品清单: /u01/app/oraInventory
从 : /etc/oraInst.loc
OPatch 版本 : 11.2.0.1.5
OUI 版本 : 11.1.0.8.0
OUI 位置 : /home/oracle/Oracle/Middleware/agent11g/oui
日志文件位置 : /home/oracle/Oracle/Middleware/agent11g/cfgtoollogs/opatch/opatch2011-08-07_10-37-13上午.log
Patch history file: /home/oracle/Oracle/Middleware/agent11g/cfgtoollogs/opatch/opatch_history.txt
OPatch detects the Middleware Home as "/home/oracle/Oracle/Middleware"
ApplySession 将中间补丁程序 '9345913'应用到 OH '/home/oracle/Oracle/Middleware/agent11g'
Running prerequisite checks...
提供电子邮件地址以用于接收有关安全问题的通知,安装 Oracle Configuration Manager并启动它。如果您使用 My Oracle
Support 电子邮件地址/用户名,操作将更简单。
有关详细信息,
请访问 http://www.oracle.com/support/policies.html。
电子邮件地址/用户名:
尚未提供电子邮件地址以接收有关安全问题的通知。
是否不希望收到有关安全问题 (是 [Y],否 [N]) [N]的通知: Y
OPatch 从产品清单中检测到非集群 Oracle主目录,将仅对本地系统打补丁。
请关闭本地系统上在此 ORACLE_HOME之外运行的 Oracle实例。
(Oracle 主目录 = '/home/oracle/Oracle/Middleware/agent11g')
本地系统是否已准备打补丁? [y|n]
y
User Responded with: Y
为 Oracle
主目录备份文件和产品清单 (不是用于自动回退)
正在备份受补丁程序 '9345913'影响的文件以用于还原。此操作将需要一些时间...
正在备份受补丁程序 '9345913'影响的文件以用于回退。此操作将需要一些时间...
Execution of 'sh /u01/software/psu/ORACLE_PSU_2011-7-21/11G/GRID_CONTROL/11.1.0.1.4_Enterprise_Manager_Agent_home/Patch_9345913/9345913/custom/scripts/pre -apply 9345913 ':
Return Code = 0
正在为组件 oracle.sysman.top.agent, 11.1.0.1.0打补丁...
用 "sysman/lib/libnmeb.a/nmebb.o"更新归档文件 "/home/oracle/Oracle/Middleware/agent11g/sysman/lib/libnmeb.a"
用 "sysman/lib/libnmee.a/nmeetm.o"更新归档文件 "/home/oracle/Oracle/Middleware/agent11g/sysman/lib/libnmee.a"
用 "sysman/lib/libnmem.a/nmemdisp.o"更新归档文件 "/home/oracle/Oracle/Middleware/agent11g/sysman/lib/libnmem.a"
用 "sysman/lib/libnmec.a/nmecmgr.o"更新归档文件 "/home/oracle/Oracle/Middleware/agent11g/sysman/lib/libnmec.a"
用 "sysman/lib/libnmec.a/nmecs.o"更新归档文件 "/home/oracle/Oracle/Middleware/agent11g/sysman/lib/libnmec.a"
用 "sysman/lib/libnmehu.a/nmehum.o"更新归档文件 "/home/oracle/Oracle/Middleware/agent11g/sysman/lib/libnmehu.a"
用 "sysman/lib/libnmejc.a/nmejcap.o"更新归档文件 "/home/oracle/Oracle/Middleware/agent11g/sysman/lib/libnmejc.a"
用 "sysman/lib/libnmesched.a/nmesse.o"更新归档文件 "/home/oracle/Oracle/Middleware/agent11g/sysman/lib/libnmesched.a"
用 "sysman/lib/libnmesched.a/nmessr.o"更新归档文件 "/home/oracle/Oracle/Middleware/agent11g/sysman/lib/libnmesched.a"
用 "sysman/lib/libnmevq.a/nmevqd.o"更新归档文件 "/home/oracle/Oracle/Middleware/agent11g/sysman/lib/libnmevq.a"
用 "sysman/lib/libnmevc.a/nmevc.o"更新归档文件 "/home/oracle/Oracle/Middleware/agent11g/sysman/lib/libnmevc.a"
用 "sysman/lib/libnmevc.a/nmevco.o"更新归档文件 "/home/oracle/Oracle/Middleware/agent11g/sysman/lib/libnmevc.a"
用 "/sysman/jlib/emagentSDK.jar/oracle/sysman/emSDK/emd/conf/InventoryLoader.class"更新 jar文件 "/home/oracle/Oracle/Middleware/agent11g/sysman/jlib/emagentSDK.jar"
将文件复制到 "/home/oracle/Oracle/Middleware/agent11g/bin/AgentSubAgent.pm"
将文件复制到 "/home/oracle/Oracle/Middleware/agent11g/sysman/admin/scripts/alertlog.pl"
将文件复制到 "/home/oracle/Oracle/Middleware/agent11g/sysman/admin/scripts/alertlogViewer.pl"
将文件复制到 "/home/oracle/Oracle/Middleware/agent11g/sysman/admin/scripts/oracle_db_files.pl"
将文件复制到 "/home/oracle/Oracle/Middleware/agent11g/sysman/admin/scripts/has/HasCluster.pm"
将文件复制到 "/home/oracle/Oracle/Middleware/agent11g/sysman/admin/default_collection/rac_database.xml"
将文件复制到 "/home/oracle/Oracle/Middleware/agent11g/sysman/admin/metadata/dyn_props.xmlp"
将文件复制到 "/home/oracle/Oracle/Middleware/agent11g/sysman/admin/metadata/osm_instance.xml"
将文件复制到 "/home/oracle/Oracle/Middleware/agent11g/sysman/lib/libnmemso.def"
将文件复制到 "/home/oracle/Oracle/Middleware/agent11g/sysman/admin/scripts/semd_common.pl"
将文件复制到 "/home/oracle/Oracle/Middleware/agent11g/sysman/admin/scripts/failedLogin.pl"
将文件复制到 "/home/oracle/Oracle/Middleware/agent11g/sysman/admin/scripts/has/HasCluster.pm"
将文件复制到 "/home/oracle/Oracle/Middleware/agent11g/sysman/admin/scripts/has/clustgtinst.pl"
将文件复制到 "/home/oracle/Oracle/Middleware/agent11g/sysman/admin/discover/eventBasedDiscovery.pl"
将文件复制到 "/home/oracle/Oracle/Middleware/agent11g/sysman/admin/default_collection/cluster.xml"
将文件复制到 "/home/oracle/Oracle/Middleware/agent11g/sysman/admin/default_collection/database.xmlp"
将文件复制到 "/home/oracle/Oracle/Middleware/agent11g/sysman/admin/default_collection/has.xml"
将文件复制到 "/home/oracle/Oracle/Middleware/agent11g/sysman/admin/default_collection/instance.xmlp"
将文件复制到 "/home/oracle/Oracle/Middleware/agent11g/sysman/admin/metadata/cluster.xml"
将文件复制到 "/home/oracle/Oracle/Middleware/agent11g/sysman/admin/metadata/has.xml"
将文件复制到 "/home/oracle/Oracle/Middleware/agent11g/sysman/admin/metadata/oracle_database.xml"
将文件复制到 "/home/oracle/Oracle/Middleware/agent11g/sysman/admin/metadata/rac_database.xml"
将文件复制到 "/home/oracle/Oracle/Middleware/agent11g/sysman/admin/metadata/database.xmlp"
将文件复制到 "/home/oracle/Oracle/Middleware/agent11g/sysman/admin/metadata/instance.xmlp"
将文件复制到 "/home/oracle/Oracle/Middleware/agent11g/sysman/admin/discover/oracledb.pl"
将文件复制到 "/home/oracle/Oracle/Middleware/agent11g/sysman/admin/discover/host.pl"
将文件复制到 "/home/oracle/Oracle/Middleware/agent11g/sysman/admin/discover/csa_collector.pl"
将文件复制到 "/home/oracle/Oracle/Middleware/agent11g/sysman/admin/scripts/emdiscoveryhelper.pm"
将文件复制到 "/home/oracle/Oracle/Middleware/agent11g/sysman/admin/scripts/alertlogAdr.pl"
将文件复制到 "/home/oracle/Oracle/Middleware/agent11g/sysman/admin/scripts/alertlogAdrAs.pl"
将文件复制到 "/home/oracle/Oracle/Middleware/agent11g/sysman/admin/scripts/osm/ecmCloneHome.pl"
正在对目标 libnmevq
运行 make 命令
正在对目标 libnmevc
运行 make 命令
正在对目标 libnmemso运行 make命令
正在对目标 emagent
运行 make 命令
ApplySession 将中间补丁程序 '9345913'添加到产品清单
Verifying the update...
Inventory check OK: Patch ID 9345913 is registered in Oracle Home inventory with proper meta-data.
Files check OK: Files from Patch ID 9345913 are present in Oracle Home.
Execution of 'sh /u01/software/psu/ORACLE_PSU_2011-7-21/11G/GRID_CONTROL/11.1.0.1.4_Enterprise_Manager_Agent_home/Patch_9345913/9345913/custom/scripts/post -apply 9345913 ':
Return Code = 0
本地系统已打补丁,
可以重新启动。
OPatch succeeded.
[oracle@gc ~]$ cd Oracle/Middleware/agent11g/bin
[oracle@gc bin]$ ./emctl start agent
Check patch 9345913(9345906)
[oracle@gc 9345913]$ /u01/app/ora11g/product/11.2.0/db_1/OPatch/opatch lsinventory
Invoking OPatch 11.2.0.1.5
Oracle 中间补丁程序安装程序版本 11.2.0.1.5
版权所有 (c) 2010, Oracle Corporation。保留所有权利。
Oracle 主目录 : /home/oracle/Oracle/Middleware/agent11g
主产品清单: /u01/app/oraInventory
从 : /etc/oraInst.loc
OPatch 版本 : 11.2.0.1.5
OUI 版本 : 11.1.0.8.0
OUI 位置 : /home/oracle/Oracle/Middleware/agent11g/oui
日志文件位置 : /home/oracle/Oracle/Middleware/agent11g/cfgtoollogs/opatch/opatch2011-08-07_10-41-32上午.log
Patch history file: /home/oracle/Oracle/Middleware/agent11g/cfgtoollogs/opatch/opatch_history.txt
OPatch detects the Middleware Home as "/home/oracle/Oracle/Middleware"
Lsinventory Output file location : /home/oracle/Oracle/Middleware/agent11g/cfgtoollogs/opatch/lsinv/lsinventory2011-08-07_10-41-32上午.txt
--------------------------------------------------------------------------------
已安装的顶级产品 (1):
Oracle Management Agent 11.1.0.1.0
此 Oracle
主目录中已安装 1 个产品。
中间补丁程序 (5) :
Patch 9345913 : applied on Sun Aug 07 10:37:49 CST 2011
Unique Patch ID: 13944002
Created on 29 Jun 2011, 03:57:45 hrs PST8PDT
Bugs fixed:
9724244, 10118817, 10170020, 9626253, 10029486, 9556885, 9789944
9659466, 10158523, 11735638, 9579384, 9687366, 10082106, 9956393, 9882856
9728084, 10297881, 9482559, 10236207, 9676134, 9500047, 11932967, 9383791
9320333, 10392806, 9486541, 9710001, 9385658, 10260369, 9775511, 9828187
Patch 8240469 : applied on Sat Aug 06 01:59:07 CST 2011
Unique Patch ID: 12108719
Created on 13 Jan 2010, 15:16:03 hrs PST8PDT
Bugs fixed:
8240469
Patch 8685010 : applied on Sat Aug 06 01:58:37 CST 2011
Unique Patch ID: 12136632
Created on 21 Jan 2010, 14:42:11 hrs US/Pacific
Bugs fixed:
8685010
Patch 7568506 : applied on Sat Aug 06 01:58:30 CST 2011
Created on 3 Dec 2008, 02:06:34 hrs US/Eastern
Bugs fixed:
7568506
Patch 5336126 : applied on Sat Aug 06 01:58:19 CST 2011
Created on 11 Nov 2008, 12:48:26 hrs US/Pacific
Bugs fixed:
5336126
--------------------------------------------------------------------------------
OPatch succeeded.
安装 OMS PSU
Setup patch 12423703(11727299)
[oracle@gc oms11g]$ export ORACLE_HOME=/home/oracle/Oracle/Middleware/oms11g
[oracle@gc oms11g]$ $ORACLE_HOME/bin/emctl stop oms
[oracle@gc oms11g]$ cd /u01/app/ora11g/product/11.2.0/db_1/OPatch
[oracle@gc OPatch]$ ./opatch lsinventory
Invoking OPatch 11.2.0.1.5
Oracle 中间补丁程序安装程序版本 11.2.0.1.5
版权所有 (c) 2010, Oracle Corporation。保留所有权利。
Oracle 主目录 : /home/oracle/Oracle/Middleware/oms11g
主产品清单: /u01/app/oraInventory
从 : /etc/oraInst.loc
OPatch 版本 : 11.2.0.1.5
OUI 版本 : 11.1.0.8.0
OUI 位置 : /home/oracle/Oracle/Middleware/oms11g/oui
日志文件位置 : /home/oracle/Oracle/Middleware/oms11g/cfgtoollogs/opatch/opatch2011-08-07_10-52-29上午.log
Patch history file: /home/oracle/Oracle/Middleware/oms11g/cfgtoollogs/opatch/opatch_history.txt
OPatch detects the Middleware Home as "/home/oracle/Oracle/Middleware"
Lsinventory Output file location : /home/oracle/Oracle/Middleware/oms11g/cfgtoollogs/opatch/lsinv/lsinventory2011-08-07_10-52-29上午.txt
--------------------------------------------------------------------------------
已安装的顶级产品 (1):
Oracle Enterprise Manager Grid Console 11.1.0.1.0
此 Oracle
主目录中已安装 1 个产品。
中间补丁程序 (2) :
Patch 9367763 : applied on Sat Aug 06 01:12:10 CST 2011
Unique Patch ID: 12255254
Created on 1 Mar 2010, 22:34:50 hrs PST8PDT
Bugs fixed:
9367763
Patch 9207217 : applied on Sat Aug 06 01:11:59 CST 2011
Unique Patch ID: 12151251
Created on 27 Jan 2010, 15:49:36 hrs US/Pacific
Bugs fixed:
9207217
--------------------------------------------------------------------------------
OPatch succeeded.
[oracle@gc OPatch]$ ./opatch prereq CheckConflictAgainstOHWithDetail -phBaseDir ./9345913
Invoking OPatch 11.2.0.1.5
Oracle 中间补丁程序安装程序版本 11.2.0.1.5
版权所有 (c) 2010, Oracle Corporation。保留所有权利。
PREREQ session
Oracle 主目录 : /home/oracle/Oracle/Middleware/oms11g
主产品清单: /u01/app/oraInventory
从 : /etc/oraInst.loc
OPatch 版本 : 11.2.0.1.5
OUI 版本 : 11.1.0.8.0
OUI 位置 : /home/oracle/Oracle/Middleware/oms11g/oui
日志文件位置 : /home/oracle/Oracle/Middleware/oms11g/cfgtoollogs/opatch/opatch2011-08-07_10-54-37上午.log
Patch history file: /home/oracle/Oracle/Middleware/oms11g/cfgtoollogs/opatch/opatch_history.txt
OPatch detects the Middleware Home as "/home/oracle/Oracle/Middleware"
Invoking prereq "checkconflictagainstohwithdetail"
Prereq "checkConflictAgainstOHWithDetail" passed.
OPatch succeeded.
[oracle@gc ~]$ cd /home/oracle/Oracle/Middleware/oms11g/bin
[oracle@gc bin]$ ./emctl stop oms -all
[oracle@gc ~]$cd ./12423703
[oracle@gc 12423703]$
/u01/app/ora11g/product/11.2.0/db_1/OPatch/opatch apply
Invoking OPatch 11.2.0.1.5
Oracle 中间补丁程序安装程序版本 11.2.0.1.5
版权所有 (c) 2010, Oracle Corporation。保留所有权利。
Oracle 主目录 : /home/oracle/Oracle/Middleware/oms11g
主产品清单: /u01/app/oraInventory
从 : /etc/oraInst.loc
OPatch 版本 : 11.2.0.1.5
OUI 版本 : 11.1.0.8.0
OUI 位置 : /home/oracle/Oracle/Middleware/oms11g//oui
日志文件位置 : /home/oracle/Oracle/Middleware/oms11g/cfgtoollogs/opatch/opatch2011-08-07_11-19-10上午.log
Patch history file: /home/oracle/Oracle/Middleware/oms11g/cfgtoollogs/opatch/opatch_history.txt
OPatch detects the Middleware Home as "/home/oracle/Oracle/Middleware"
ApplySession 将中间补丁程序 '12423703'应用到 OH '/home/oracle/Oracle/Middleware/oms11g'
Execution of 'sh /u01/software/psu/ORACLE_PSU_2011-7-21/11G/GRID_CONTROL/11.1.0.1.4_Enterprise_Manager_OMS_home/Patch_12423703/12423703/custom/scripts/init -apply 12423703 ':
Return Code = 0
Running prerequisite checks...
提供电子邮件地址以用于接收有关安全问题的通知,安装 Oracle Configuration Manager并启动它。如果您使用 My Oracle
Support 电子邮件地址/用户名,操作将更简单。
有关详细信息,
请访问 http://www.oracle.com/support/policies.html。
电子邮件地址/用户名:
尚未提供电子邮件地址以接收有关安全问题的通知。
是否不希望收到有关安全问题 (是 [Y],否 [N]) [N]的通知: Y
OPatch 从产品清单中检测到非集群 Oracle主目录,将仅对本地系统打补丁。
为 Oracle
主目录备份文件和产品清单 (不是用于自动回退)
正在备份受补丁程序 '12423703'影响的文件以用于还原。此操作将需要一些时间...
正在备份受补丁程序 '12423703'影响的文件以用于回退。此操作将需要一些时间...
--这时运行时间可能会稍长些
Execution of 'sh /u01/software/psu/ORACLE_PSU_2011-7-21/11G/GRID_CONTROL/11.1.0.1.4_Enterprise_Manager_OMS_home/Patch_12423703/12423703/custom/scripts/pre -apply 12423703 ':
Return Code = 0
正在为组件 oracle.sysman.oms.core, 11.1.0.1.0打补丁...
用 "/sysman/jlib/emCORE.jar/oracle/sysman/eml/ecm/policy/PolicyViolationsController.class"更新 jar文件 "/home/oracle/Oracle/Middleware/oms11g/sysman/jlib/emCORE.jar"
….
…
Copying file :/home/oracle/Oracle/Middleware/wlserver_10.3/common/nodemanager/nodemanager.domains to:/home/oracle/Oracle/Middleware/wlserver_10.3/common/emnodemanager/nodemanager.domains
Return Code = 0
OPatch succeeded.
$ $ORACLE_HOME/bin/rcuJDBCEngine sysman@<host>:<port>:<SID> JDBC_SCRIPT apply.sql $PWD $ORACLE_HOME
[oracle@gc~]$ cd ./12423703
[oracle@gc 12423703]$ $ORACLE_HOME/bin/rcuJDBCEngine sysman/oracle123@gc.ums.com:1521:gcdb JDBC_SCRIPT apply.sql $PWD $ORACLE_HOME
--此处出现“问题1”,需要先打Patch
12620174 (matalink下载,此补丁的安装方法)后,再执行上面的语句
[oracle@gc 12423703]$ $ORACLE_HOME/bin/emctl secure console -self_signed
Oracle Enterprise Manager 11g Release 1 Grid Control
Copyright (c) 1996, 2010 Oracle Corporation. All rights reserved.
Securing Console... Started.
Securing Console... Successful
[oracle@gc 12423703]$ $ORACLE_HOME/bin/emctl start oms
Oracle Enterprise Manager 11g Release 1 Grid Control
Copyright (c) 1996, 2010 Oracle Corporation. All rights reserved.
Starting WebTier...
WebTier Successfully Started
Starting Oracle Management Server...
Oracle Management Server Successfully Started
Oracle Management Server is Up
[oracle@gc 12423703]$ $ORACLE_HOME/bin/emcli sync
错误: 会话已失效。请运行 emcli login以建立会话。
[oracle@gc oms11g]$ $ORACLE_HOME/bin/emcli login -username=sysman -password=oracle123
登录成功
[oracle@gc oms11g]$ $ORACLE_HOME/bin/emcli sync
已成功同步
Check patch 12423703(11727299)
[oracle@gc oms11g]$ /u01/app/ora11g/product/11.2.0/db_1/OPatch/opatch lsinventory
Invoking OPatch 11.2.0.1.5
Oracle 中间补丁程序安装程序版本 11.2.0.1.5
版权所有 (c) 2010, Oracle Corporation。保留所有权利。
Oracle 主目录 : /home/oracle/Oracle/Middleware/oms11g
主产品清单: /u01/app/oraInventory
从 : /etc/oraInst.loc
OPatch 版本 : 11.2.0.1.5
OUI 版本 : 11.1.0.8.0
OUI 位置 : /home/oracle/Oracle/Middleware/oms11g/oui
日志文件位置 : /home/oracle/Oracle/Middleware/oms11g/cfgtoollogs/opatch/opatch2011-08-07_17-39-01下午.log
Patch history file: /home/oracle/Oracle/Middleware/oms11g/cfgtoollogs/opatch/opatch_history.txt
OPatch detects the Middleware Home as "/home/oracle/Oracle/Middleware"
Lsinventory Output file location : /home/oracle/Oracle/Middleware/oms11g/cfgtoollogs/opatch/lsinv/lsinventory2011-08-07_17-39-01下午.txt
--------------------------------------------------------------------------------
已安装的顶级产品 (1):
Oracle Enterprise Manager Grid Console 11.1.0.1.0
此 Oracle
主目录中已安装 1 个产品。
中间补丁程序 (4) :
Patch 12620174 : applied on Sun Aug 07 16:50:29 CST 2011
Unique Patch ID: 13908113
Created on 3 Jun 2011, 02:07:37 hrs PST8PDT
Bugs fixed:
12620174
Patch 12423703 : applied on Sun Aug 07 12:42:46 CST 2011
Unique Patch ID: 13943874
Created on 6 Jul 2011, 02:32:55 hrs PST8PDT
Bugs fixed:
9804442, 10122270, 9930146, 9576468, 8638231, 10108019, 10372513, 9535382
9928480, 10114291, 9543582, 9276193, 10278756, 9892455, 9476313, 9911851
9506062, 9876632, 11900474, 9386076, 12657533, 10372559, 9803798
11076661, 10418856, 10043790, 9646681, 9965939, 9500255, 10307099
9390531, 9662869, 9462098, 9544428, 9747671, 9489355, 9706552, 9562462
9570911, 8859562, 11808680, 10638043, 9937784, 9723689, 7340407, 9575427
10204587, 10177562, 9935898, 9734399, 9504581, 9558551, 9446422, 9874327
9586285, 9548105, 9313608, 12423703, 9308029, 9534200, 9184007, 9684768
9341486, 10122223, 11683765, 9241402, 9838084, 10307544, 9537948
9849222, 10118817, 9919614, 11696545, 9903280, 9888852, 10636783
9558026, 11728549, 9342290, 10410743, 9151748, 9953045, 9221090, 9559264
9491872, 9952713, 10257014, 10213026, 10015330, 10036568, 10042225
Patch 9367763 : applied on Sat Aug 06 01:12:10 CST 2011
Unique Patch ID: 12255254
Created on 1 Mar 2010, 22:34:50 hrs PST8PDT
Bugs fixed:
9367763
Patch 9207217 : applied on Sat Aug 06 01:11:59 CST 2011
Unique Patch ID: 12151251
Created on 27 Jan 2010, 15:49:36 hrs US/Pacific
Bugs fixed:
9207217
--------------------------------------------------------------------------------
OPatch succeeded.
二.安装主库
Hostname hotel01 10.1.5.241
vi /etc/hosts
10.1.5.241 hotel01
10.1.5.242 hotel02
10.1.5.243 hotel03
10.1.5.245 gc.localdomain gc
hotel01首先安装数据库软件不建库不创建监听,然后安装GI的时候会自动创建监听并启动,一定要用GIRD的监听,不然ASM注册不到监听。最后安装AGENT
1、
数据库软件
2、
GI
3、
Agent
4、最后安装,db,gi,agent最新补丁
注意:在安装主备库时,一定要按照上面的安装软件的顺序,否则可能会遇到在安装完db,gi后不能在grid
control发现home安装目标,所以要先安装完种软件,最后打补丁。
安装11.2.0.2 db software
安装方法如GC的安装。
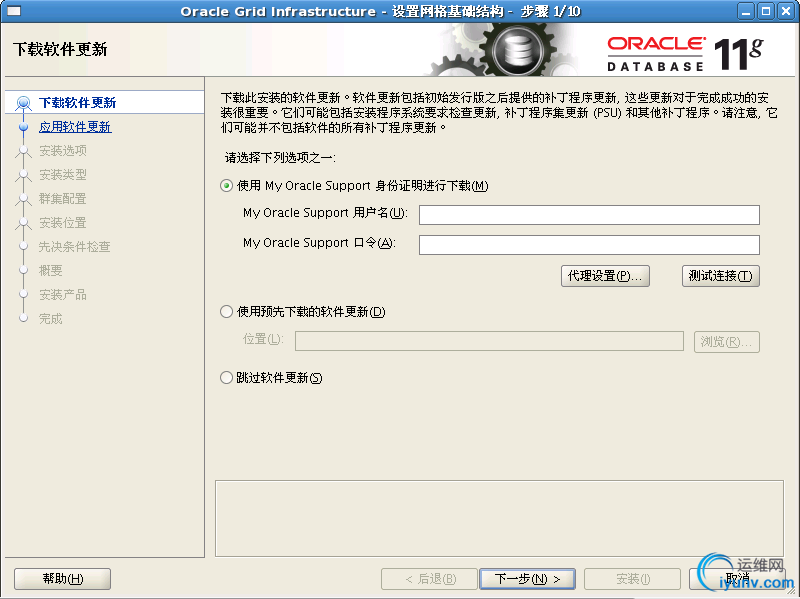
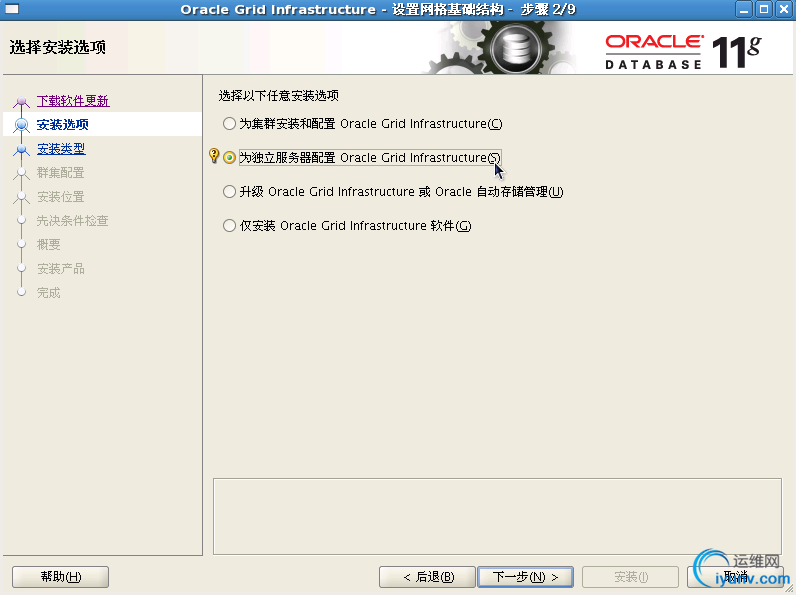
安装11.2.0.2 gi(Grid Infrastructure)
unset ORACLE_HOMEenv
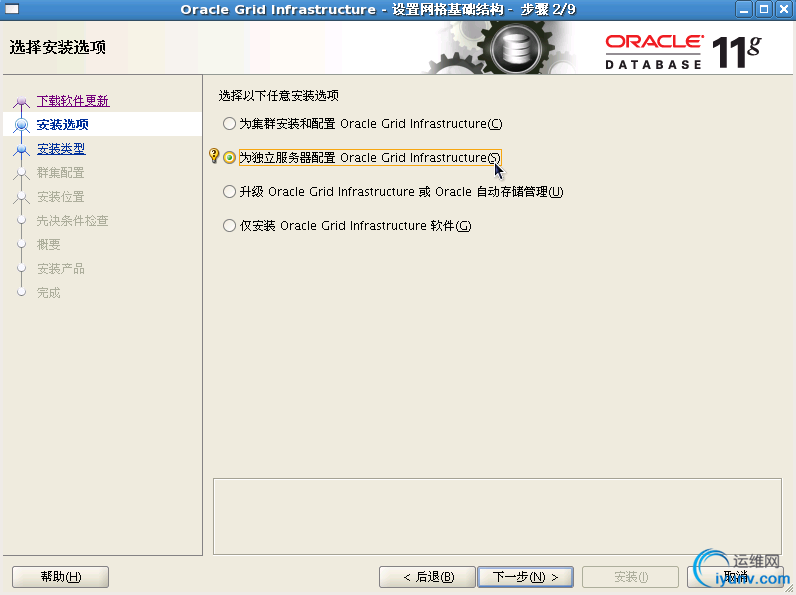
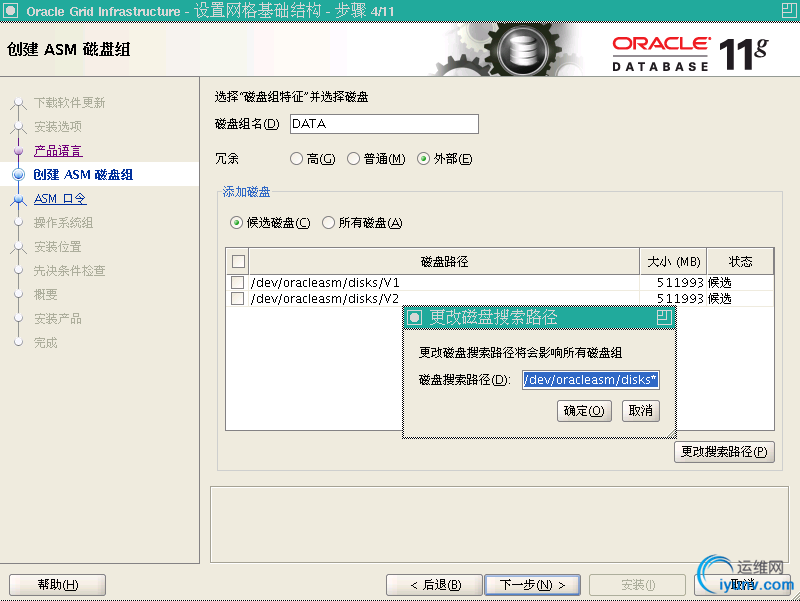
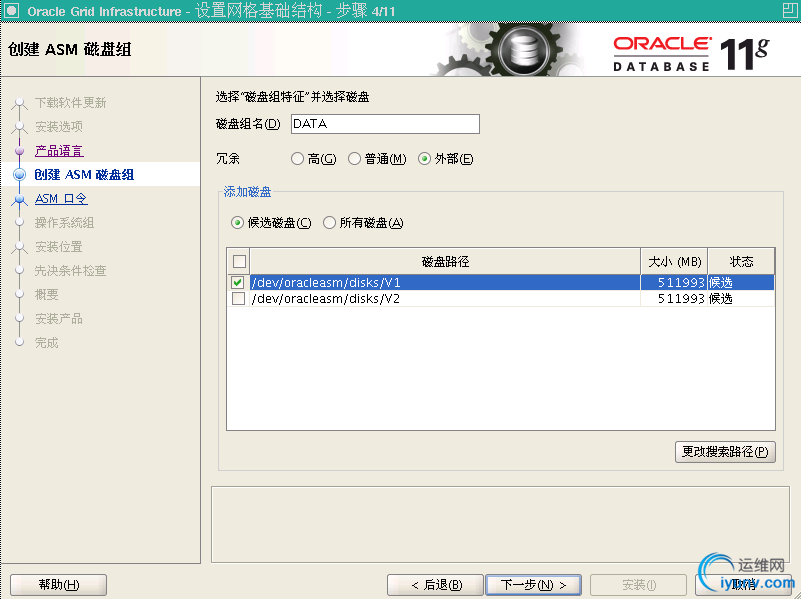
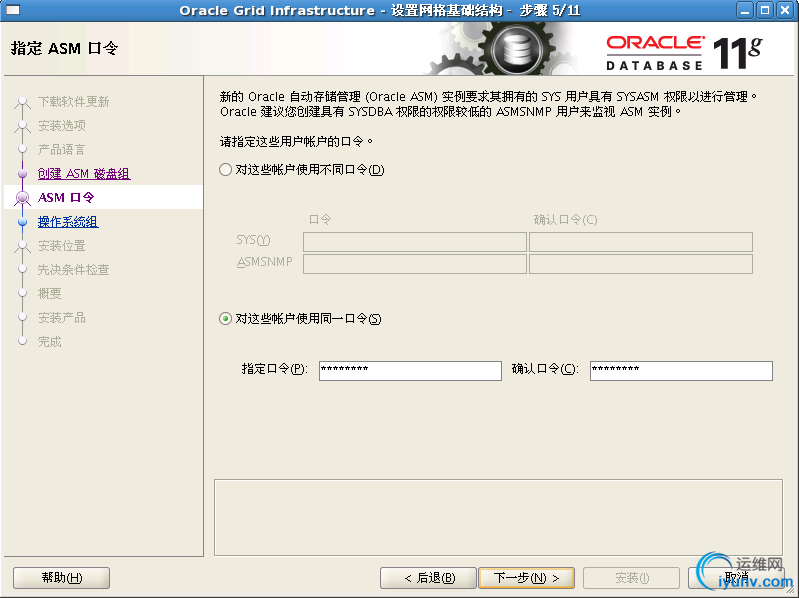
Weblogic123
http://img.my.csdn.net/uploads/201209/03/1346665327_5141.png
http://img.my.csdn.net/uploads/201209/03/1346665349_7375.png
http://img.my.csdn.net/uploads/201209/03/1346665362_5404.png
http://img.my.csdn.net/uploads/201209/03/1346665377_1829.png
http://img.my.csdn.net/uploads/201209/03/1346665387_9160.png
http://img.my.csdn.net/uploads/201209/03/1346665417_2140.png
http://img.my.csdn.net/uploads/201209/03/1346665444_5781.png
[iyunv@hotel01 ~]# /u01/app/ora11g/product/11.2.0/grid/root.sh
Running Oracle 11g root script...
The following environment variables are set as:
ORACLE_OWNER= oracle
ORACLE_HOME= /u01/app/ora11g/product/11.2.0/grid
Enter the full pathname of the local bin directory: [/usr/local/bin]:
Copying dbhome to /usr/local/bin ...
Copying oraenv to /usr/local/bin ...
Copying coraenv to /usr/local/bin ...
Creating /etc/oratab file...
Entries will be added to the /etc/oratab file as needed by
Database Configuration Assistant when a database is created
Finished running generic part of root script.
Now product-specific root actions will be performed.
Using configuration parameter file: /u01/app/ora11g/product/11.2.0/grid/crs/install/crsconfig_params
Creating trace directory
LOCAL ADD MODE
Creating OCR keys for user 'oracle', privgrp 'oinstall'..
Operation successful.
LOCAL ONLY MODE
Successfully accumulated necessary OCR keys.
Creating OCR keys for user 'root', privgrp 'root'..
Operation successful.
CRS-4664: Node njdyw successfully pinned.
Adding daemon to inittab
ACFS-9459:
ADVM/ACFS is not supported on this OS version: '2.6.32-100.26.2.el5
'
hotel01 2011/06/03 11:15:43 /u01/app/ora11g/product/11.2.0/grid/cdata/ hotel01/backup_20110603_111543.olr
Successfully configured Oracle Grid Infrastructure for a Standalone Server
http://img.my.csdn.net/uploads/201209/03/1346665459_9962.png
[oracle@hotel01 ~]$ cd /u01/app/ora11g/product/11.2.0/grid/bin/
[oracle@hotel01bin]$ ./crs_stat -t
名称类型目标状态主机
------------------------------------------------------------
ora.DATA.dg ora....up.type ONLINE ONLINE hotel01
ora....ER.lsnr ora....er.type ONLINE ONLINE hotel01
ora.asm ora.asm.type ONLINE ONLINE hotel01
ora.cssd ora.cssd.type ONLINE ONLINE hotel01
ora.diskmon ora....on.type ONLINE ONLINE hotel01
ora.evmd ora.evm.type ONLINE ONLINE hotel01
ora.ons ora.ons.type OFFLINE OFFLINE
[oracle@ hotel01 bin]$
安装agent
Oracle
wget https://gc:4900/agent_download/11.1.0.1.0/linux_x64/agentDownload.linux_x64 --no-check-certificate
**
[oracle@hotel01 ~]$ wget https://gc:4900/agent_download/11.1.0.1.0/linux_x64/agentDownload.linux_x64 --no-check-certificate
--2011-03-04 09:34:18-- https://gc:4900/agent_download/11.1.0.1.0/linux_x64/agentDownload.linux_x64
正在解析主机 gc... 10.1.5.245
Connecting to gc|10.1.5.245|:4900...已连接。
WARNING: cannot verify gc's certificate, issued by `/O=EnterpriseManager on gc/OU=EnterpriseManager on gc/L=EnterpriseManager on gc/ST=CA/C=US/CN=gc':
Self-signed certificate encountered.
已发出 HTTP
请求,正在等待回应... 200 OK
长度:38505 (38K) [text/plain]
Saving to: `agentDownload.linux_x64'
100%[===================================================================================================================>] 38,505 --.-K/s in 0.006s
2011-03-04 09:34:18 (6.28 MB/s) - `agentDownload.linux_x64' saved [38505/38505]
[oracle@hotel01 ~]$
**
oracle
chmod u+x agentDownload.linux_x64
oracle
setup
[oracle@hotel01 ~]$ ./agentDownload.linux_x64 -b /u01/app/ -m gc -r 4900 -y
详细见
最后需要root执行/u01/app//agent11g/root.sh
[oracle@hotel01 ~]$ cd /u01/app/agent11g/bin/
[oracle@hotel01 bin]$ ./emctl status agent
Oracle Enterprise Manager 11g Release 1 Grid Control 11.1.0.1.0
Copyright (c) 1996, 2010 Oracle Corporation. All rights reserved.
---------------------------------------------------------------
Agent Version : 11.1.0.1.0
OMS Version : 11.1.0.1.0
Protocol Version : 11.1.0.0.0
Agent Home : /u01/app/agent11g
Agent binaries : /u01/app/agent11g
Agent Process ID : 9088
Parent Process ID : 9066
Agent URL : https://OEL01:3872/emd/main/
Repository URL : https://gc:4900/em/upload
Started at : 2011-03-04 09:45:29
Started by user : oracle
Last Reload : 2011-03-04 09:45:29
Last successful upload : 2011-03-04 09:51:30
Total Megabytes of XML files uploaded so far : 3.86
Number of XML files pending upload : 0
Size of XML files pending upload(MB) : 0.00
Available disk space on upload filesystem : 66.88%
Last successful heartbeat to OMS : 2011-03-04 09:50:48
---------------------------------------------------------------
Agent is Running and Ready
如下图参考:此时目标应为1,安装应为3
http://img.my.csdn.net/uploads/201209/03/1346665823_7766.png
http://img.my.csdn.net/uploads/201209/03/1346665831_9234.png
|