|
|
前言
<> 非常感谢Kason老师给予的帮助!
马哥教到布署LNAMP时,我遇到了一些问题:
- Nginx是代理,不需要与后端直接建立连接;
- 我开始使用跨网段没有实现成功;
- 后来我使用同网段的方法,但访问时就会跳转到后端,查看后端日志时,其访问者也是客户端IP;
> 总结:
> 对windows虚拟机中的vmnet#不了解;
> wordpress程序定其只能根据IP访问;
windows上基于虚拟主机实现LNAMP
配置前提
- 关闭防火墙、SELinux,如果要启动,则在所有配置成功以后,再行启动;
- 同步时间;ntp, chrony
- EPEL源和Base源;php-mbstring, php-mcrypt包依赖EPEL;
# iptables -F
# setenforce 0
//Nginx主机上配置时间服务器同步时间
# echo "allow 192.168.10/24" >> /etc/chrony.conf
# systemctl start chronyd.service
# systemctl enable chronyd.service
# netstat -unlp
Active Internet connections (only servers)
Proto Recv-Q Send-Q Local Address Foreign Address State PID/Program name
udp 0 0 0.0.0.0:123 0.0.0.0:* 784/chronyd
udp 0 0 127.0.0.1:323 0.0.0.0:* 784/chronyd
udp6 0 0 :::123 :::* 784/chronyd
udp6 0 0 ::1:323 :::* 784/chronyd
# ntpdate 192.168.10.254
31 Dec 10:04:02 ntpdate[13649]: adjust time server 192.168.10.254 offset 0.181638 sec
Nginx主机172.16.0.6上配置
- 安装程序包
~]# yum -y install nginx
- 启用nginx
~]# systemctl start nginx.service
- 查看端口是否监听
~]# netstat -tnlp
Active Internet connections (only servers)
Proto Recv-Q Send-Q Local Address Foreign Address State PID/Program name
tcp 0 0 0.0.0.0:80 0.0.0.0:* LISTEN 3660/nginx: master
tcp 0 0 0.0.0.0:22 0.0.0.0:* LISTEN 1029/sshd
tcp 0 0 127.0.0.1:25 0.0.0.0:* LISTEN 1917/master
tcp6 0 0 :::80 :::* LISTEN 3660/nginx: master
tcp6 0 0 :::22 :::* LISTEN 1029/sshd
tcp6 0 0 ::1:25 :::* LISTEN 1917/master
- 查看nginx进程
~]# ps axu
root 3660 0.0 0.7 123456 5240 ? Ss 09:29 0:00 nginx: master process /usr/sbin/nginx
nginx 3674 0.0 0.5 125872 4168 ? S 09:35 0:00 nginx: worker process
- 配置反代
~]# vim /etc/nginx/conf.d/ilinux.conf
server {
listen 80;
server_name www.ilinux.io;
location / {
proxy_pass http://192.168.10.11:80;
proxy_set_header X-Real-IP $remote_addr;
add_header X-Via $server_addr;
}
}
- 测试语法
~]# nginx -t
nginx: the configuration file /etc/nginx/nginx.conf syntax is ok
nginx: configuration file /etc/nginx/nginx.conf test is successful
- 重载服务
~]# nginx -s reload
在LAMP主机 192.168.10.11上配置
- 安装程序包:httpd php php-mysql mariadb-server php-mbstring php-mcrypt
~]# yum -y install httpd php php-mysql maraidb-server php-mbstring php-mcrypt
- 启动httpd
~]# systemctl start httpd.service
- 查看端口是否端口
~]# netstat -tnlp
Active Internet connections (only servers)
Proto Recv-Q Send-Q Local Address Foreign Address State PID/Program name
tcp 0 0 0.0.0.0:22 0.0.0.0:* LISTEN 1366/sshd
tcp 0 0 127.0.0.1:25 0.0.0.0:* LISTEN 2506/master
tcp6 0 0 :::80 :::* LISTEN 13442/httpd
tcp6 0 0 :::22 :::* LISTEN 1366/sshd
tcp6 0 0 ::1:25 :::* LISTEN 2506/master
- 查看进程
~]# ps axu
root 13442 0.0 1.3 396676 13128 ? Ss 09:45 0:00 /usr/sbin/httpd -DFOREGROUND
apache 13444 0.0 0.6 398760 6872 ? S 09:45 0:00 /usr/sbin/httpd -DFOREGROUND
apache 13445 0.0 0.6 398760 6872 ? S 09:45 0:00 /usr/sbin/httpd -DFOREGROUND
apache 13446 0.0 0.6 398760 6872 ? S 09:45 0:00 /usr/sbin/httpd -DFOREGROUND
apache 13447 0.0 0.6 398760 6872 ? S 09:45 0:00 /usr/sbin/httpd -DFOREGROUND
apache 13448 0.0 0.6 398760 6872 ? S 09:45 0:00 /usr/sbin/httpd -DFOREGROUND
- 准备测试文件
1.准备Index.html
~]# vim /var/www/html/index.html
<h1>192.168.10.11</h1>
http://192.168.10.11/
http://www.ilinux.io/
2.准备phpinfo.php
~]# vim /var/www/html/phpinfo.php
<html>
<title>Test Page</title>
<body>
<h1>192.168.10.11</h1>
<?php
phpinfo();
?>
</body>
</html>
http://192.168.10.11/phpinfo.php
http://www.ilinux.io/phpinfo.php
3.准备php-mysql.php
~]# vim /var/www/html/php-mysql.php
<?php
$conn = mysql_connect('192.168.10.11','wpuser','wppass');
if ($conn)
echo "connect 192.168.10.11 success";
else
echo "connect 192.168.10.11 failure";
?>
http://192.168.10.11/php-mysql.php
http://www.ilinux.io/php-mysql.php
4.准备wordpress
[root@localhost html]# pwd
/var/www/html
[root@localhost html]# ls
index.html phpinfo.php php-mysql.php wordpress-4.9.1-zh_CN.tar.gz
[root@localhost html]# tar xf wordpress-4.9.1-zh_CN.tar.gz
[root@localhost html]# ln -sv wordpress wp
‘wp’ -> ‘wordpress’
[root@localhost html]# ll
total 9912
-rw-r--r-- 1 root root 20 Dec 18 14:04 index.html
-rw-r--r-- 1 root root 109 Dec 18 14:04 phpinfo.php
-rw-r--r-- 1 root root 157 Dec 18 14:16 php-mysql.php
drwxr-xr-x 1 nobody nfsnobody 498 Nov 30 20:20 wordpress
-rw-r--r-- 1 root root 10130710 Dec 1 18:57 wordpress-4.9.1-zh_CN.tar.gz
lrwxrwxrwx 1 root root 9 Dec 18 14:21 wp -> wordpress
[root@localhost html]# cp wp/wp-config-sample.php wp/wp-config.php
[root@localhost html]# vim wp/wp-config.php
/** WordPress数据库的名称 */
define('DB_NAME', 'wordpress');
/** MySQL数据库用户名 */
define('DB_USER', 'wpuser');
/** MySQL数据库密码 */
define('DB_PASSWORD', 'wppass');
/** MySQL主机 */
define('DB_HOST', '192.168.10.11');
- 配置mariadb
# vim /etc/my.cnf
[mysqld]
skip_name_resolve=ON
innodb_file_per_table=ON
- 启动mariadb-server
~]# systemctl start mariadb.service
# netstat -tunlp
Active Internet connections (only servers)
Proto Recv-Q Send-Q Local Address Foreign Address State PID/Program name
tcp 0 0 0.0.0.0:3306 0.0.0.0:* LISTEN 13915/mysqld
tcp 0 0 0.0.0.0:22 0.0.0.0:* LISTEN 1366/sshd
tcp 0 0 127.0.0.1:25 0.0.0.0:* LISTEN 2506/master
tcp6 0 0 :::80 :::* LISTEN 13442/httpd
tcp6 0 0 :::22 :::* LISTEN 1366/sshd
tcp6 0 0 ::1:25 :::* LISTEN 2506/master
- 安全初始化
# mysql_secure_installation
- 授权用户
~]# msyql -uroot -h localhost -pmagedu
MariaDB [(none)]> CREATE DATABASE wordpress;
Query OK, 1 row affected (0.00 sec)
MariaDB [(none)]> GRANT ALL ON wordpress.* TO 'wpuser'@'%' IDENTIFIED BY 'wppass';
Query OK, 0 rows affected (0.00 sec)
MariaDB [(none)]> FLUSH PRIVILEGES;
Query OK, 0 rows affected (0.00 sec)
- 测试访问
~]# mysql -uwpuser -h192.168.10.11 -pwppass
MariaDB [(none)]>
配置wordpress
- 访问http://www.ilinux.io/wp,wfc 会自动 跳转如下

- 此时输入如下,点击安装
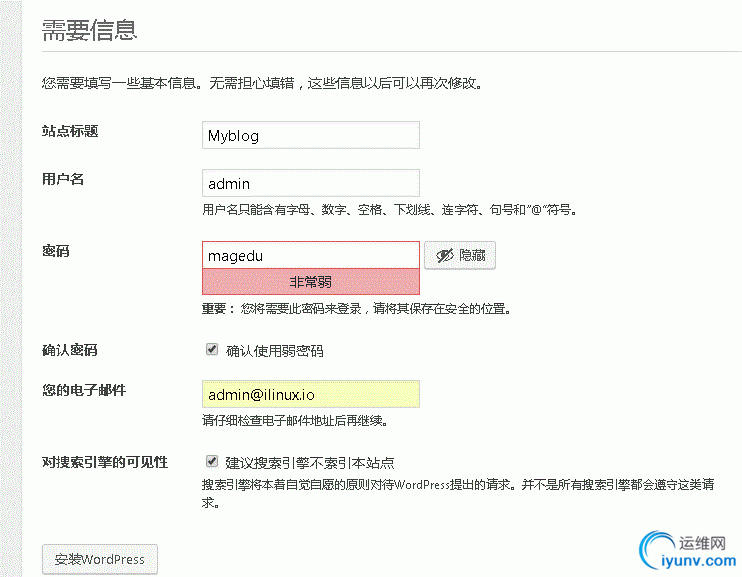
- 看见此页面时,在浏览器器中输入www.ilinux.io/wp/wp-login.php

- 输入刚才设定的账号和密码,点击登陆

- 查看后端服务器的日志是否是nginx代理?
~]# ifconfig eno16777736 | awk 'NR == 2{print}'
inet 192.168.10.11 netmask 255.255.255.0 broadcast 192.168.10.255
~]# tail -n 10 /var/log/httpd/access_log
192.168.10.1 - - [31/Dec/2017:10:27:08 +0800] "POST /wp/wp-admin/admin-ajax.php HTTP/1.1" 200 47 "http://192.168.10.11/wp/wp-admin/" "Mozilla/5.0 (Windows NT 6.1; WOW64) AppleWebKit/537.36 (KHTML, like Gecko) Chrome/62.0.3202.94 Safari/537.36"
/*这个是vmnet1,访问本机的vmnet1是vmnet1虚拟网卡的地址
并非是192.168.10.254,即Nginx并没有反代
*/
- 点击设置
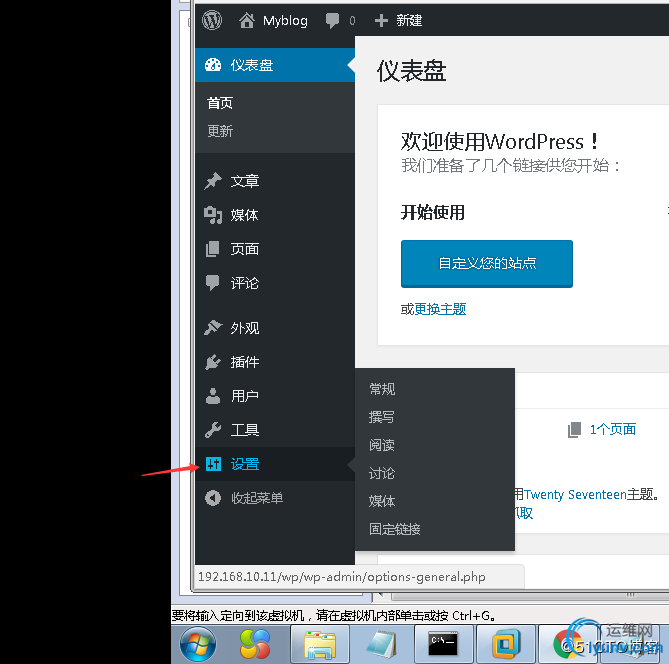
- 修改如下URL中的IP为Nginx主机的FQDN,点击'保存更改'
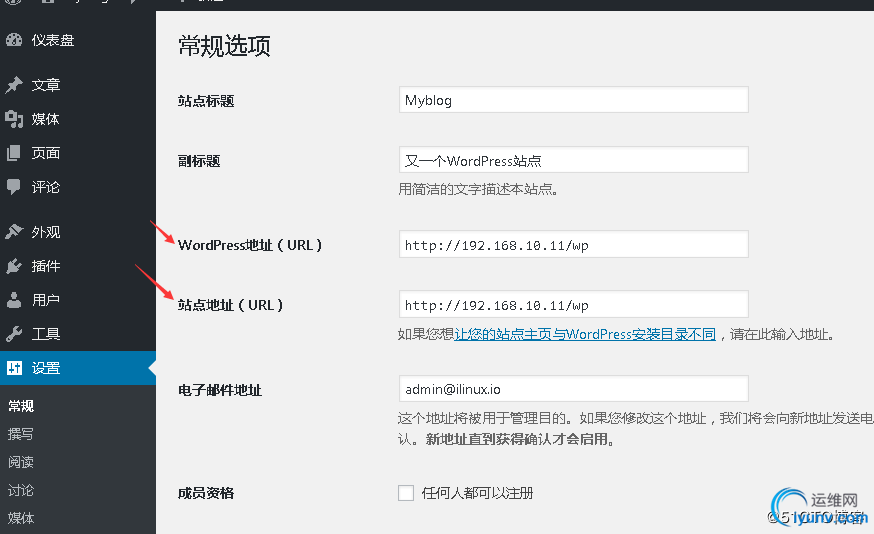

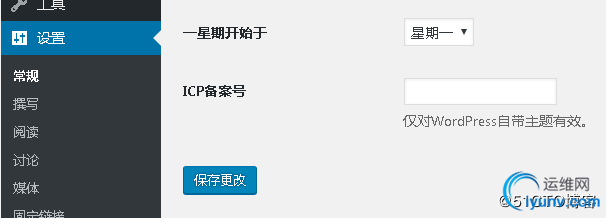
- 此时清空缓存
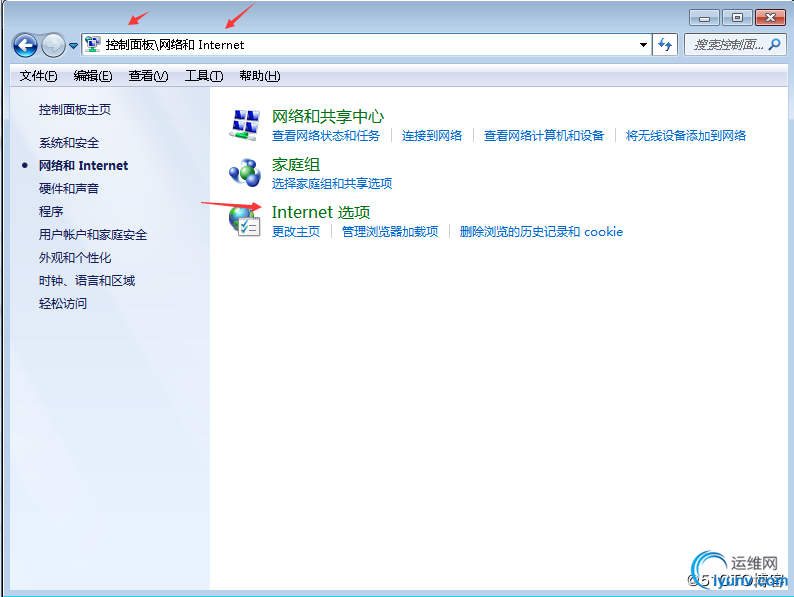
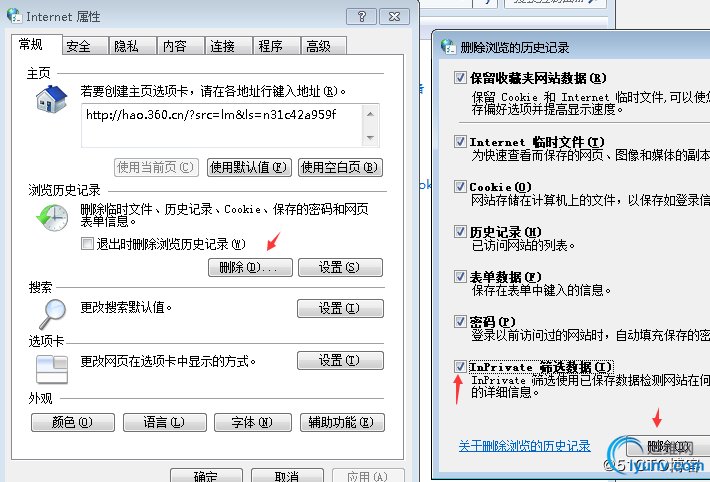
- 查看日志
~]# tail -n 2 /var/log/httpd/access_log
192.168.10.254 - - [31/Dec/2017:10:45:44 +0800] "POST /wp/wp-admin/admin-ajax.php HTTP/1.0" 200 23 "http://www.ilinux.io/wp/wp-admin/options-general.php?settings-updated=true" "Mozilla/5.0 (Windows NT 6.1; WOW64) AppleWebKit/537.36 (KHTML, like Gecko) Chrome/62.0.3202.94 Safari/537.36"
192.168.10.254 - - [31/Dec/2017:10:46:13 +0800] "POST /wp/wp-admin/admin-ajax.php HTTP/1.0" 200 47 "http://www.ilinux.io/wp/wp-admin/options-general.php?settings-updated=true" "Mozilla/5.0 (Windows NT 6.1; WOW64) AppleWebKit/537.36 (KHTML, like Gecko) Chrome/62.0.3202.94 Safari/537.36"
~}# grep "LogFormat" /etc/httpd/conf/httpd.conf
LogFormat "%{X-Real-IP}i %l %u %t \"%r\" %>s %b \"%{Referer}i\" \"%{User-Agent}i\"" combined
>* ww.ilinux.io, 意此时在172.16.0.0/16网段内只要可以访问Nginx的主机均可以访问访问此wordpress

 |
|
|