|
VMware workstation上oracle 11G ASM的安装 环境: VMware Workstation :9.0.0 build-812388 OS :RedHat Enterprise Linux Server release 6.3 (Santiago) Oracle :11203 磁盘 50G 分别有两块网卡 内存1.5G Swap为内存的2倍 VMware virtual Ethernet adapter 1 192.168.10网段 1.IP规划
192.168.10.30 dg 编辑修改/etc/hosts,添加以下内容 192.168.10.30 dg 编辑修改/etc/sysconfig/network,添加以下内容 HOSTNAME=dg 保存退出 2. 修改shm大小
编辑 /etc/fstab 添加如下一行(根据主机内存修改,本次内存为1.5G) 1
| shmfs /dev/shm tmpfs size=1500m 0
|
3. 关闭服务
1
2
3
| [iyunv@localhost~]# chkconfig iptables off
[iyunv@localhost~]# chkconfig ip6tables off
[iyunv@localhost~]# chkconfig postfix off
|
关闭selinux 1
2
3
| [iyunv@localhost ~]# sed -i 's/SELINUX=enforcing/SELINUX=disabled/g' /etc/selinux/config
[iyunv@localhost ~]# cat /etc/sysconfig/selinux | grep SELINUX
[iyunv@localhost ~]#mv /etc/ntp.conf /etc/ntp.conf.bak
|
操作完毕reboot 4. 软件包安装检查
执行以下命令检查所需的包是否安装 rpm -q --qf '%{NAME}-%{VERSION}-%{RELEASE}(%{ARCH})\n'binutils \ compat-libstdc++- \ compat-libstdc++- \ elfutils-libelf- \ elfutils-libelf-devel \ gcc \ gcc-c++ \ glibc \ glibc \ glibc-common \ glibc-devel \ glibc-devel \ glibc-headers \ ksh \ libaio \ libaio-devel \ libgcc \ libstdc++ \ libstdc++-devel \ make \ numactl-devel \ sysstat 5. 配置本地yum安装软件包
编辑/etc/yum.repos.d/local.repo,添加以下内容 1
2
3
4
5
| [local]
name=local
baseurl=file:///mnt
enabled=1
gpgcheck=0
|
挂载光盘,安装所需的包
选择上一步检查未安装的包,使用yum安装 1
| yum install binutils*compat-libstdc* elfutils-libelf* gcc*glibc* ksh* libaio* libgcc* libstdc* make*numactl-devel* sysstat* compat*elfutils* unix* libXp* -y
|
6.创建用户、组
1
2
3
4
5
6
7
8
9
10
| groupadd oinstall
groupadd dba
groupadd oper
groupadd asmadmin
groupadd asmdba
groupadd asmoper
useradd -g oinstall -Gdba,asmdba,asmadmin,asmoper grid
useradd -g oinstall -G dba,oper,asmdba oracle
echo -n oracle|passwd --stdin grid
echo -n oracle|passwd --stdin oracle
|
7. 创建软件安装目录并赋予权限
目录规划: Oracle Base 目录 :/oracle/db Grid Base 目录:/oracle/grid Grid Home 目录:/oracle/asm 创建目录 1
2
3
4
| mkdir -p /oracle
mkdir -p /oracle/db
mkdir -p /oracle/grid
mkdir -p /oracle/asm
|
赋予权限 1
2
3
4
5
| chown -R grid.dba /oracle
chown -R grid.dba /oracle/asm
chown -R grid.dba/oracle/grid
chown -R oracle.dba/oracle/db
chmod -R 775 /oracle
|
8. 修改系统内核参数
8.1编辑/etc/sysctl.conf文件中加入下列参数 1
2
3
4
5
6
7
8
9
10
11
| fs.aio-max-nr = 1048576
fs.file-max = 6815744
kernel.shmall = 2097152
kernel.shmmax = 5368709120
kernel.shmmni = 4096
kernel.sem = 250 32000 100 128
net.ipv4.ip_local_port_range = 9000 65500
net.core.rmem_default = 262144
net.core.rmem_max = 4194304
net.core.wmem_default = 262144
net.core.wmem_max = 1048586
|
8.2设置Shell Limits(系统资源限制) 1
2
3
4
5
6
7
8
9
10
| oracle soft nproc 2047
oracle hard nproc 16384
oracle soft nofile 1024
oracle hard nofile 65536
oracle soft stack 10240
grid soft nproc 2047
grid hard nproc 16384
grid soft nofile 1024
grid hard nofile 65536
grid soft stack 10240
|
8.3修改安全限制 编辑/etc/pam.d/login文件,添加下列行 1
| session required pam_limits.so
|
8.4修改/etc/profile 添加下列为文件 1
2
3
4
5
6
7
8
9
| if [ $USER = "oracle" ] || [ $USER = "grid" ];then
if [ $SHELL = "/bin/ksh" ]; then
ulimit -p 16384
ulimit -n 65536
else
ulimit -u 16384 -n 65536
fi
umask 022
fi
|
运行使其生效
9. 修改用户环境变量
Grid用户环境变量 1
2
3
4
5
6
7
8
9
10
11
12
13
| [iyunv@dg ~]# su - grid
[grid@dg ~]$ vi.bash_profile
export ORACLE_BASE=/oracle/grid
export ORACLE_HOME=/oracle/asm
export ORACLE_SID=+ASM
export PATH=$PATH:$ORACLE_HOME/bin:$HOME/bin
export PATH=$ORACLE_HOME/bin:$ORACLE_HOME/Apache/Apache/bin:$PATH
LD_LIBRARY_PATH=$ORACLE_HOME/lib:/lib:/usr/lib:/usr/local/lib
export LD_LIBRARY_PATH
CLASSPATH=$ORACLE_HOME/JRE:$ORACLE_HOME/jlib:$ORACLE_HOME/rdbms/jlib
CLASSPATH=$CLASSPATH:$ORACLE_HOME/network/jlib
export CLASSPATH
[grid@dg ~]$ source .bash_profile
|
Oracle用户环境变量 1
2
3
4
5
6
7
8
9
10
11
12
13
| [iyunv@dg ~]# su - oracle
[oracle@dg ~]$ vi.bash_profile
export ORACLE_BASE=/oracle/db
export ORACLE_HOME=$ORACLE_BASE/product/11.2.0/dbhome_1
export ORACLE_SID=racdb
export PATH=$PATH:$ORACLE_HOME/bin:$HOME/bin
export PATH=$ORACLE_HOME/bin:$ORACLE_HOME/Apache/Apache/bin:$PATH
LD_LIBRARY_PATH=$ORACLE_HOME/lib:/lib:/usr/lib:/usr/local/lib
export LD_LIBRARY_PATH
CLASSPATH=$ORACLE_HOME/JRE:$ORACLE_HOME/jlib:$ORACLE_HOME/rdbms/jlib
CLASSPATH=$CLASSPATH:$ORACLE_HOME/network/jlib
export CLASSPATH
[oracle@dg ~]$source .bash_profile
|
10. 映射磁盘到裸设备
1
2
3
4
| [iyunv@dg ~]# fdisk –l
[iyunv@dg ~]# fdisk/dev/sdb
[iyunv@dg ~]# fdisk/dev/sdb –l
[iyunv@dg ~]# partprobe
|
具体如图所示 编辑/etc/udev/rules.d/60-raw.rules,添加以下内容 1
2
3
4
5
6
7
8
9
10
11
| [iyunv@dg ~]# vi/etc/udev/rules.d/60-raw.rules
ACTION=="add",KERNEL=="sdb1",RUN+="/bin/raw /dev/raw/raw1 %N"
ACTION=="add",KERNEL=="sdb2",RUN+="/bin/raw /dev/raw/raw2 %N"
KERNEL=="raw*",OWNER="grid",GROUP="dba",MODE="660"
[iyunv@dg ~]#start_udev
[iyunv@dg ~]# ls -l/dev/raw
total 0
crw-rw---- 1 griddba 162, 1 Oct 12 11:00 raw1
crw-rw---- 1 griddba 162, 2 Oct 12 11:00 raw2
crw-rw---- 1 griddba 162, 0 Oct 12 11:00 rawctl
|
软件安装部分
11.介质上传
p10404530_112030_Linux-x86-64_1of7.zip p10404530_112030_Linux-x86-64_2of7.zip p10404530_112030_Linux-x86-64_3of7.zip 1
2
3
4
5
| [iyunv@dg ~]# su -grid
[grid@dg ~]$ unzipp10404530_112030_Linux-x86-64_3of7.zip
[iyunv@dg ~]# xhost+
[iyunv@dg ~]# su -grid
[grid@dg ~]$ xclock
|
如图所示
1
2
| [grid@dg ~]$ cd grid/
[grid@dg grid]$./runInstaller
|
11.1跳过软件自动更新,下一步

11.2选择 configure oracle grid infrastructrue for a standalone server ,next

11.3选择产品语言,添加简体中文,下一步
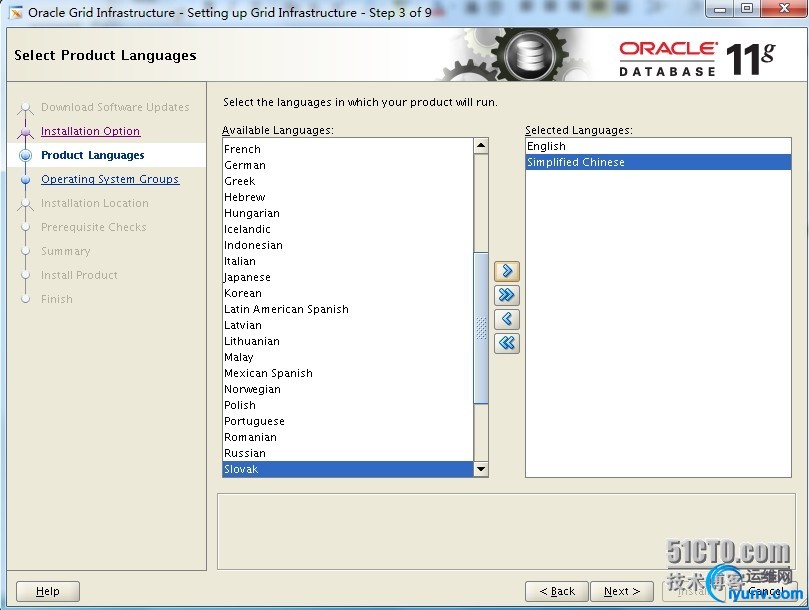
11.4创建asm 磁盘组,取名datadg1,选择裸设备,下一步

11.5输入grid管理密码,可能会提示强度不够,忽略,下一步

11.6选择dba作为属组,忽略提示,下一步

11.7查看对应的目录是否和环境变量中设置的是否一致
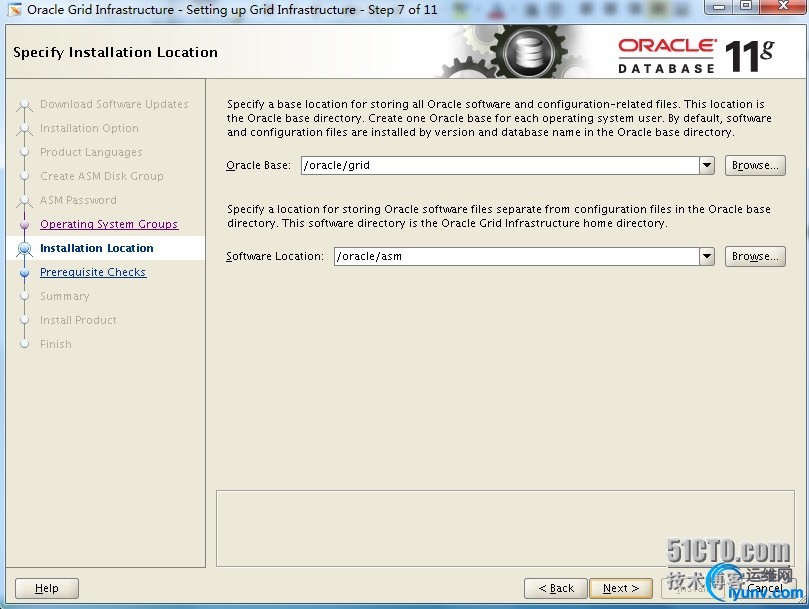
11.8产品安装目录确认
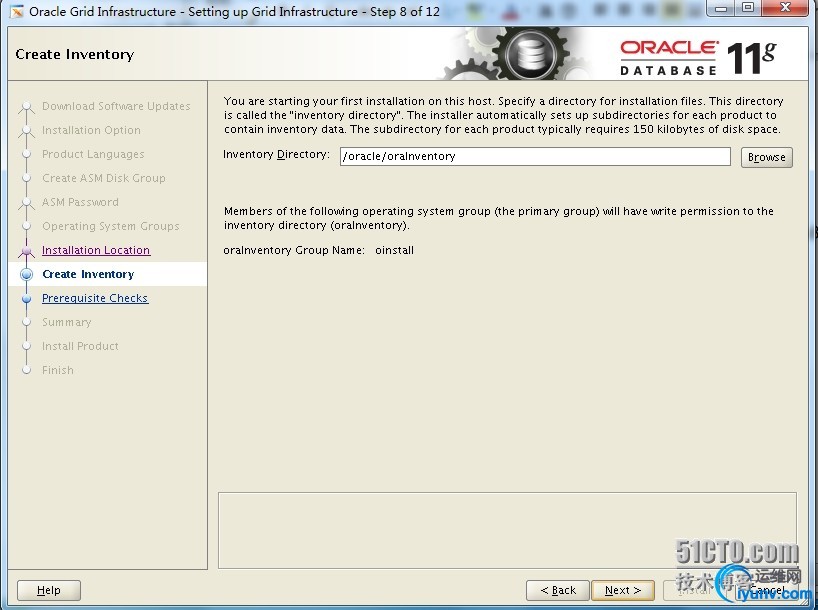
11.9安装前检查,如下警告,忽略
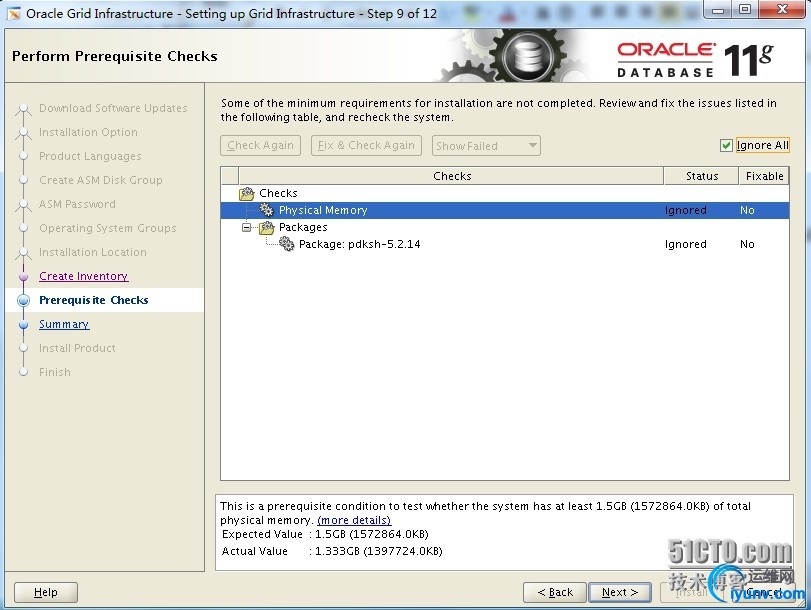
11.10查看结果是否正确
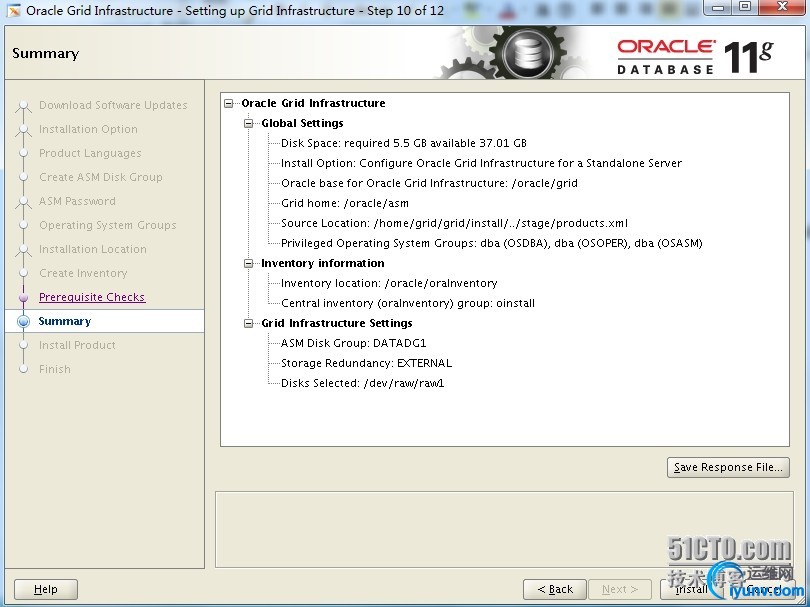
11.11

11.12使用root用户执行以下两个脚本
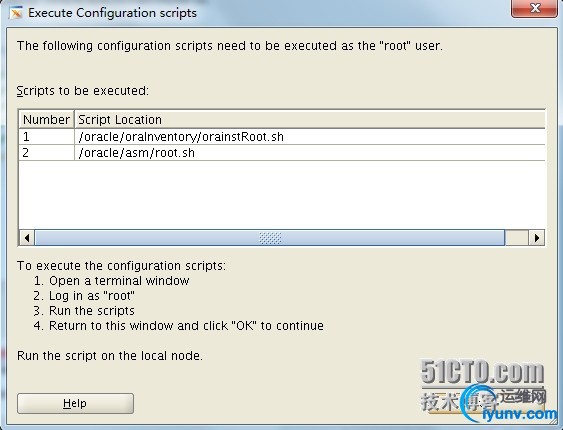
1
2
3
4
5
6
7
8
9
10
11
12
13
14
15
16
17
18
19
20
21
22
23
24
25
26
27
28
29
30
31
32
33
34
| [iyunv@dg ~]#/oracle/oraInventory/orainstRoot.sh
Changing permissions of/oracle/oraInventory.
Adding read,writepermissions for group.
Removing read,write,executepermissions for world.
Changing groupname of/oracle/oraInventory to oinstall.
The execution of the scriptis complete.
[iyunv@dg ~]#/oracle/asm/root.sh
Performing root useroperation for Oracle 11g
The following environmentvariables are set as:
ORACLE_OWNER= grid
ORACLE_HOME= /oracle/asm
Enter the full pathname ofthe local bin directory: [/usr/local/bin]:
Copying dbhome to /usr/local/bin ...
Copying oraenv to /usr/local/bin ...
Copying coraenv to /usr/local/bin ...
Creating /etc/oratab file...
Entries will be added to the/etc/oratab file as needed by
Database ConfigurationAssistant when a database is created
Finished running genericpart of root script.
Now product-specific rootactions will be performed.
Using configurationparameter file: /oracle/asm/crs/install/crsconfig_params
Creating trace directory
LOCAL ADD MODE
Creating OCR keys for user'grid', privgrp 'oinstall'..
Operation successful.
LOCAL ONLY MODE
Successfully accumulatednecessary OCR keys.
Creating OCR keys for user'root', privgrp 'root'..
Operation successful.
CRS-4664: Node dgsuccessfully pinned.
Adding Clusterware entriesto upstart
dg 2015/10/12 11:24:13 /oracle/asm/cdata/dg/backup_20151012_112413.olr
Successfully configuredOracle Grid Infrastructure for a Standalone Server
[iyunv@dg ~]#
|
11.13安装完毕

以上,grid安装完毕,下一步安装rdbms软件
rdbms安装 12上传介质 1
2
3
4
5
| [iyunv@dg ~]# su – oracle
[oracle@dg ~]$unzip p10404530_112030_Linux-x86-64_1of7.zip
[oracle@dg ~]$unzip p10404530_112030_Linux-x86-64_2of7.zip
[oracle@dg ~]$ cd database/
[oracle@dg database]$ ./runInstaller
|
12.1去掉mos支持

12.2跳过软件更新

12.3只安装数据库软件

12.4选择单实例数据库安装

12.5产品语言支持,添加简体中文

12.6选择安装企业版
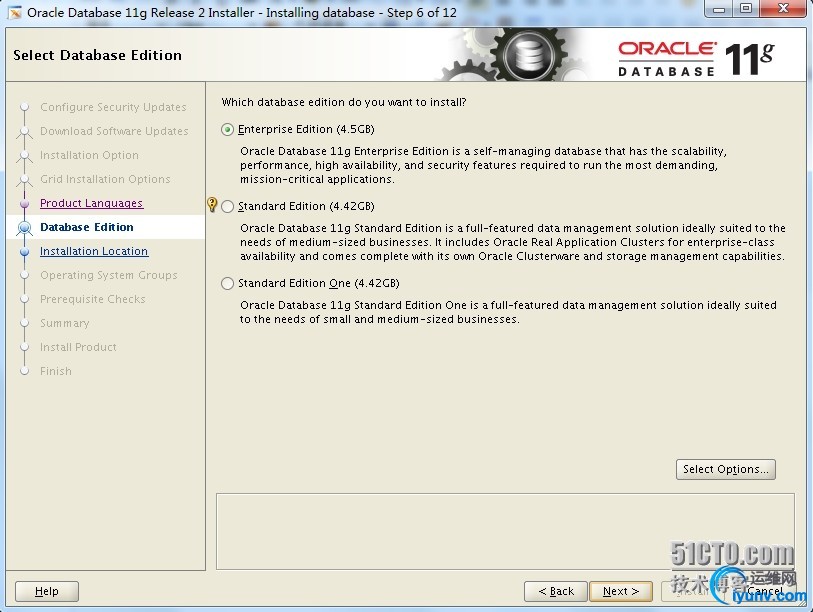
12.7查看显示的是否和环境变量中设置的一致

12.8选择属组为dba

12.9安装前预检查
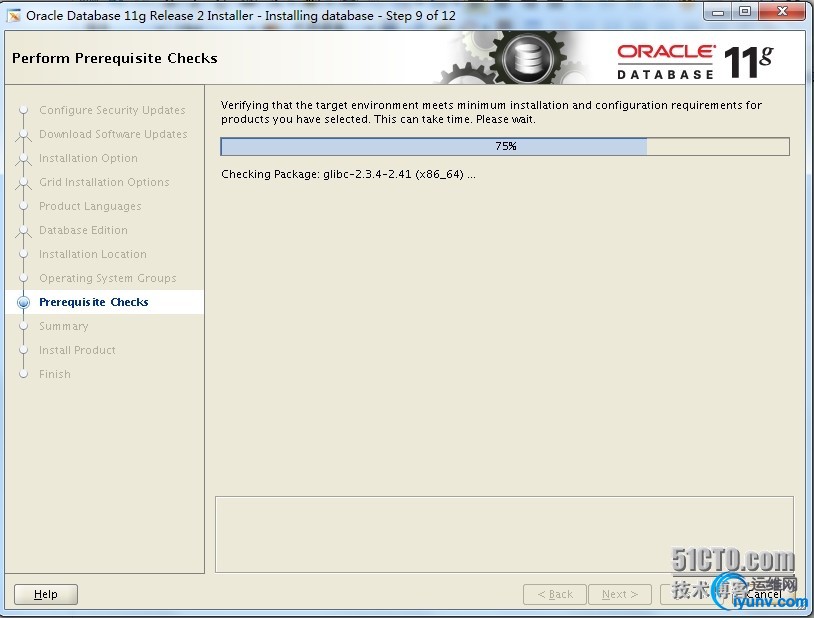
12.11出现以下警告,忽略即可

12.12检查安装列表清单
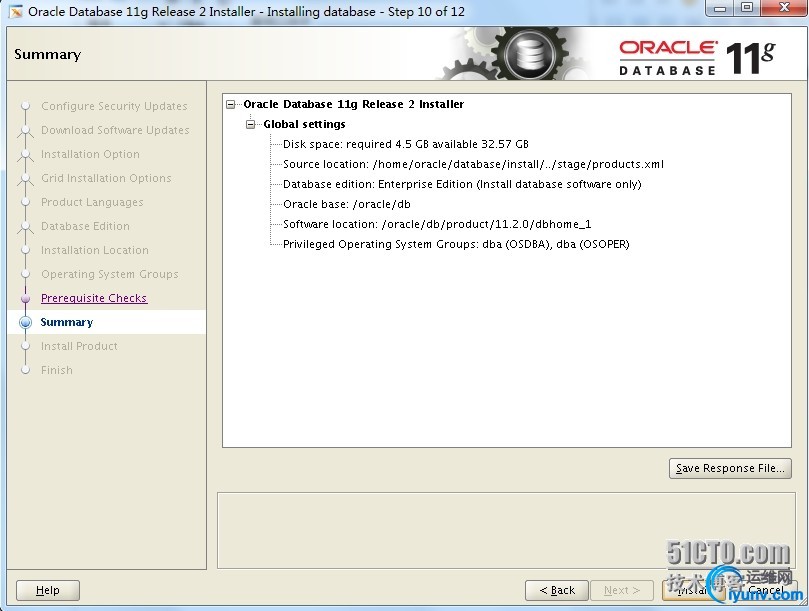
12.13安装进行

12.14使用root用户执行以下脚本 执行完之后再关闭窗口 1
2
3
4
5
6
7
8
9
10
11
12
13
14
| [iyunv@dg ~]#/oracle/db/product/11.2.0/dbhome_1/root.sh
Performing root useroperation for Oracle 11g
The following environmentvariables are set as:
ORACLE_OWNER= oracle
ORACLE_HOME= /oracle/db/product/11.2.0/dbhome_1
Enter the full pathname ofthe local bin directory: [/usr/local/bin]:
The contents of"dbhome" have not changed. No need to overwrite.
The contents of"oraenv" have not changed. No need to overwrite.
The contents of"coraenv" have not changed. No need to overwrite.
Entries will be added to the/etc/oratab file as needed by
Database ConfigurationAssistant when a database is created
Finished running genericpart of root script.
Now product-specific rootactions will be performed.
Finishedproduct-specific root actions.
|
12.15安装完成
13 创建数据库
13.1选择创建数据库

13.2选择自定义数据库

13.3指定数据库名和实例名

13.4选择不配置EM 如果需要,后面可以单独配置

13.5指定oracle管理密码,可能会提示密码强度不够,忽略

13.6选择存储类型,asm管理,选择安装grid时创建的diskgroup datadg1

13.7不指定闪回区

13.7选择需要的组件

13.8自定义内存的大小 这里以总内存大小1.5G来进行分配

13.9数据库字符集的选择

13.10数据库存储,可以指定各文件的大小等,这里默认
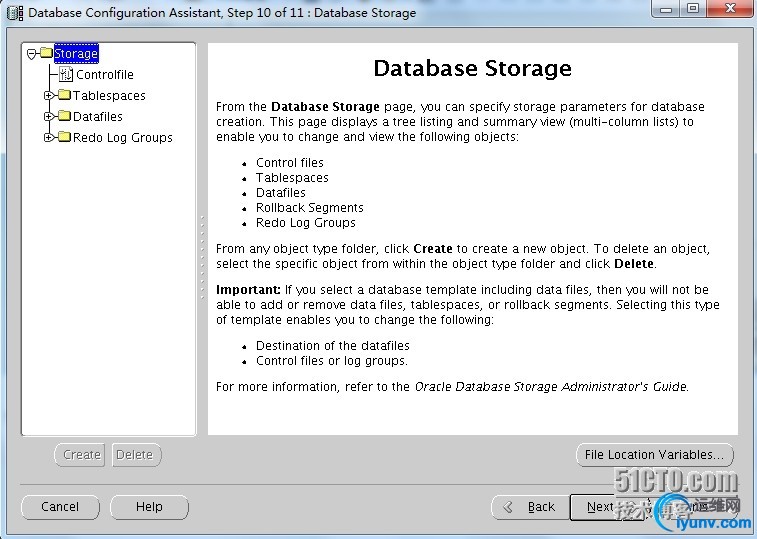
13.11点击finish创建数据库

13.12信息一览 13.13数据库创建中 13.14数据库创建完成 至此,11G Oracle asm安装完毕。
|