|
|
去年写了篇flume+kafka+storm的文章,最近重新回顾发现改动挺大的,就重新整理这篇文章。希望能帮上大家。架构图、组件介绍就不重复了,这篇文章重点将如何安装部署。需要源码的请留言。
顺便打个广告:
大数据工作室接活
我们的团队leader是北京某金融公司的大数据负责人,带过hadoop spark impala storm等多个银行项目。
团队成员现就职HP,vmware等企业。由于都是外企闲暇时间较充分,现在想接点项目做。
团队成员都有4年以上工作经验,最低学历是本科,两个计算机研究生。
我们的优势在于成员项目经验非常丰富,代码质量绝对有保障,同时英文能力很强,已经承接并完成多个大数据项目。
如果有合作意向请给我发邮件:5724589@qq.com
版本介绍:
zookeeper3.4.6
flume-ng1.6
kafka2.10-0.8.2
storm0.9.5
安装zookeeper
1.下载最新release版zookeeper
http://zookeeper.apache.org/releases.html#download
2.修改zookeeper配置文件
$zookeeper_home/conf
$ cp zoo_sample.cfg zoo_sample.cfg.bak
$ mv zoo_sample.cfg zoo.cfg
修改zoo.cfg中的zookeeper保存临时文件的路径
在$zookeeper_home的根目录下创建tmp目录
vi zoo.cfg
找到 dataDir=/tmp/zookeeper 改为 刚才创建的目录
3.验证zookeeper是否启动成功
进入$zookeeper_home/bin目录下执行
mylover:bin luobao$ shzkServer.sh
start
显示如下内容表示成功
JMX enabled by default
Using config: /Users/luobao/study/zookeeper-3.4.6/bin/../conf/zoo.cfg
-n Starting zookeeper ...
STARTED
安装storm
1.下载最新release版storm
http://apache.claz.org/storm/apache-storm-0.9.5/apache-storm-0.9.5.tar.gz
2.解压压缩包并配置storm的环境变量
3.验证storm是否能启动
注:启动storm之前必须启动zookeeper
依次启动:
$storm nimbus
$storm supervisor
$storm ui
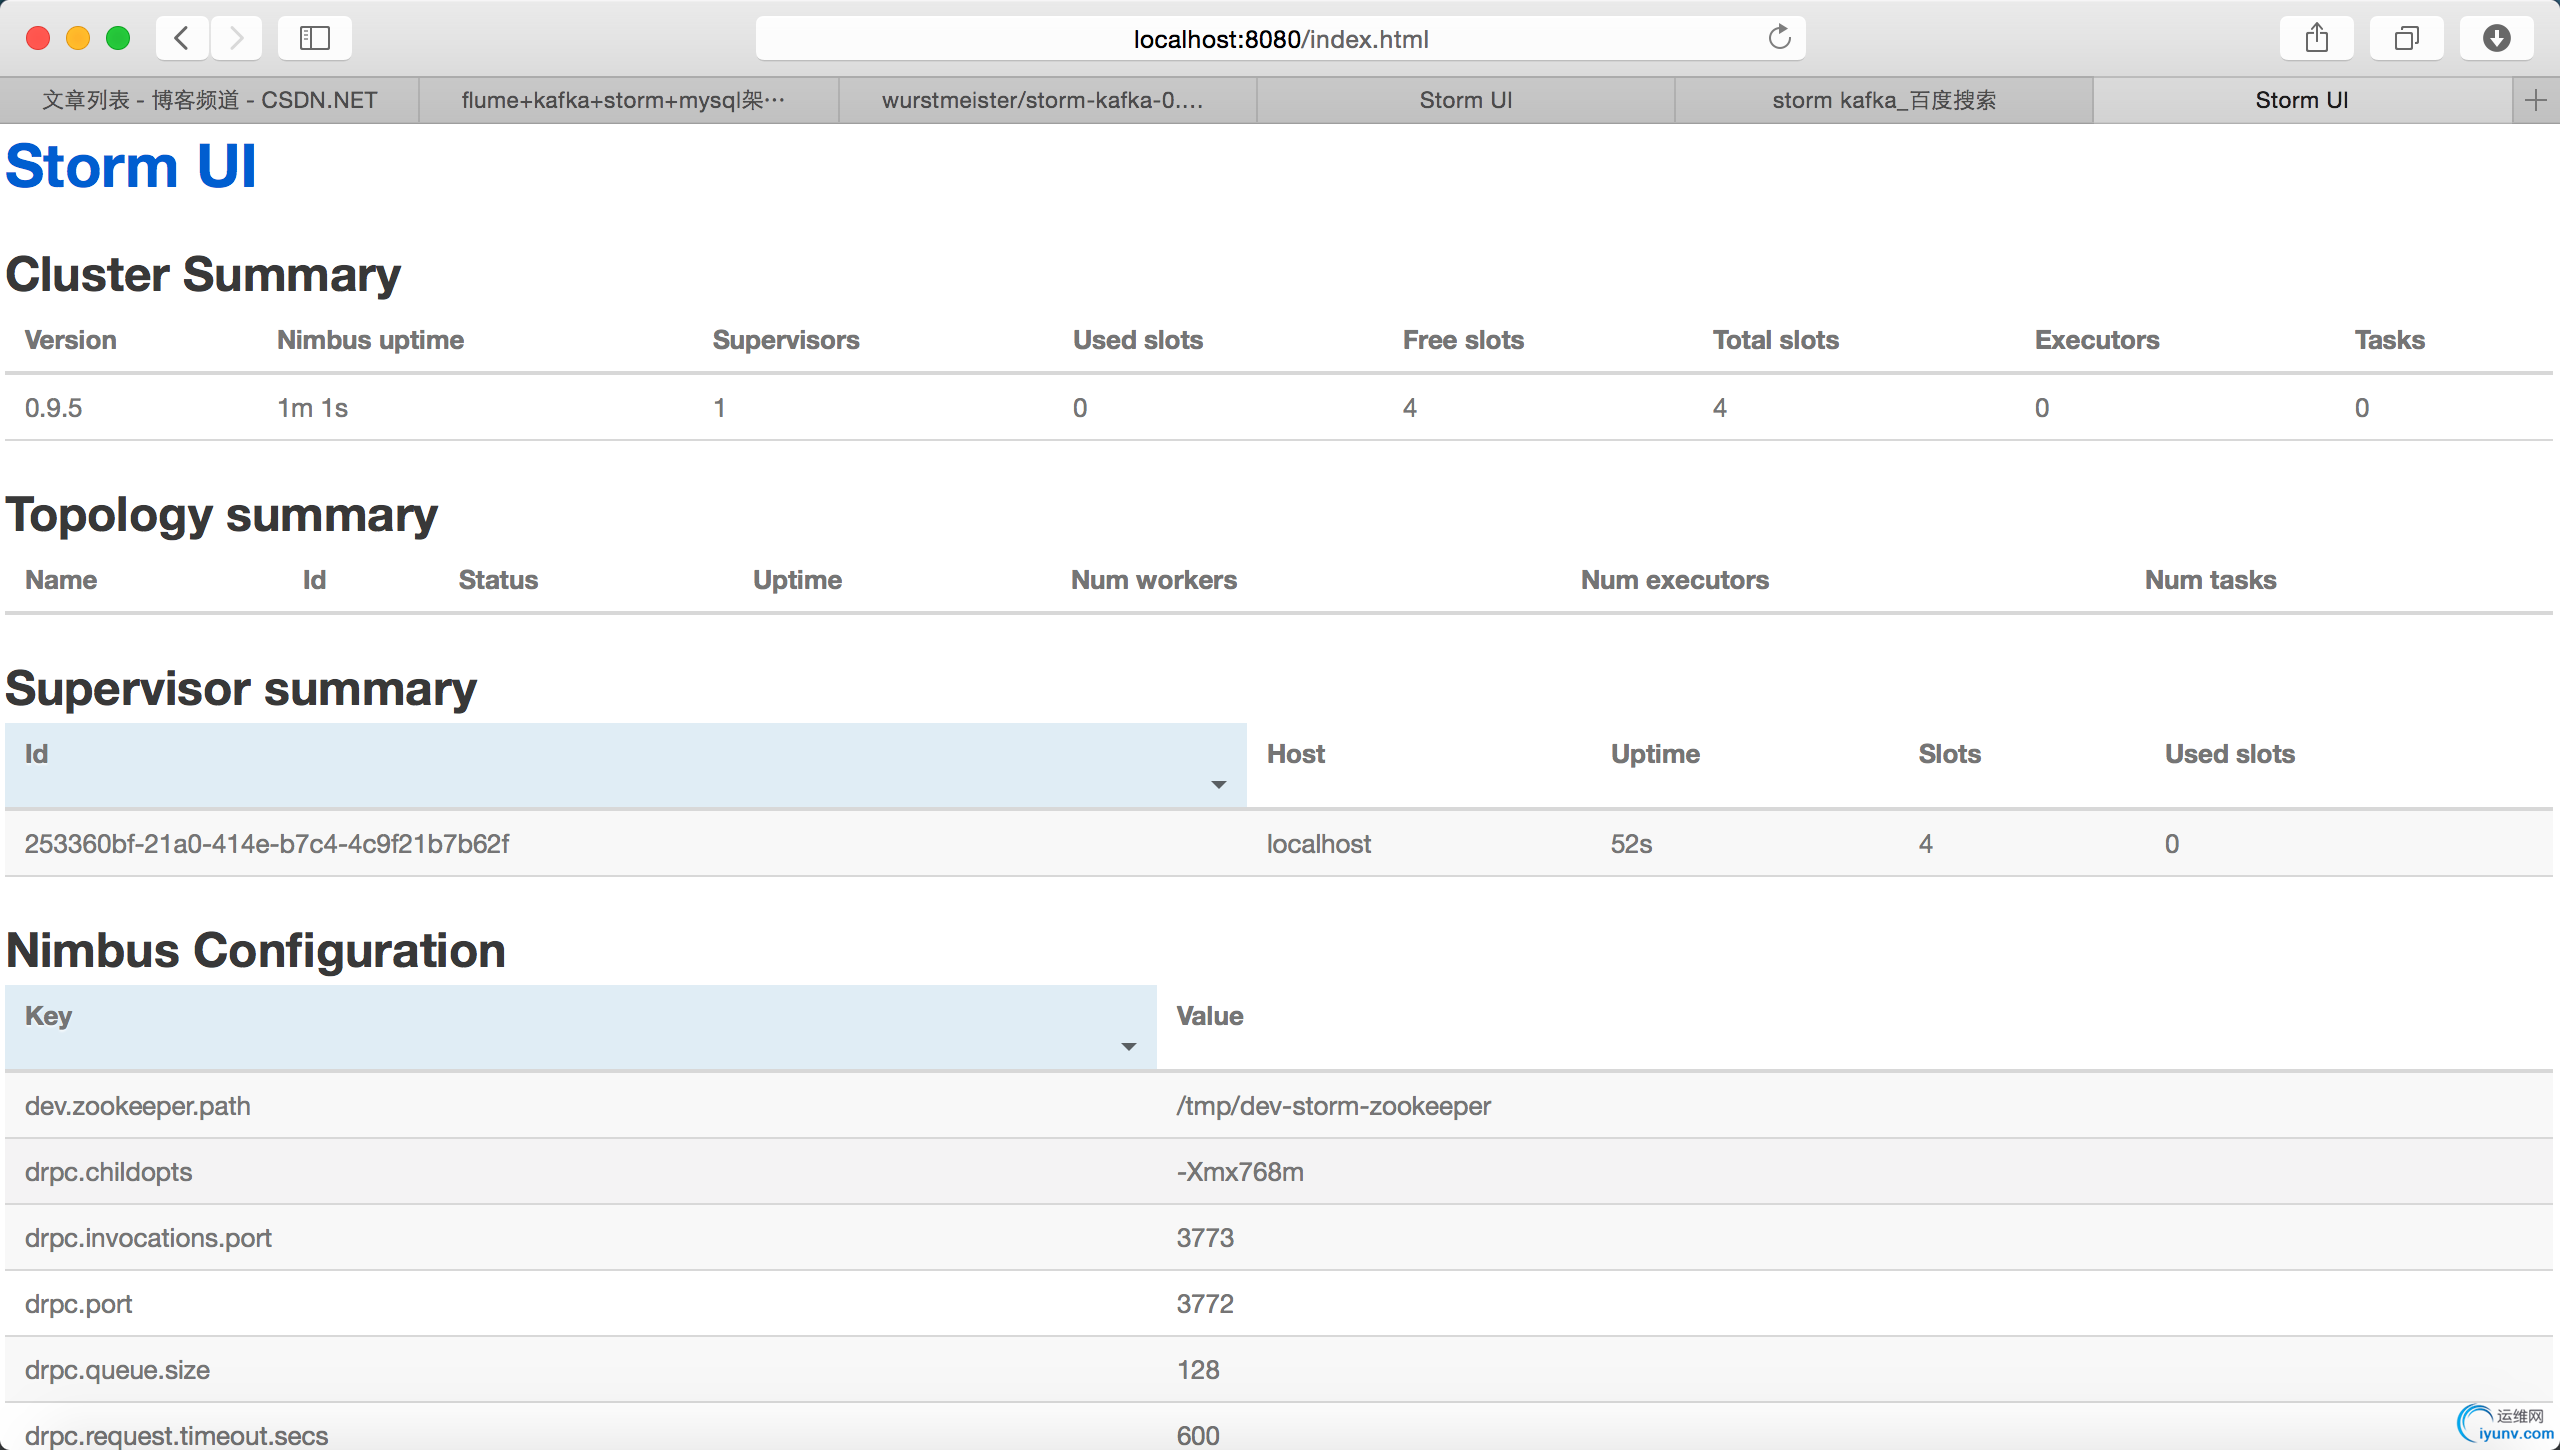
打开浏览器地址http://localhost:8080 看到如下界面表示启动成功

安装kafka
1.下载对应scala版本的kafka
http://kafka.apache.org/downloads.html
2.启动并验证kafka
启动及测试命令:
下面的启动步骤是从kafka官网复制来的,之前使用的是kafka0.8.0,发现命令都和0.8.2不同。
Step 1: Download the code
Download the
0.8.2.0 release and un-tar it.
> tar -xzf kafka_2.10-0.8.2.0.tgz
> cd kafka_2.10-0.8.2.0
Step 2: Start the server
Kafka uses ZooKeeper so you need to first start a ZooKeeper server if you don't already have one. You can use the convenience script packaged with kafka to get a quick-and-dirty single-node ZooKeeper instance.
> bin/zookeeper-server-start.sh config/zookeeper.properties
[2013-04-22 15:01:37,495] INFO Reading configuration from: config/zookeeper.properties (org.apache.zookeeper.server.quorum.QuorumPeerConfig)
...
Now start the Kafka server:
> bin/kafka-server-start.sh config/server.properties
[2013-04-22 15:01:47,028] INFO Verifying properties (kafka.utils.VerifiableProperties)
[2013-04-22 15:01:47,051] INFO Property socket.send.buffer.bytes is overridden to 1048576 (kafka.utils.VerifiableProperties)
...
Step 3: Create a topic
Let's create a topic named "test" with a single partition and only one replica:
> bin/kafka-topics.sh --create --zookeeper localhost:2181 --replication-factor 1 --partitions 1 --topic test
We can now see that topic if we run the list topic command:
> bin/kafka-topics.sh --list --zookeeper localhost:2181
test
Alternatively, instead of manually creating topics you can also configure your brokers to auto-create topics when a non-existent topic is published to.
Step 4: Send some messages
Kafka comes with a command line client that will take input from a file or from standard input and send it out as messages to the Kafka cluster. By default each line will be sent as a separate message.
Run the producer and then type a few messages into the console to send to the server.
> bin/kafka-console-producer.sh --broker-list localhost:9092 --topic test
This is a message
This is another message
Step 5: Start a consumer
Kafka also has a command line consumer that will dump out messages to standard output.
> bin/kafka-console-consumer.sh --zookeeper localhost:2181 --topic test --from-beginning
This is a message
This is another message
storm 和kafka准备就绪了,现在让我们把他们结合起来使用。
kafka和storm整合
1.下载kafka-storm0.8插件:https://github.com/wurstmeister/storm-kafka-0.8-plus
以maven方式将该项目导入eclipse中,等所有依赖包下载好后我们就来写自己的topology吧
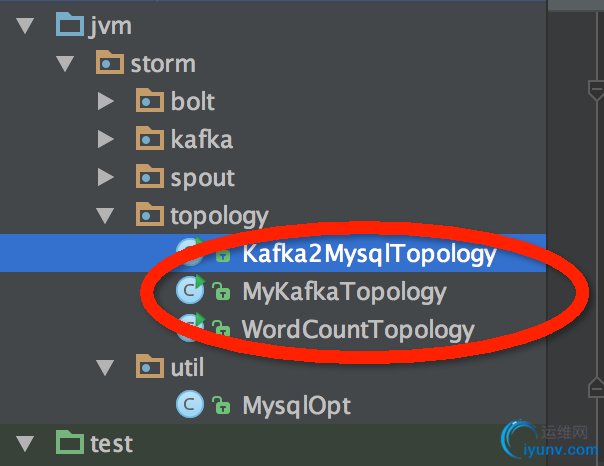
我这里写了三个topology提供给大家作为参考

我们运行MykafkaTopology后,回到上文中kafka的命令终端,输入测试单词,即可在控制台看到处理日志,当然程序在我们手里debug来看运行还是最能学到东西的。
spout和bolt的组合使用才能完成我们的业务需求,大家可以参考我上文画的架构图,制定自己的topology。
大部分的日常业务kafka+storm就可以满足了,但是这里我再写下kafka和flume的整合,用flume采集数据,kafka作为缓冲和传输作用。
kafka+flume的整合
1.下载flume-kafka-plus: https://github.com/beyondj2ee/flumeng-kafka-plugin
2.提取插件中的flume-conf.properties文件
修改该文件:#source section
producer.sources.s.type = exec
producer.sources.s.command = tail -f -n+1 /Users/luobao/study/test.log
producer.sources.s.channels = c
修改所有topic的值改为test
将改后的配置文件放进flume/conf目录下
3.将flume-kafka-plus/package/flume-kafka-plugins.jar复制到flume的lib下
启动flume
$bin/flume-ng agent --conf conf --conf-file conf/flume-conf.properties --name producer
现在我们向/Users/luobao/study/test.log文件中写入字符
这里我写了个简单脚本来向test.log写入当前日期
while true
do
echo $(date +"%y-%m-%d %H:%M:%S") >> /Users/luobao/study/test.log
sleep 3
done
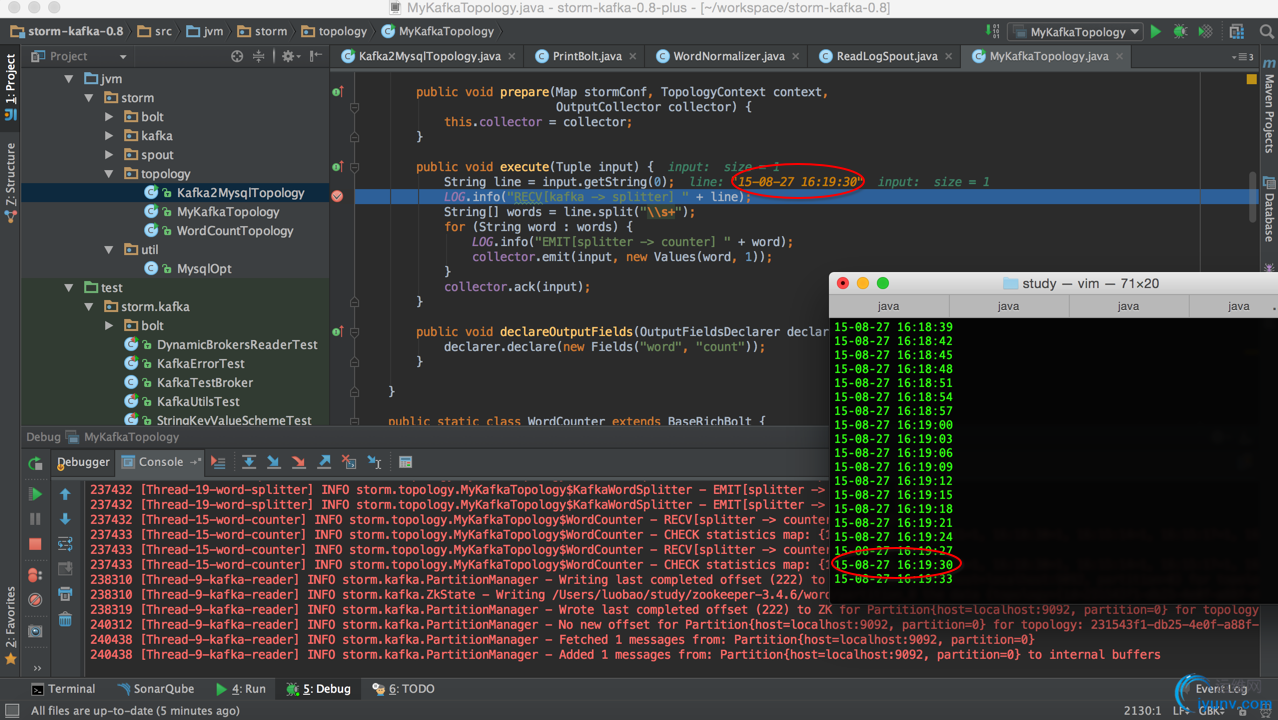
我们可以进入flume的log文件夹下观看flume收到的消息。同时在debug来看看storm是否读取到。

通过debug我们看出storm已经在不停的处理采集到的数据了。
注:我在看flume的lib包时注意到flume自带了对kafka的支持,猜想找到对应JAR包下面两个配置文件的路径即可
producer.sinks.r.type = org.apache.flume.plugins.KafkaSink
producer.sinks.r.partitioner.class=org.apache.flume.plugins.SinglePartition
暂且遗留下来,有时间再看吧。
总结下:
启动流程:zookeeper - kafka - storm - flume |
|