1,创建基于文件夹的存储池(目录)
1
2
3
4
5
6
7
| [iyunv@KVM test]# mkdir -p /images/vmfs
[iyunv@KVM test]# cd ..
[iyunv@KVM images]# ll
total 12
drwxr-xr-x 2 root root 4096 Feb 2 14:41 iso
drwxr-xr-x 2 root root 4096 Feb 5 16:44 test
drwxr-xr-x 2 root root 4096 Feb 6 13:08 vmfs
|
2,定义存储池与目录
1
2
3
| [iyunv@KVM images]# virsh pool-define-as vmdisk --type dir --target /images/vmfs/
Pool vmdisk defined
[iyunv@KVM images]#
|
3,创建已定义的存储池
1
2
| [iyunv@KVM images]# virsh pool-build vmdisk
Pool vmdisk built
|
4,查看已定义的存储池,存储池不激活就无法使用。
[iyunv@KVM images]# virsh pool-list --all
Name State Autostart
-----------------------------------------
default active yes
vmdisk inactive no
5,激活并自动启动已定义的存储池。
1
2
3
4
5
6
7
8
9
| [iyunv@KVM images]# virsh pool-autostart vmdisk
Pool vmdisk marked as autostarted
[iyunv@KVM images]# virsh pool-start vmdisk
Pool vmdisk started
[iyunv@KVM images]# virsh pool-list --all
Name State Autostart
-----------------------------------------
default active yes
vmdisk active yes
|
这里vmdisk存储池就已经创建好了,可以直接在这个存储池中创建虚拟磁盘文件了
6,在存储池中创建虚拟机存储卷
1
2
| [iyunv@KVM images]# virsh vol-create-as vmdisk hadoop5.qcow2 20G --format qcow2
Vol hadoop5.qcow2 created
|
7,根据创建虚拟机存储卷安装虚拟机
1
2
3
4
5
| [iyunv@KVM images]# virt-install --name=qfmy --ram 512 --vcpus=1 \
--disk path=/images/vmfs/lqb.qcow2,format=qcow2,size=7,bus=virtio \
--accelerate --cdrom /images/iso/CentOS-6.5-x86_64-minimal.iso -d --vnc --vncport=5902 \
--network network:default \
--noautoconsole
|
注意1:KVM存储池主要是体现一种管理方式,可以通过挂载存储目录,lvm逻辑卷的方式创建存储池,虚拟机存储卷创建完成后,剩下的操作与无存储卷的方式无任何区别了。 注意2:KVM存储池也要用于虚拟机迁移任务。
备注:存储池相关管理命令
(1)在存储池中删除虚拟机存储卷
1
2
| [iyunv@KVM images]# virsh vol-delete --pool vmdisk lqb.qcow2
Vol lqb.qcow2 deleted
|
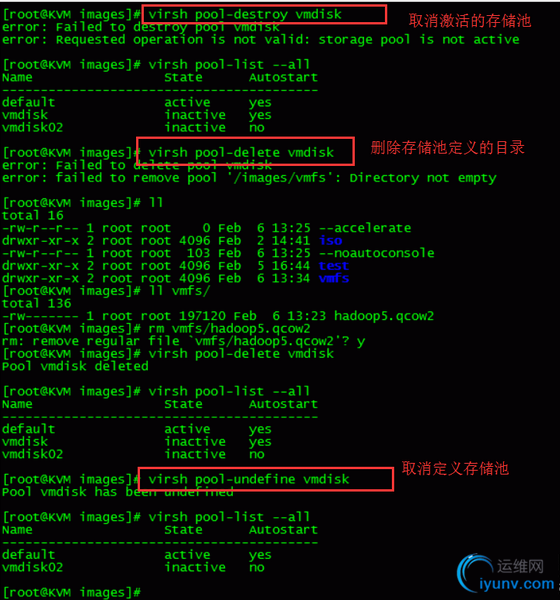
(2)取消激活的存储池
1
2
| [iyunv@KVM images]# virsh pool-destroy vmdisk
Pool vmdisk destroyed
|
(3)删除存储池定义的目录/images/vmfs
1
2
3
4
5
6
7
8
| [iyunv@KVM images]# virsh pool-delete vmdisk
Pool vmdisk deleted
[iyunv@KVM images]# virsh pool-list --all
Name State Autostart
-----------------------------------------
default active yes
vmdisk inactive yes
vmdisk02 inactive no
|
1
2
3
4
5
6
7
8
| (4)取消定义存储池
[iyunv@KVM images]# virsh pool-undefine vmdisk
Pool vmdisk has been undefined
[iyunv@KVM images]# virsh pool-list --all
Name State Autostart
-----------------------------------------
default active yes
vmdisk02 inactive no
|

至此,kvm存储池配置与管理的操作就完成了
|