|
|
首先是 要在eclipse下面安装相关的插件。
相关url:
1.http://dl.google.com/eclipse/plugin/3.5
2.http://pydev.org/updates/
相关的操作步骤参考
http://code.google.com/intl/zh-CN/eclipse/docs/install-eclipse-3.5.html
开始一个 hello world了。

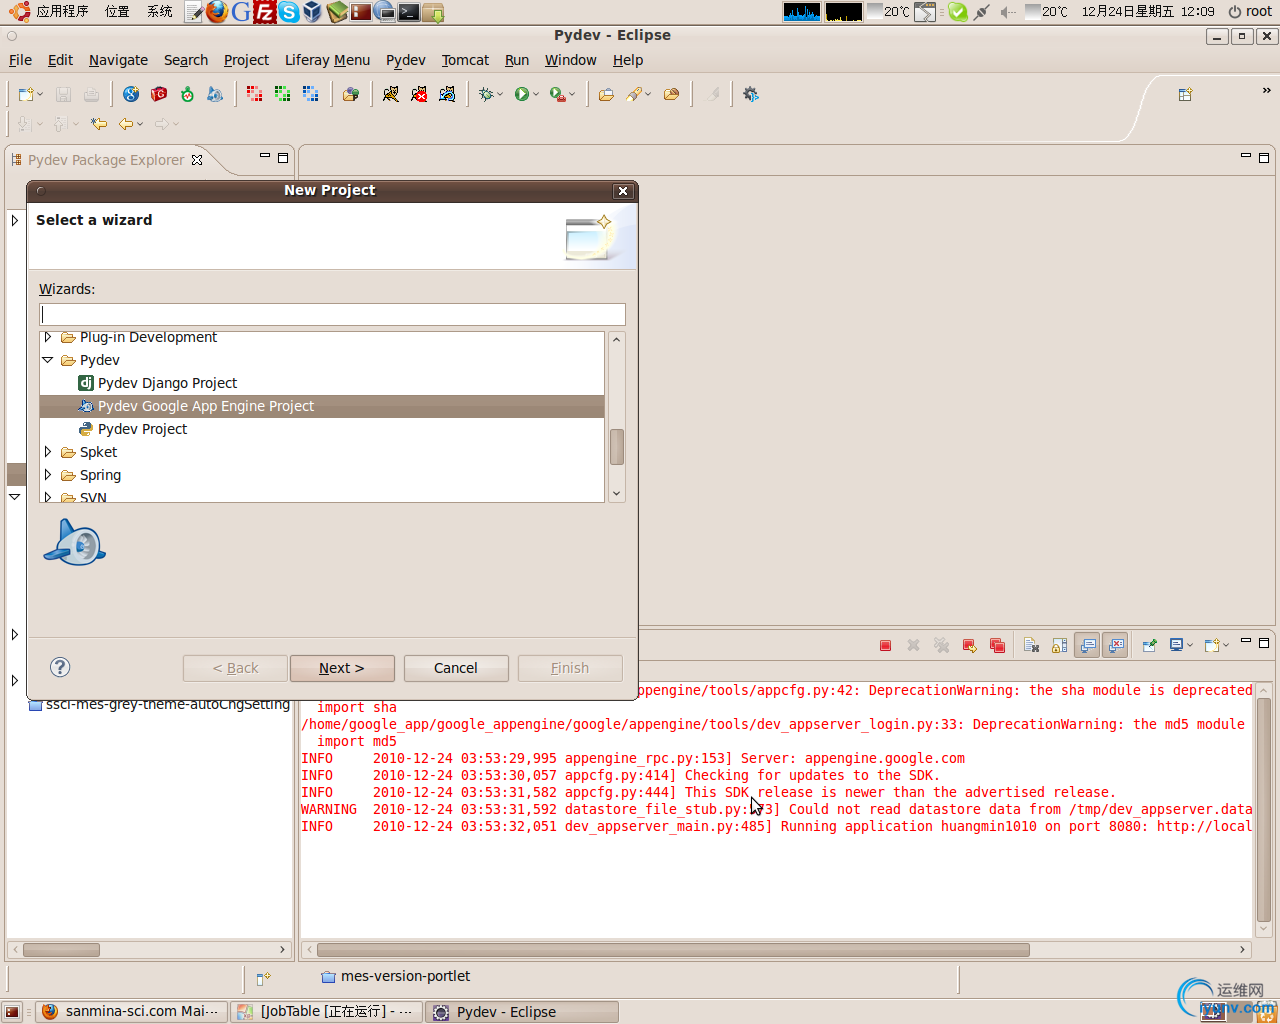
在Pydev 目录下面有三个选项我的理解是:
1.Pydev Django Project 是开发以Django为框架的python项目。
2.Pydev Google App Engine Project 在 Google App Engine下的项目
3.最基础的python项目
(如果理解有错误,请大家多多 指出)
我们是 Google App Engine开发,我们就选择2.
这一步填写完成project name之后,可以直接next,choose the project type 为Python,版本可以根据你本机的2.6,也可以默认2.7,Interpreter 选择Default,也可以选择自己所·配置的,具体点击Click here to configure an interpreter
not listed。
选择好google app engine 所安装对应的位置
在sample-app对应的输入框中填写你注册的在google注册的一个账号。http://code.google.com/intl/zh-CN/appengine/
下面选择project的模板,我选择的是 Hello webapp world。点击finish。完成创建!
右键点击项目的src目录--》Run As --》Pydev Google App Run
在控制台看到
/home/google_app/google_appengine/google/appengine/tools/appcfg.py:42: DeprecationWarning: the sha module is deprecated; use the hashlib module instead
import sha
/home/google_app/google_appengine/google/appengine/tools/dev_appserver_login.py:33: DeprecationWarning: the md5 module is deprecated; use hashlib instead
import md5
INFO 2010-12-24 06:26:58,538 appengine_rpc.py:153] Server: appengine.google.com
INFO 2010-12-24 06:26:58,554 appcfg.py:414] Checking for updates to the SDK.
INFO 2010-12-24 06:26:59,972 appcfg.py:444] This SDK release is newer than the advertised release.
WARNING 2010-12-24 06:26:59,972 datastore_file_stub.py:573] Could not read datastore data from /tmp/dev_appserver.datastore
INFO 2010-12-24 06:27:00,036 dev_appserver_main.py:485] Running application huangmin1010 on port 8080: http://localhost:8080
能后在地址栏目中输入http://localhost:8080
就能看到
Hello, webapp World!
这样第一个程序就成功了。
如果想将项目上传到google上去
右键点击项目的src目录--》Pydev: Google App Engine --》Upload
这样就ok! |
|