|
|
本帖最后由 jhfgds 于 2017-10-11 09:02 编辑
ERROR : Errorappeared during Puppet run: 192.168.4.5_amqp.pp
Error: Could notstart Service[rabbitmq-server]: Execution of '/usr/bin/systemctl startrabbitmq-server' returned 1: Job for rabbitmq-server.service failed because thecontrol process exited with error code. See "systemctl statusrabbitmq-server.service" and "journalctl -xe" for details.
You will find fulltrace in log/var/tmp/packstack/20171010-050219-WenzF1/manifests/192.168.4.5_amqp.pp.log
Please check log file/var/tmp/packstack/20171010-050219-WenzF1/openstack-setup.log for moreinformation
Additionalinformation:
* File /root/keystonerc_admin has been createdon OpenStack client host 192.168.4.5. To use the command line tools you need tosource the file.
* To access the OpenStack Dashboard browse tohttp://192.168.4.5/dashboard .
Please, find your logincredentials stored in the keystonerc_admin in your home directory.
[iyunv@vh02network-scripts]# journalctl -xe
-- Subject: Unitsession-353.scope has finished start-up
-- Defined-By:systemd
-- Support:http://lists.freedesktop.org/mailman/listinfo/systemd-devel
--
-- Unitsession-353.scope has finished starting up.
--
-- The start-upresult is done.
10月 10 05:20:01 vh02.ldc.cn systemd[1]: StartingSession 353 of user root.
-- Subject: Unitsession-353.scope has begun start-up
-- Defined-By: systemd
-- Support:http://lists.freedesktop.org/mailman/listinfo/systemd-devel
--
-- Unitsession-353.scope has begun starting up.
10月 10 05:20:01 vh02.ldc.cn CROND[27313]: (root)CMD (/usr/lib64/sa/sa1 1 1)
10月 10 05:30:01 vh02.ldc.cn systemd[1]: StartedSession 354 of user root.
-- Subject: Unitsession-354.scope has finished start-up
-- Defined-By:systemd
-- Support:http://lists.freedesktop.org/mailman/listinfo/systemd-devel
--
-- Unitsession-354.scope has finished starting up.
--
-- The start-upresult is done.
10月 10 05:30:01 vh02.ldc.cn systemd[1]: StartingSession 354 of user root.
-- Subject: Unitsession-354.scope has begun start-up
-- Defined-By:systemd
-- Support:http://lists.freedesktop.org/mailman/listinfo/systemd-devel
--
-- Unitsession-354.scope has begun starting up.
10月 10 05:30:01 vh02.ldc.cn CROND[27401]: (root)CMD (/usr/lib64/sa/sa1 1 1)
lines 3119-3147/3147(END)
本人在做安装openstack packstack 安装先设置好的应答文件answer.txt,[iyunv@vh02 ~]# packstack --answer-file answer.txt 出现以上错误,查看报错日志,和journalctl -xe journalctl -f systemctl status rabbitmq-server.service 根据提示,大概出现在两个位置,一个是hosts ,hostname 另外一个是数据库mariadb上,错误提示无法启动rabbitmq-server这个服务。查阅大量的百度资料还是无法解决这个问题。
经过反复推敲,现在已经找到问题所在原因:
1.因为本机的192.168.4.1 192.168.4.2 这个IP 已经被别的虚拟机占用,因此我就用vh01.ldc.cn:192.168.4.4
vh02.ldc.cn :192.168.4.5
这样来设置,错误就出现在这里,因为下面的vim/var/named/ldc.cn.zone中使用的是
$generate 1-9 vh0$ IN A 192.168.4.$
$generate 10-254 vh$ IN A 192.168.4.$
“$”这个变量 IP 是跟vh主机对应的,也就是说vh01 对应 192.168.4.1 我给忽略了,因此在安装过程中就会导致报错。
2.把虚拟IP 改为4.1 4.2 分别与vh01.ldc.cn vh02.ldc.cn 对应,然后删除answer.txt
生成自动应答文件,并编辑
[iyunv@vh02 ~]#packstack --gen-answer-file answer.txt
[iyunv@vh02 ~]#packstack --answer-file answer.txt
成功。。。。
以下是安装流程:
准备主机
vh01.ldc.cn ->提供DNS和NTP
vh02.ldc.cn ->安装openstack 需要有额外添加虚拟硬盘
物理主机 ->提供yum源
实现此案例需要按照如下步骤进行。
步骤一:通过ftp 输出软件包
1)创建软件包目录
[iyunv@vh01~]# mkdir /var/ftp/rhel7.2
[iyunv@vh01~]# mkdir /var/ftp/osp8
2)挂载光盘镜像到软件包目录
[iyunv@vh01~]# vim /etc/fstab
/ISO/CentOS-7-x86_64-DVD-1511.iso/var/ftp/rhel7.2 iso9660 defaults 0 0
/ISO/RHEL7OSP-8.0-20160421-x86_64.iso/var/ftp/osp8 iso9660 defaults 0 0
[iyunv@vh01~]# mount -a
3)创建rhel7 源配置文件:
[iyunv@vh01~]# vim /etc/yum.repos.d/server.repo
[rhel7.2]
name=rhel7.2
baseurl=ftp://192.168.4.1/rhel7.2
enabled=1
gpgcheck=0
步骤二:通过脚本生成osp 仓库源配置文件
1)编写脚本
[iyunv@vh01~]# mkdir bin; cd bin
[iyunv@vh01bin]# vim mkrepo.sh
#!/bin/bash
cd /var/ftp/osp8
for folder in *
do
if [ -d $folder ]; then
cat << EOF >>/etc/yum.repos.d/osp8.repo
[$folder]
name=$folder
baseurl=ftp://192.168.4.1/osp8/$folder
enabled=1
gpgcheck=0
EOF
fi
done
2)生成配置文件并验证
[iyunv@vh01 bin]# bash mkrepo.sh
[iyunv@vh01 bin]# cat /etc/yum.repos.d/osp8.repo
[rhel-7-server-extras-rpms]
name=rhel-7-server-extras-rpms
baseurl=ftp://192.168.4.1/osp8/rhel-7-server-extras-rpms
enabled=1
gpgcheck=0
[rhel-7-server-openstack-8-director-rpms]
name=rhel-7-server-openstack-8-director-rpms
baseurl=ftp://192.168.4.1/osp8/rhel-7-server-openstack-8-director-rpms
enabled=1
gpgcheck=0
[rhel-7-server-openstack-8-rpms]
name=rhel-7-server-openstack-8-rpms
baseurl=ftp://192.168.4.1/osp8/rhel-7-server-openstack-8-rpms
enabled=1
gpgcheck=0
[rhel-7-server-rhceph-1.3-calamari-rpms]
name=rhel-7-server-rhceph-1.3-calamari-rpms
baseurl=ftp://192.168.4.1/osp8/rhel-7-server-rhceph-1.3-calamari-rpms
enabled=1
gpgcheck=0
[rhel-7-server-rhceph-1.3-installer-rpms]
name=rhel-7-server-rhceph-1.3-installer-rpms
baseurl=ftp://192.168.4.1/osp8/rhel-7-server-rhceph-1.3-installer-rpms
enabled=1
gpgcheck=0
[rhel-7-server-rhceph-1.3-mon-rpms]
name=rhel-7-server-rhceph-1.3-mon-rpms
baseurl=ftp://192.168.4.1/osp8/rhel-7-server-rhceph-1.3-mon-rpms
enabled=1
gpgcheck=0
[rhel-7-server-rhceph-1.3-osd-rpms]
name=rhel-7-server-rhceph-1.3-osd-rpms
baseurl=ftp://192.168.4.1/osp8/rhel-7-server-rhceph-1.3-osd-rpms
enabled=1
gpgcheck=0
[rhel-7-server-rhceph-1.3-tools-rpms]
name=rhel-7-server-rhceph-1.3-tools-rpms
baseurl=ftp://192.168.4.1/osp8/rhel-7-server-rhceph-1.3-tools-rpms
enabled=1
gpgcheck=0
[rhel-7-server-rh-common-rpms]
name=rhel-7-server-rh-common-rpms
baseurl=ftp://192.168.4.1/osp8/rhel-7-server-rh-common-rpms
enabled=1
gpgcheck=0
[rhel-7-server-rpms]
name=rhel-7-server-rpms
baseurl=ftp://192.168.4.1/osp8/rhel-7-server-rpms
enabled=1
gpgcheck=0
[rhel-ha-for-rhel-7-server-rpms]
name=rhel-ha-for-rhel-7-server-rpms
baseurl=ftp://192.168.4.1/osp8/rhel-ha-for-rhel-7-server-rpms
enabled=1
gpgcheck=0
[iyunv@vh01 bin]# yum repolist
源标识 源名称 状态
rhel-7-server-extras-rpmsrhel-7-server-extras-rpms 54
rhel-7-server-openstack-8-director-rpmsrhel-7-server-openstack-8-director 39
rhel-7-server-openstack-8-rpmsrhel-7-server-openstack-8-rpms 467
rhel-7-server-rh-common-rpmsrhel-7-server-rh-common-rpms 76
rhel-7-server-rhceph-1.3-calamari-rpmsrhel-7-server-rhceph-1.3-calamari- 15
rhel-7-server-rhceph-1.3-installer-rpmsrhel-7-server-rhceph-1.3-installer 88
rhel-7-server-rhceph-1.3-mon-rpms rhel-7-server-rhceph-1.3-mon-rpms38
rhel-7-server-rhceph-1.3-osd-rpmsrhel-7-server-rhceph-1.3-osd-rpms 35
rhel-7-server-rhceph-1.3-tools-rpmsrhel-7-server-rhceph-1.3-tools-rpm 23
rhel-7-server-rpms rhel-7-server-rpms 519
rhel-ha-for-rhel-7-server-rpms rhel-ha-for-rhel-7-server-rpms30
rhel7.2 rhel7.2 3,723
repolist: 5,107
以上OSP仓库搭建需要用到这个镜像里面的包,太大了自行百度下载

大小:3.3GB
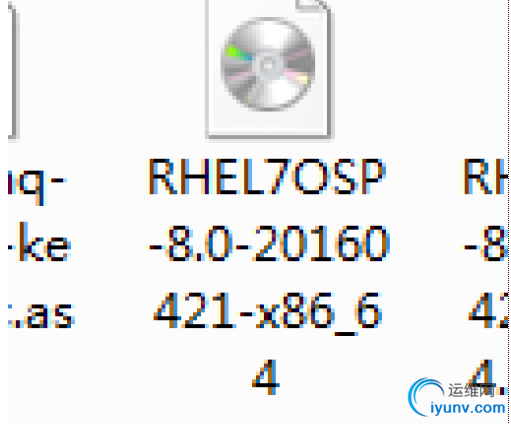
RHEL7OSP-8.0-20160421-x86_64
需要用到这些rpms包:

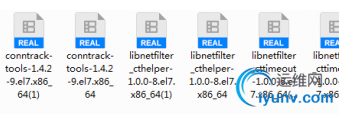
附件提供了:
conntrack-tools-1.4.2-9.el7.x86_64(1)
conntrack-tools-1.4.2-9.el7.x86_64
libnetfilter_cthelper-1.0.0-8.el7.x86_64(1)
libnetfilter_cthelper-1.0.0-8.el7.x86_64
libnetfilter_cttimeout-1.0.0-6.el7.x86_64(1)
libnetfilter_cttimeout-1.0.0-6.el7.x86_64
libnetfilter_queue-1.0.2-1.el7.x86_64(1)
libnetfilter_queue-1.0.2-1.el7.x86_64
准备环境
1、在vh01上配置dns
[iyunv@vh01 ~]# yuminstall -y bind
[iyunv@vh01 ~]# vim/etc/named.conf
listen-on port 53 { any; };
allow-query { any; };
[iyunv@vh01 ~]# vim/etc/named.rfc1912.zones
zone "ldc.cn"IN {
type master;
file "ldc.cn.zone";
allow-update { none; };
};
[iyunv@vh01 ~]# vim/var/named/ldc.cn.zone
$TTL 86400
@ IN SOA vh01.ldc.cn. root.ldc.cn. (
20170801
3H
15M
1W
1D )
IN NS vh01
$generate 1-9 vh0$ IN A 192.168.4.$
$generate 10-254 vh$ IN A 192.168.4.$
[iyunv@vh01 ~]# chmod 640/var/named/ldc.cn.zone
[iyunv@vh01 ~]# chgrpnamed /var/named/ldc.cn.zone
[iyunv@vh01 ~]# systemctlstart named; systemctl enable named
检查语法
[iyunv@vh01 ~]#named-checkconf /etc/named.rfc1912.zones
[iyunv@vh01 ~]#named-checkzone ldc.cn /var/named/ldc.cn.zone
[iyunv@vh01 ~]# nslookupvh201.ldc.cn
NTP:网络时间协议
[iyunv@vh01 ~]# yum install-y ntp
[iyunv@vh01 ~]# vim/etc/ntp.conf
restrict 192.168.4.0 mask255.255.255.0 nomodify
server 127.127.1.0 iburst
fudge 127.127.1.0 stratum3
[iyunv@vh01 ~]# systemctlstart ntpd; systemctl enable ntpd
在vh02上同步时间
[iyunv@vh02 ~]# date -s"2017-08-21 12:00:00"
[iyunv@vh02 ~]# ntpdate192.168.4.1
配置openstack
1、为vh02配置IP地址
eth0: 192.168.4.2/24 dns: 192.168.4.1
eth1: 192.168.2.2/24
2、关闭NetworkManager服务
[iyunv@vh02 ~]# systemctlstop NetworkManager
[iyunv@vh02 ~]# systemctldisable NetworkManager
3、创建名为cinder-volumes的卷组,用于提供云硬盘
[iyunv@vh02 ~]# pvcreate/dev/vdb
[iyunv@vh02 ~]# vgcreatecinder-volumes /dev/vdb
[iyunv@vh02 ~]# vgs
4、导入rabbitmq的签名信息(如果连接互联网,可跳过)
[iyunv@vh02 openstack]#rpm --import rabbitmq-signing-key-public.asc
5、安装光盘上不存在的依赖包
[iyunv@vh02 rpms]# yuminstall -y *rpm
-----------------------------------------
-----------------------------------------
6、安装packstack
[iyunv@vh02 rpms]# yuminstall -y openstack-packstack
7、生成自动应答文件,并编辑
[iyunv@vh02 ~]# packstack--gen-answer-file answer.txt
[iyunv@vh02 ~]# vimanswer.txt
CONFIG_DEFAULT_PASSWORD=redhat
CONFIG_SWIFT_INSTALL=n
CONFIG_NTP_SERVERS=192.168.4.1
CONFIG_COMPUTE_HOSTS=192.168.4.2
CONFIG_KEYSTONE_ADMIN_PW=redhat
CONFIG_CINDER_VOLUMES_CREATE=n
CONFIG_NEUTRON_ML2_VXLAN_GROUP=239.1.1.2
CONFIG_NEUTRON_ML2_VNI_RANGES=1001:2000
CONFIG_NEUTRON_OVS_BRIDGE_MAPPINGS=physnet1:br-ex
CONFIG_NEUTRON_OVS_TUNNEL_IF=eth1
CONFIG_PROVISION_DEMO=n
8、安装openstack
[iyunv@vh02 ~]# packstack--answer-file answer.txt
9、配置虚拟网络,使得物理网卡成为虚拟交换机上的一个端口
[iyunv@vh02 ~]# cd/etc/sysconfig/network-scripts/
[iyunv@vh02network-scripts]# cp ifcfg-eth0 ifcfg-br-ex
TYPE=OVSBridge
BOOTPROTO=none
NAME=br-ex
DEVICE=br-ex
ONBOOT=yes
IPADDR=192.168.4.2
PREFIX=24
DNS1=192.168.4.1
DEVICETYPE=ovs
[iyunv@vh02network-scripts]# vim ifcfg-eth0
TYPE=OVSPort
DEVICETYPE=ovs
OVS_BRIDGE=br-ex
BOOTPROTO=none
NAME=eth0
DEVICE=eth0
ONBOOT=yes
[iyunv@vh02 ~]# systemctl restart network
 rpm包.rar
(413.48 KB, 下载次数: 0)
|
|